* 检查翻译是否正确。
* 如有需要,改进你的语言特定提示、通用提示,或英文文档。
* 然后手动修正翻译中剩余的问题,确保这是一个优秀的译文。
-* 重新翻译,在已有的优秀译文基础上进行。理想情况是 LLM 不再对译文做任何更改。这意味着通用提示和你的语言特定提示已经尽可能完善(有时它仍会做一些看似随机的改动,原因是<a href="https://doublespeak.chat/#/handbook#deterministic-output" class="external-link" target="_blank">LLM 不是确定性算法</a>)。
+* 重新翻译,在已有的优秀译文基础上进行。理想情况是 LLM 不再对译文做任何更改。这意味着通用提示和你的语言特定提示已经尽可能完善(有时它仍会做一些看似随机的改动,原因是[LLM 不是确定性算法](https://doublespeak.chat/#/handbook#deterministic-output))。
测试如下:
链接文本应被翻译,链接地址应保持不变:
* [链接到上面的标题](#code-snippets)
-* [内部链接](index.md#installation){.internal-link target=_blank}
-* <a href="https://sqlmodel.tiangolo.com/" class="external-link" target="_blank">外部链接</a>
-* <a href="https://fastapi.tiangolo.com/css/styles.css" class="external-link" target="_blank">样式链接</a>
-* <a href="https://fastapi.tiangolo.com/js/logic.js" class="external-link" target="_blank">脚本链接</a>
-* <a href="https://fastapi.tiangolo.com/img/foo.jpg" class="external-link" target="_blank">图片链接</a>
+* [内部链接](index.md#installation)
+* [外部链接](https://sqlmodel.tiangolo.com/)
+* [样式链接](https://fastapi.tiangolo.com/css/styles.css)
+* [脚本链接](https://fastapi.tiangolo.com/js/logic.js)
+* [图片链接](https://fastapi.tiangolo.com/img/foo.jpg)
链接文本应被翻译,且链接地址应指向对应的译文页面:
-* <a href="https://fastapi.tiangolo.com/zh/" class="external-link" target="_blank">FastAPI 链接</a>
+* [FastAPI 链接](https://fastapi.tiangolo.com/zh/)
////
参见例如 `docs/de/llm-prompt.md` 中的 `### List of English terms and their preferred German translations` 部分。
////
-
-////
-
-翻译(术语)对照:
-
-//// tab | 测试(译文)
-
-* 你
-* 你的
-
-* 例如
-* 等等
-
-* 将 `foo` 作为 `int`
-* 将 `bar` 作为 `str`
-* 将 `baz` 作为 `list`
-
-* 教程 - 用户指南
-* 高级用户指南
-* SQLModel 文档
-* API 文档
-* 自动文档
-
-* 数据科学
-* 深度学习
-* 机器学习
-* 依赖注入
-* HTTP 基本认证
-* HTTP 摘要认证
-* ISO 格式
-* JSON Schema 标准
-* JSON 模式
-* 模式定义
-* 密码流
-* 移动端
-
-* 已弃用
-* 设计的
-* 无效
-* 即时
-* 标准的
-* 默认的
-* 区分大小写
-* 不区分大小写
-
-* 为应用提供服务
-* 为页面提供服务
-
-* 应用
-* 应用程序
-
-* 请求
-* 响应
-* 错误响应
-
-* 路径操作
-* 路径操作装饰器
-* 路径操作函数
-
-* 主体
-* 请求体
-* 响应体
-* JSON 体
-* 表单体
-* 文件体
-* 函数体
-
-* 参数
-* 请求体参数
-* 路径参数
-* 查询参数
-* Cookie 参数
-* Header 参数
-* 表单参数
-* 函数参数
-
-* 事件
-* 启动事件
-* 服务器的启动
-* 关闭事件
-* 生命周期事件
-
-* 处理器
-* 事件处理器
-* 异常处理器
-* 处理
-
-* 模型
-* Pydantic 模型
-* 数据模型
-* 数据库模型
-* 表单模型
-* 模型对象
-
-* 类
-* 基类
-* 父类
-* 子类
-* 子类
-* 兄弟类
-* 类方法
-
-* 请求头
-* 请求头
-* 授权头
-* `Authorization` 头
-* 转发头
-
-* 依赖注入系统
-* 依赖
-* 可依赖对象
-* 依赖项
-
-* I/O 受限
-* CPU 受限
-* 并发
-* 并行
-* 多进程
-
-* 环境变量
-* 环境变量
-* `PATH`
-* `PATH` 变量
-
-* 认证
-* 认证提供方
-* 授权
-* 授权表单
-* 授权提供方
-* 用户进行认证
-* 系统对用户进行认证
-
-* CLI
-* 命令行界面
-
-* 服务器
-* 客户端
-
-* 云服务提供商
-* 云服务
-
-* 开发
-* 开发阶段
-
-* dict
-* 字典
-* 枚举
-* 枚举
-* 枚举成员
-
-* 编码器
-* 解码器
-* 编码
-* 解码
-
-* 异常
-* 抛出
-
-* 表达式
-* 语句
-
-* 前端
-* 后端
-
-* GitHub 讨论
-* GitHub Issue
-
-* 性能
-* 性能优化
-
-* 返回类型
-* 返回值
-
-* 安全
-* 安全方案
-
-* 任务
-* 后台任务
-* 任务函数
-
-* 模板
-* 模板引擎
-
-* 类型注解
-* 类型提示
-
-* 服务器 worker
-* Uvicorn worker
-* Gunicorn worker
-* worker 进程
-* worker 类
-* 工作负载
-
-* 部署
-* 部署
-
-* SDK
-* 软件开发工具包
-
-* `APIRouter`
-* `requirements.txt`
-* Bearer Token
-* 破坏性变更
-* Bug
-* 按钮
-* 可调用对象
-* 代码
-* 提交
-* 上下文管理器
-* 协程
-* 数据库会话
-* 磁盘
-* 域名
-* 引擎
-* 假 X
-* HTTP GET 方法
-* 项
-* 库
-* 生命周期
-* 锁
-* 中间件
-* 移动应用
-* 模块
-* 挂载
-* 网络
-* 源
-* 覆盖
-* 负载
-* 处理器
-* 属性
-* 代理
-* Pull Request
-* 查询
-* RAM
-* 远程机器
-* 状态码
-* 字符串
-* 标签
-* Web 框架
-* 通配符
-* 返回
-* 校验
-
-////
-
-//// tab | 信息(译文)
-
-此清单是不完整且非规范性的,列出(主要是)文档中出现的技术术语。它有助于提示词设计者确定哪些术语需要额外的指引。例如当 LLM 总是把更好的译法改回次优译法,或在你的语言中难以正确变形时。
-
-也可参见 `docs/de/llm-prompt.md` 中的 `### List of English terms and their preferred German translations` 部分。
-
-////
要查看响应中究竟可以包含什么,你可以查看 OpenAPI 规范中的以下部分:
-* <a href="https://github.com/OAI/OpenAPI-Specification/blob/master/versions/3.1.0.md#responses-object" class="external-link" target="_blank">OpenAPI Responses 对象</a>,它包含 `Response Object`。
-* <a href="https://github.com/OAI/OpenAPI-Specification/blob/master/versions/3.1.0.md#response-object" class="external-link" target="_blank">OpenAPI Response 对象</a>,你可以把这里的任何内容直接包含到 `responses` 参数中的每个响应里。包括 `description`、`headers`、`content`(在这里声明不同的媒体类型和 JSON Schemas),以及 `links`。
+* [OpenAPI Responses 对象](https://github.com/OAI/OpenAPI-Specification/blob/master/versions/3.1.0.md#responses-object),它包含 `Response Object`。
+* [OpenAPI Response 对象](https://github.com/OAI/OpenAPI-Specification/blob/master/versions/3.1.0.md#response-object),你可以把这里的任何内容直接包含到 `responses` 参数中的每个响应里。包括 `description`、`headers`、`content`(在这里声明不同的媒体类型和 JSON Schemas),以及 `links`。
{* ../../docs_src/additional_status_codes/tutorial001_an_py310.py hl[4,25] *}
-/// warning | 警告
+/// warning
当你直接返回一个像上面例子中的 `Response` 对象时,它会直接返回。
///
-/// note | 注æ\84\8f
+/// note | æ\8a\80æ\9c¯ç»\86è\8a\82
你也可以使用 `from starlette.responses import JSONResponse`。
如果你直接返回额外的状态码和响应,它们不会包含在 OpenAPI 方案(API 文档)中,因为 FastAPI 没办法预先知道你要返回什么。
-但是你可以使用 [额外的响应](additional-responses.md){.internal-link target=_blank} 在代码中记录这些内容。
+但是你可以使用 [额外的响应](additional-responses.md) 在代码中记录这些内容。
这样会话会释放数据库连接,让其他请求可以使用。
-如果你还有其他需要在 `yield` 依赖项中提前退出的用例,请创建一个 <a href="https://github.com/fastapi/fastapi/discussions/new?category=questions" class="external-link" target="_blank">GitHub 讨论问题</a>,说明你的具体用例以及为何提前关闭会对你有帮助。
+如果你还有其他需要在 `yield` 依赖项中提前退出的用例,请创建一个 [GitHub 讨论问题](https://github.com/fastapi/fastapi/discussions/new?category=questions),说明你的具体用例以及为何提前关闭会对你有帮助。
如果确有有力的用例需要提前关闭,我会考虑新增一种选择性启用提前关闭的方式。
### 后台任务与带 `yield` 的依赖项(技术细节) { #background-tasks-and-dependencies-with-yield-technical-details }
-在 FastAPI 0.106.0 之前,`yield` 之后抛出异常是不可行的,因为带 `yield` 的依赖项中的退出代码会在响应发送之后才执行,此时[异常处理器](../tutorial/handling-errors.md#install-custom-exception-handlers){.internal-link target=_blank}已经运行完毕。
+在 FastAPI 0.106.0 之前,`yield` 之后抛出异常是不可行的,因为带 `yield` 的依赖项中的退出代码会在响应发送之后才执行,此时[异常处理器](../tutorial/handling-errors.md#install-custom-exception-handlers)已经运行完毕。
之所以这样设计,主要是为了允许在后台任务中继续使用依赖项通过 `yield`“产出”的对象,因为退出代码会在后台任务完成之后才执行。
`TestClient` 在内部通过一些“魔法”操作,使得您可以在普通的 `def` 测试函数中调用异步的 FastAPI 应用程序,并使用标准的 pytest。但当我们在异步函数中使用它时,这种“魔法”就不再生效了。由于测试以异步方式运行,我们无法在测试函数中继续使用 `TestClient`。
-`TestClient` 是基于 <a href="https://www.python-httpx.org" class="external-link" target="_blank">HTTPX</a> 的。幸运的是,我们可以直接使用它来测试API。
+`TestClient` 是基于 [HTTPX](https://www.python-httpx.org) 的。幸运的是,我们可以直接使用它来测试 API。
## 示例 { #example }
-举个简单的例子,让我们来看一个[更大的应用](../tutorial/bigger-applications.md){.internal-link target=_blank}和[测试](../tutorial/testing.md){.internal-link target=_blank}中描述的类似文件结构:
+举个简单的例子,让我们来看一个与[更大的应用](../tutorial/bigger-applications.md)和[测试](../tutorial/testing.md)中描述的类似文件结构:
```
.
/// warning | 警告
-如果您的应用程序依赖于生命周期事件, `AsyncClient` 将不会触发这些事件。为了确保它们被触发,请使用 <a href="https://github.com/florimondmanca/asgi-lifespan#usage" class="external-link" target="_blank">florimondmanca/asgi-lifespan</a> 中的 `LifespanManager` 。
+如果您的应用程序依赖于生命周期事件, `AsyncClient` 将不会触发这些事件。为了确保它们被触发,请使用 [florimondmanca/asgi-lifespan](https://github.com/florimondmanca/asgi-lifespan#usage) 中的 `LifespanManager` 。
///
/// tip | 提示
-如果您在测试程序中集成异步函数调用的时候遇到一个 `RuntimeError: Task attached to a different loop` 的报错(例如,使用 <a href="https://stackoverflow.com/questions/41584243/runtimeerror-task-attached-to-a-different-loop" class="external-link" target="_blank">MongoDB 的 MotorClient</a> 时),请记住,只能在异步函数中实例化需要事件循环的对象,例如在 `@app.on_event("startup")` 回调中初始化。
+如果您在测试程序中集成异步函数调用的时候遇到一个 `RuntimeError: Task attached to a different loop` 的报错(例如,使用 [MongoDB 的 MotorClient](https://stackoverflow.com/questions/41584243/runtimeerror-task-attached-to-a-different-loop) 时),请记住,只能在异步函数中实例化需要事件循环的对象,例如在 `@app.on_event("startup")` 回调中初始化。
///
这些代理相关的请求头包括:
-- <a href="https://developer.mozilla.org/en-US/docs/Web/HTTP/Reference/Headers/X-Forwarded-For" class="external-link" target="_blank">X-Forwarded-For</a>
-- <a href="https://developer.mozilla.org/en-US/docs/Web/HTTP/Reference/Headers/X-Forwarded-Proto" class="external-link" target="_blank">X-Forwarded-Proto</a>
-- <a href="https://developer.mozilla.org/en-US/docs/Web/HTTP/Reference/Headers/X-Forwarded-Host" class="external-link" target="_blank">X-Forwarded-Host</a>
+* [X-Forwarded-For](https://developer.mozilla.org/en-US/docs/Web/HTTP/Reference/Headers/X-Forwarded-For)
+* [X-Forwarded-Proto](https://developer.mozilla.org/en-US/docs/Web/HTTP/Reference/Headers/X-Forwarded-Proto)
+* [X-Forwarded-Host](https://developer.mozilla.org/en-US/docs/Web/HTTP/Reference/Headers/X-Forwarded-Host)
///
/// tip | 提示
-如果你想了解更多关于 HTTPS 的内容,查看指南:[关于 HTTPS](../deployment/https.md){.internal-link target=_blank}。
+如果你想了解更多关于 HTTPS 的内容,查看指南:[关于 HTTPS](../deployment/https.md)。
///
请注意,服务器(Uvicorn)不会用这个 `root_path` 做别的事情,只会把它传给应用。
-但是,如果你用浏览器打开 <a href="http://127.0.0.1:8000/app" class="external-link" target="_blank">http://127.0.0.1:8000/app</a>,你会看到正常的响应:
+但是,如果你用浏览器打开 [http://127.0.0.1:8000/app](http://127.0.0.1:8000/app),你会看到正常的响应:
```JSON
{
## 使用 Traefik 进行本地测试 { #testing-locally-with-traefik }
-你可以很容易地使用 <a href="https://docs.traefik.io/" class="external-link" target="_blank">Traefik</a> 在本地运行一个移除路径前缀的实验。
+你可以很容易地使用 [Traefik](https://docs.traefik.io/) 在本地运行一个移除路径前缀的实验。
-<a href="https://github.com/containous/traefik/releases" class="external-link" target="_blank">下载 Traefik</a>,它是一个单独的二进制文件,你可以解压压缩包并直接在终端中运行。
+[下载 Traefik](https://github.com/containous/traefik/releases),它是一个单独的二进制文件,你可以解压压缩包并直接在终端中运行。
然后创建一个 `traefik.toml` 文件,内容如下:
### 查看响应 { #check-the-responses }
-现在,如果你访问 Uvicorn 端口对应的 URL:<a href="http://127.0.0.1:8000/app" class="external-link" target="_blank">http://127.0.0.1:8000/app</a>,你会看到正常响应:
+现在,如果你访问 Uvicorn 端口对应的 URL:[http://127.0.0.1:8000/app](http://127.0.0.1:8000/app),你会看到正常响应:
```JSON
{
///
-现在打开包含路径前缀、使用 Traefik 端口的 URL:<a href="http://127.0.0.1:9999/api/v1/app" class="external-link" target="_blank">http://127.0.0.1:9999/api/v1/app</a>。
+现在打开包含路径前缀、使用 Traefik 端口的 URL:[http://127.0.0.1:9999/api/v1/app](http://127.0.0.1:9999/api/v1/app)。
我们得到相同的响应:
访问应用的“官方”方式应该是通过我们定义的带有路径前缀的代理。因此,正如预期的那样,如果你尝试不带路径前缀、直接由 Uvicorn 提供的文档界面,它将无法工作,因为它期望通过代理访问。
-你可以在 <a href="http://127.0.0.1:8000/docs" class="external-link" target="_blank">http://127.0.0.1:8000/docs</a> 查看:
+你可以在 [http://127.0.0.1:8000/docs](http://127.0.0.1:8000/docs) 查看:
<img src="/img/tutorial/behind-a-proxy/image01.png">
但如果我们在“官方”URL(代理端口为 `9999`)的 `/api/v1/docs` 访问文档界面,它就能正常工作!🎉
-你可以在 <a href="http://127.0.0.1:9999/api/v1/docs" class="external-link" target="_blank">http://127.0.0.1:9999/api/v1/docs</a> 查看:
+你可以在 [http://127.0.0.1:9999/api/v1/docs](http://127.0.0.1:9999/api/v1/docs) 查看:
<img src="/img/tutorial/behind-a-proxy/image02.png">
///
-在 <a href="http://127.0.0.1:9999/api/v1/docs" class="external-link" target="_blank">http://127.0.0.1:9999/api/v1/docs</a> 的文档界面中,它看起来是这样的:
+在文档界面 [http://127.0.0.1:9999/api/v1/docs](http://127.0.0.1:9999/api/v1/docs) 中,它看起来是这样的:
<img src="/img/tutorial/behind-a-proxy/image03.png">
## 挂载子应用 { #mounting-a-sub-application }
-如果你需要在使用带有 `root_path` 的代理时挂载一个子应用(参见 [子应用 - 挂载](sub-applications.md){.internal-link target=_blank}),你可以像预期的那样正常操作。
+如果你需要在使用带有 `root_path` 的代理时挂载一个子应用(参见 [子应用 - 挂载](sub-applications.md)),你可以像预期的那样正常操作。
FastAPI 会在内部智能地使用 `root_path`,因此它可以直接正常工作。✨
# 自定义响应 - HTML、流、文件等 { #custom-response-html-stream-file-others }
-**FastAPI** 默认会使用 `JSONResponse` 返回响应。
+默认情况下,**FastAPI** 会返回 JSON 响应。
-你可以通过直接返回 `Response` 来重载它,参见 [直接返回响应](response-directly.md){.internal-link target=_blank}。
+你可以像在 [直接返回响应](response-directly.md) 中那样,直接返回 `Response` 来重载它。
-但如果你直接返回一个 `Response`(或其任意子类,比如 `JSONResponse`),返回数据不会自动转换(即使你声明了 `response_model`),也不会自动生成文档(例如,在生成的 OpenAPI 中,HTTP 头 `Content-Type` 里的特定「媒体类型」不会被包含)。
+但如果你直接返回一个 `Response`(或其任意子类,比如 `JSONResponse`),返回的数据不会自动转换(即使你声明了 `response_model`),也不会自动生成文档(例如,在生成的 OpenAPI 中,HTTP 头 `Content-Type` 里的特定「媒体类型」不会被包含)。
你还可以在 *路径操作装饰器* 中通过 `response_class` 参数声明要使用的 `Response`(例如任意 `Response` 子类)。
你从 *路径操作函数* 中返回的内容将被放在该 `Response` 中。
-并且如果该 `Response` 有一个 JSON 媒体类型(`application/json`),比如使用 `JSONResponse` 或 `UJSONResponse` 的时候,返回的数据将使用你在路径操作装饰器中声明的任何 Pydantic 的 `response_model` 自动转换(和过滤)。
-
/// note | 注意
-如果你使用不带有任何媒体类型的响应类,FastAPI 会认为你的响应没有任何内容,所以不会在生成的 OpenAPI 文档中记录响应格式。
+如果你使用不带有媒体类型的响应类,FastAPI 会认为你的响应没有任何内容,所以不会在生成的 OpenAPI 文档中记录响应格式。
///
-## 使用 `ORJSONResponse` { #use-orjsonresponse }
-
-例如,如果你需要压榨性能,你可以安装并使用 <a href="https://github.com/ijl/orjson" class="external-link" target="_blank">`orjson`</a> 并将响应设置为 `ORJSONResponse`。
-
-导入你想要使用的 `Response` 类(子类)然后在 *路径操作装饰器* 中声明它。
-
-对于较大的响应,直接返回一个 `Response` 会比返回一个字典快得多。
-
-这是因为默认情况下,FastAPI 会检查其中的每一项并确保它可以被序列化为 JSON,使用教程中解释的相同 [JSON 兼容编码器](../tutorial/encoder.md){.internal-link target=_blank}。这正是它允许你返回「任意对象」的原因,例如数据库模型。
-
-但如果你确定你返回的内容是「可以用 JSON 序列化」的,你可以将它直接传给响应类,从而避免在传给响应类之前先通过 `jsonable_encoder` 带来的额外开销。
+## JSON 响应 { #json-responses }
-{* ../../docs_src/custom_response/tutorial001b_py310.py hl[2,7] *}
+默认情况下 FastAPI 返回 JSON 响应。
-/// info | 信息
-
-参数 `response_class` 也会用来定义响应的「媒体类型」。
+如果你声明了一个[响应模型](../tutorial/response-model.md),FastAPI 会使用 Pydantic 将数据序列化为 JSON。
-å\9c¨è¿\99个ä¾\8bå\90ä¸ï¼\8cHTTP 头ç\9a\84 `Content-Type` ä¼\9a被设置æ\88\90 `application/json`。
+å¦\82æ\9e\9cä½ æ²¡æ\9c\89声æ\98\8eå\93\8dåº\94模å\9e\8bï¼\8cFastAPI ä¼\9a使ç\94¨ [JSON å\85¼å®¹ç¼\96ç \81å\99¨](../tutorial/encoder.md) ä¸è§£é\87\8aç\9a\84 `jsonable_encoder`ï¼\8c并æ\8a\8aç»\93æ\9e\9cæ\94¾è¿\9bä¸\80个 `JSONResponse`。
-并ä¸\94å\9c¨ OpenAPI æ\96\87æ¡£ä¸ä¹\9fä¼\9aè¿\99æ ·è®°å½\95。
+å¦\82æ\9e\9cä½ å\9c¨ `response_class` ä¸å£°æ\98\8eäº\86ä¸\80个 JSON åª\92ä½\93ç±»å\9e\8bï¼\88`application/json`ï¼\89ç\9a\84ç±»ï¼\88æ¯\94å¦\82 `JSONResponse`ï¼\89ï¼\8cä½ è¿\94å\9b\9eç\9a\84æ\95°æ\8d®ä¼\9a使ç\94¨ä½ å\9c¨ *è·¯å¾\84æ\93\8dä½\9cè£\85饰å\99¨* ä¸å£°æ\98\8eç\9a\84ä»»æ\84\8f Pydantic `response_model` è\87ªå\8a¨è½¬æ\8d¢ï¼\88å\92\8cè¿\87滤ï¼\89ã\80\82ä½\86æ\95°æ\8d®ä¸\8dä¼\9aç\94± Pydantic åº\8få\88\97å\8c\96为 JSON å\97è\8a\82ï¼\9bè\80\8cæ\98¯å\85\88ç\94¨ `jsonable_encoder` 转æ\8d¢å\90\8eä¼ ç»\99 `JSONResponse`ï¼\8cç\94±å®\83使ç\94¨ Python æ \87å\87\86 JSON åº\93åº\8få\88\97å\8c\96为å\97è\8a\82。
-///
+### JSON 性能 { #json-performance }
-/// tip | 提示
+简而言之,如果你想要获得最大性能,请使用[响应模型](../tutorial/response-model.md),并且不要在 *路径操作装饰器* 中声明 `response_class`。
-`ORJSONResponse` 目前只在 FastAPI 中可用,而在 Starlette 中不可用。
-
-///
+{* ../../docs_src/response_model/tutorial001_01_py310.py ln[15:17] hl[16] *}
## HTML 响应 { #html-response }
### 返回一个 `Response` { #return-a-response }
-正如你在 [直接返回响应](response-directly.md){.internal-link target=_blank} 中了解到的,你也可以通过直接返回响应在 *路径操作* 中直接重载响应。
+正如你在 [直接返回响应](response-directly.md) 中了解到的,你也可以通过直接返回响应在 *路径操作* 中直接重载响应。
和上面一样的例子,返回一个 `HTMLResponse` 看起来可能是这样:
如上文所述,这是 **FastAPI** 中使用的默认响应。
-### `ORJSONResponse` { #orjsonresponse }
-
-如上文所述,`ORJSONResponse` 是一个使用 <a href="https://github.com/ijl/orjson" class="external-link" target="_blank">`orjson`</a> 的快速的可选 JSON 响应。
-
-/// info | 信息
-
-这需要先安装 `orjson`,例如使用 `pip install orjson`。
-
-///
-
-### `UJSONResponse` { #ujsonresponse }
-
-`UJSONResponse` 是一个使用 <a href="https://github.com/ultrajson/ultrajson" class="external-link" target="_blank">`ujson`</a> 的可选 JSON 响应。
-
-/// info | 信息
-
-这需要先安装 `ujson`,例如使用 `pip install ujson`。
-
-///
-
-/// warning | 警告
-
-在处理某些边缘情况时,`ujson` 不如 Python 的内置实现那么谨慎。
-
-///
-
-{* ../../docs_src/custom_response/tutorial001_py310.py hl[2,7] *}
+/// note | 技术细节
-/// tip | 提示
+但如果你声明了响应模型或返回类型,将直接使用它来把数据序列化为 JSON,并直接返回一个具备正确 JSON 媒体类型的响应,而不会使用 `JSONResponse` 类。
-`ORJSONResponse` 可能是一个更快的选择。
+这是获得最佳性能的理想方式。
///
### `StreamingResponse` { #streamingresponse }
-采用异步生成器或普通生成器/迭代器,然后流式传输响应主体。
-
-{* ../../docs_src/custom_response/tutorial007_py310.py hl[2,14] *}
-
-#### 对类似文件的对象使用 `StreamingResponse` { #using-streamingresponse-with-file-like-objects }
+采用异步生成器或普通生成器/迭代器(带有 `yield` 的函数),然后流式传输响应主体。
-如果您有一个<a href="https://docs.python.org/3/glossary.html#term-file-like-object" class="external-link" target="_blank">类文件</a>对象(例如由 `open()` 返回的对象),你可以创建一个生成器函数来迭代该类文件对象。
+{* ../../docs_src/custom_response/tutorial007_py310.py hl[3,16] *}
-这样,你就不必先把它全部读入内存,可以将该生成器函数传给 `StreamingResponse` 并返回它。
-
-这也包括许多与云存储、视频处理等交互的库。
+/// note | 技术细节
-{* ../../docs_src/custom_response/tutorial008_py310.py hl[2,10:12,14] *}
+一个 `async` 任务只有在到达 `await` 时才能被取消。如果没有 `await`,生成器(带有 `yield` 的函数)无法被正确取消,即使已请求取消也可能继续运行。
-1. 这是生成器函数。之所以是「生成器函数」,是因为它内部包含 `yield` 语句。
-2. 通过使用 `with` 代码块,我们可以确保在生成器函数完成后关闭类文件对象。因此,在它完成发送响应之后会被关闭。
-3. 这个 `yield from` 告诉函数去迭代名为 `file_like` 的那个对象。然后,对于每个被迭代出来的部分,都把该部分作为来自这个生成器函数(`iterfile`)的值再 `yield` 出去。
+由于这个小示例不需要任何 `await` 语句,我们添加 `await anyio.sleep(0)`,给事件循环一个处理取消的机会。
- 因此,它是一个把「生成」工作内部转交给其他东西的生成器函数。
+对于大型或无限流,这一点更为重要。
- 通过这种方式,我们可以把它放在 `with` 代码块中,从而确保类文件对象在结束后被关闭。
+///
/// tip | 提示
-注意在这里,因为我们使用的是不支持 `async` 和 `await` 的标准 `open()`,我们使用普通的 `def` 声明了路径操作。
+与其直接返回 `StreamingResponse`,更推荐遵循 [流式数据](./stream-data.md) 的写法,它更方便并在幕后为你处理取消。
+
+如果你在流式传输 JSON Lines,请参阅教程:[流式传输 JSON Lines](../tutorial/stream-json-lines.md)。
///
你可以创建你自己的自定义响应类,继承自 `Response` 并使用它。
-例如,假设你想使用 <a href="https://github.com/ijl/orjson" class="external-link" target="_blank">`orjson`</a>,但要使用内置 `ORJSONResponse` 类没有启用的一些自定义设置。
+例如,假设你想用一些设置来使用 [`orjson`](https://github.com/ijl/orjson)。
假设你想让它返回带缩进、格式化的 JSON,因此你想使用 orjson 选项 `orjson.OPT_INDENT_2`。
-你可以创建一个 `CustomORJSONResponse`。你需要做的主要事情是实现一个返回 `bytes` 的 `Response.render(content)` 方法:
+你可以创建一个 `CustomORJSONResponse`。你需要做的主要事情是实现一个 `Response.render(content)` 方法,并返回 `bytes`:
{* ../../docs_src/custom_response/tutorial009c_py310.py hl[9:14,17] *}
当然,你很可能会找到比格式化 JSON 更好的方式来利用这一点。😉
+### `orjson` 或响应模型 { #orjson-or-response-model }
+
+如果你追求的是性能,使用[响应模型](../tutorial/response-model.md) 往往比返回 `orjson` 响应更好。
+
+使用响应模型时,FastAPI 会使用 Pydantic 直接把数据序列化为 JSON,不需要诸如通过 `jsonable_encoder` 转换这样的中间步骤(其他情况下会发生)。
+
+并且在底层,Pydantic 使用与 `orjson` 相同的 Rust 机制来序列化 JSON,所以使用响应模型你已经可以获得最佳性能。
+
## 默认响应类 { #default-response-class }
在创建 **FastAPI** 类实例或 `APIRouter` 时,你可以指定默认要使用的响应类。
用于定义它的参数是 `default_response_class`。
-在下面的示例中,**FastAPI** 会在所有 *路径操作* 中默认使用 `ORJSONResponse`,而不是 `JSONResponse`。
+在下面的示例中,**FastAPI** 会在所有 *路径操作* 中默认使用 `HTMLResponse`,而不是 JSON。
{* ../../docs_src/custom_response/tutorial010_py310.py hl[2,4] *}
## 额外文档 { #additional-documentation }
-你还可以使用 `responses` 在 OpenAPI 中声明媒体类型和许多其他详细信息:[OpenAPI 中的额外文档](additional-responses.md){.internal-link target=_blank}。
+你还可以使用 `responses` 在 OpenAPI 中声明媒体类型和许多其他详细信息:[OpenAPI 中的额外响应](additional-responses.md)。
FastAPI 基于 **Pydantic** 构建,我已经向你展示过如何使用 Pydantic 模型声明请求与响应。
-但 FastAPI 也支持以相同方式使用 <a href="https://docs.python.org/3/library/dataclasses.html" class="external-link" target="_blank">`dataclasses`</a>:
+但 FastAPI 也支持以相同方式使用 [`dataclasses`](https://docs.python.org/3/library/dataclasses.html):
{* ../../docs_src/dataclasses_/tutorial001_py310.py hl[1,6:11,18:19] *}
-这仍然得益于 **Pydantic**,因为它对 <a href="https://docs.pydantic.dev/latest/concepts/dataclasses/#use-of-stdlib-dataclasses-with-basemodel" class="external-link" target="_blank">`dataclasses` 的内置支持</a>。
+这仍然得益于 **Pydantic**,因为它对 [`dataclasses` 的内置支持](https://docs.pydantic.dev/latest/concepts/dataclasses/#use-of-stdlib-dataclasses-with-basemodel)。
因此,即便上面的代码没有显式使用 Pydantic,FastAPI 也会使用 Pydantic 将那些标准数据类转换为 Pydantic 风格的 dataclasses。
一如既往,在 FastAPI 中你可以按需组合 `def` 和 `async def`。
- 如果需要回顾何时用哪一个,请查看关于 [`async` 和 `await`](../async.md#in-a-hurry){.internal-link target=_blank} 的文档中的 _“急不可待?”_ 一节。
+ 如果需要回顾何时用哪一个,请查看关于 [`async` 和 `await`](../async.md#in-a-hurry) 的文档中的 _“急不可待?”_ 一节。
9. 这个 *路径操作函数* 返回的不是数据类(当然也可以返回数据类),而是包含内部数据的字典列表。
FastAPI 会使用(包含数据类的)`response_model` 参数来转换响应。
你还可以把 `dataclasses` 与其它 Pydantic 模型组合、从它们继承、把它们包含到你自己的模型中等。
-想了解更多,请查看 <a href="https://docs.pydantic.dev/latest/concepts/dataclasses/" class="external-link" target="_blank">Pydantic 关于 dataclasses 的文档</a>。
+想了解更多,请查看 [Pydantic 关于 dataclasses 的文档](https://docs.pydantic.dev/latest/concepts/dataclasses/)。
## 版本 { #version }
只是为好奇者提供的技术细节。🤓
-在底层,这部分是 ASGI 技术规范中的 <a href="https://asgi.readthedocs.io/en/latest/specs/lifespan.html" class="external-link" target="_blank">Lifespan 协议</a>的一部分,定义了称为 `startup` 和 `shutdown` 的事件。
+在底层,这部分是 ASGI 技术规范中的 [Lifespan 协议](https://asgi.readthedocs.io/en/latest/specs/lifespan.html)的一部分,定义了称为 `startup` 和 `shutdown` 的事件。
/// info | 信息
-你可以在 <a href="https://www.starlette.dev/lifespan/" class="external-link" target="_blank">Starlette 的 Lifespan 文档</a> 中阅读更多关于 `lifespan` 处理器的内容。
+你可以在 [Starlette 的 Lifespan 文档](https://www.starlette.dev/lifespan/) 中阅读更多关于 `lifespan` 处理器的内容。
包括如何处理生命周期状态,以便在代码的其他部分使用。
## 子应用 { #sub-applications }
-🚨 请注意,这些生命周期事件(startup 和 shutdown)只会在主应用上执行,不会在[子应用 - 挂载](sub-applications.md){.internal-link target=_blank}上执行。
+🚨 请注意,这些生命周期事件(startup 和 shutdown)只会在主应用上执行,不会在[子应用 - 挂载](sub-applications.md)上执行。
## 开源 SDK 生成器 { #open-source-sdk-generators }
-一个功能多样的选择是 <a href="https://openapi-generator.tech/" class="external-link" target="_blank">OpenAPI Generator</a>,它支持**多种编程语言**,可以根据你的 OpenAPI 规范生成 SDK。
+一个功能多样的选择是 [OpenAPI Generator](https://openapi-generator.tech/),它支持**多种编程语言**,可以根据你的 OpenAPI 规范生成 SDK。
-对于 **TypeScript 客户端**,<a href="https://heyapi.dev/" class="external-link" target="_blank">Hey API</a> 是为 TypeScript 生态打造的专用方案,提供优化的使用体验。
+对于 **TypeScript 客户端**,[Hey API](https://heyapi.dev/) 是为 TypeScript 生态打造的专用方案,提供优化的使用体验。
-你还可以在 <a href="https://openapi.tools/#sdk" class="external-link" target="_blank">OpenAPI.Tools</a> 上发现更多 SDK 生成器。
+你还可以在 [OpenAPI.Tools](https://openapi.tools/#sdk) 上发现更多 SDK 生成器。
/// tip | 提示
本节介绍的是由赞助 FastAPI 的公司提供的、具备**风险投资背景**或**公司支持**的方案。这些产品在高质量生成的 SDK 之上,提供了**更多特性**和**集成**。
-通过 ✨ [**赞助 FastAPI**](../help-fastapi.md#sponsor-the-author){.internal-link target=_blank} ✨,这些公司帮助确保框架及其**生态**保持健康并且**可持续**。
+通过 ✨ [**赞助 FastAPI**](../help-fastapi.md#sponsor-the-author) ✨,这些公司帮助确保框架及其**生态**保持健康并且**可持续**。
他们的赞助也体现了对 FastAPI **社区**(也就是你)的高度承诺,不仅关注提供**优秀的服务**,也支持一个**健壮且繁荣的框架**——FastAPI。🙇
例如,你可以尝试:
-* <a href="https://speakeasy.com/editor?utm_source=fastapi+repo&utm_medium=github+sponsorship" class="external-link" target="_blank">Speakeasy</a>
-* <a href="https://www.stainless.com/?utm_source=fastapi&utm_medium=referral" class="external-link" target="_blank">Stainless</a>
-* <a href="https://developers.liblab.com/tutorials/sdk-for-fastapi?utm_source=fastapi" class="external-link" target="_blank">liblab</a>
+* [Speakeasy](https://speakeasy.com/editor?utm_source=fastapi+repo&utm_medium=github+sponsorship)
+* [Stainless](https://www.stainless.com/?utm_source=fastapi&utm_medium=referral)
+* [liblab](https://developers.liblab.com/tutorials/sdk-for-fastapi?utm_source=fastapi)
其中一些方案也可能是开源的或提供免费层级,你可以不花钱就先试用。其他商业 SDK 生成器也可在网上找到。🤓
这会在 `./src/client` 生成一个 TypeScript SDK。
-你可以在其官网了解如何<a href="https://heyapi.dev/openapi-ts/get-started" class="external-link" target="_blank">安装 `@hey-api/openapi-ts`</a>,以及阅读<a href="https://heyapi.dev/openapi-ts/output" class="external-link" target="_blank">生成结果</a>的说明。
+你可以在其官网了解如何[安装 `@hey-api/openapi-ts`](https://heyapi.dev/openapi-ts/get-started),以及阅读[生成结果](https://heyapi.dev/openapi-ts/output)的说明。
### 使用 SDK { #using-the-sdk }
## 附加功能 { #additional-features }
-主要的[教程 - 用户指南](../tutorial/index.md){.internal-link target=_blank}足以带你了解 **FastAPI** 的所有主要特性。
+主要的[教程 - 用户指南](../tutorial/index.md)足以带你了解 **FastAPI** 的所有主要特性。
在接下来的章节中,你将看到其他选项、配置和附加功能。
/// tip | 提示
-接下来的章节不一定是“高级”的。
+接下来的章节**不一定是“高级”的**。
对于你的用例,解决方案很可能就在其中之一。
## 先阅读教程 { #read-the-tutorial-first }
-仅凭主要[教程 - 用户指南](../tutorial/index.md){.internal-link target=_blank}中的知识,你已经可以使用 **FastAPI** 的大多数功能。
+仅凭主要[教程 - 用户指南](../tutorial/index.md)中的知识,你已经可以使用 **FastAPI** 的大多数功能。
接下来的章节默认你已经读过它,并理解其中的核心概念。
# 高级中间件 { #advanced-middleware }
-用户指南介绍了如何为应用添加[自定义中间件](../tutorial/middleware.md){.internal-link target=_blank} 。
+用户指南介绍了如何为应用添加[自定义中间件](../tutorial/middleware.md)。
-以及如何[使用 `CORSMiddleware` 处理 CORS](../tutorial/cors.md){.internal-link target=_blank}。
+以及如何[使用 `CORSMiddleware` 处理 CORS](../tutorial/cors.md)。
本章学习如何使用其它中间件。
## 其它中间件 { #other-middlewares }
-除了上述中间件外,FastAPI 还支持其它ASGI 中间件。
+除了上述中间件外,FastAPI 还支持其它 ASGI 中间件。
例如:
-* <a href="https://github.com/encode/uvicorn/blob/master/uvicorn/middleware/proxy_headers.py" class="external-link" target="_blank">Uvicorn 的 `ProxyHeadersMiddleware`</a>
-* <a href="https://github.com/florimondmanca/msgpack-asgi" class="external-link" target="_blank">MessagePack</a>
+* [Uvicorn 的 `ProxyHeadersMiddleware`](https://github.com/encode/uvicorn/blob/master/uvicorn/middleware/proxy_headers.py)
+* [MessagePack](https://github.com/florimondmanca/msgpack-asgi)
-其它可用中间件详见 <a href="https://www.starlette.dev/middleware/" class="external-link" target="_blank">Starlette 官档 - 中间件</a> 及 <a href="https://github.com/florimondmanca/awesome-asgi" class="external-link" target="_blank">ASGI Awesome 列表</a>。
+其它可用中间件详见 [Starlette 官档 - 中间件](https://www.starlette.dev/middleware/) 及 [ASGI Awesome 列表](https://github.com/florimondmanca/awesome-asgi)。
/// tip | 提示
-`callback_url` 查询参数使用 Pydantic 的 <a href="https://docs.pydantic.dev/latest/api/networks/" class="external-link" target="_blank">Url</a> 类型。
+`callback_url` 查询参数使用 Pydantic 的 [Url](https://docs.pydantic.dev/latest/api/networks/) 类型。
///
实际的回调只是 HTTP 请求。
-实现回调时,要使用 <a href="https://www.python-httpx.org" class="external-link" target="_blank">HTTPX</a> 或 <a href="https://requests.readthedocs.io/" class="external-link" target="_blank">Requests</a>。
+实现回调时,要使用 [HTTPX](https://www.python-httpx.org) 或 [Requests](https://requests.readthedocs.io/)。
///
回调*路径操作*与常规*路径操作*有两点主要区别:
* 它不需要任何实际的代码,因为应用不会调用这段代码。它只是用于存档*外部 API*。因此,函数的内容只需要 `pass` 就可以了
-* *路径*可以包含 <a href="https://github.com/OAI/OpenAPI-Specification/blob/master/versions/3.1.0.md#key-expression" class="external-link" target="_blank">OpenAPI 3 表达式</a>(详见下文),可以使用带参数的变量,以及发送至您的 API 的原始请求的部分
+* *路径*可以包含 [OpenAPI 3 表达式](https://github.com/OAI/OpenAPI-Specification/blob/master/versions/3.1.0.md#key-expression)(详见下文),可以使用带参数的变量,以及发送至您的 API 的原始请求的部分
### 回调路径表达式 { #the-callback-path-expression }
-回调*路径*支持包含发送给您的 API 的原始请求的部分的 <a href="https://github.com/OAI/OpenAPI-Specification/blob/master/versions/3.1.0.md#key-expression" class="external-link" target="_blank">OpenAPI 3 表达式</a>。
+回调*路径*支持包含发送给您的 API 的原始请求的部分的 [OpenAPI 3 表达式](https://github.com/OAI/OpenAPI-Specification/blob/master/versions/3.1.0.md#key-expression)。
-本例中是**字符串**:
+本例中是 `str`:
```Python
"{$callback_url}/invoices/{$request.body.id}"
/// tip | 提示
-注意,不能把路由本身(`invoices_callback_router`)传递给 `callback=`,要传递 `invoices_callback_router.routes` 中的 `.routes` 属性。
+注意,不能把路由本身(`invoices_callback_router`)传递给 `callbacks=`,要传递 `invoices_callback_router.routes` 中的 `.routes` 属性。
///
### 查看文档 { #check-the-docs }
-现在,启动应用并打开 <a href="http://127.0.0.1:8000/docs" class="external-link" target="_blank">http://127.0.0.1:8000/docs</a>。
+现在,启动应用并打开 [http://127.0.0.1:8000/docs](http://127.0.0.1:8000/docs)。
就能看到文档的*路径操作*已经包含了**回调**的内容以及*外部 API*:
有些情况下,您可能想告诉您的 API **用户**,您的应用程序可以携带一些数据调用*他们的*应用程序(给它们发送请求),通常是为了**通知**某种**事件**。
-这意味着,除了您的用户向您的 API 发送请求的一般情况,**您的 API**(或您的应用)也可以向**他们的系统**(他们的 API、他们的应用)**发送请求**。
+这意味着,与通常由您的用户向您的 API 发送请求的流程相反,是**您的 API**(或您的应用)可以**向他们的系统**(他们的 API、他们的应用)**发送请求**。
这通常被称为**网络钩子**(Webhook)。
### 查看文档 { #check-the-docs }
-现在您可以启动您的应用程序并访问 <a href="http://127.0.0.1:8000/docs" class="external-link" target="_blank">http://127.0.0.1:8000/docs</a>.
+现在您可以启动您的应用程序并访问 [http://127.0.0.1:8000/docs](http://127.0.0.1:8000/docs)。
您会看到您的文档不仅有正常的*路径操作*显示,现在还多了一些**网络钩子**:
你也可以为它声明带有各自模型、状态码等的附加响应。
-文档中有一个完整章节,你可以阅读这里的[OpenAPI 中的附加响应](additional-responses.md){.internal-link target=_blank}。
+文档中有一个完整章节,你可以阅读这里的[OpenAPI 中的附加响应](additional-responses.md)。
## OpenAPI Extra { #openapi-extra }
/// note | 技术细节
-在 OpenAPI 规范中,这被称为 <a href="https://github.com/OAI/OpenAPI-Specification/blob/main/versions/3.0.3.md#operation-object" class="external-link" target="_blank">Operation 对象</a>。
+在 OpenAPI 规范中,这被称为 [Operation 对象](https://github.com/OAI/OpenAPI-Specification/blob/main/versions/3.0.3.md#operation-object)。
///
这是一个较低层级的扩展点。
-如果你只需要声明附加响应,更方便的方式是使用[OpenAPI 中的附加响应](additional-responses.md){.internal-link target=_blank}。
+如果你只需要声明附加响应,更方便的方式是使用[OpenAPI 中的附加响应](additional-responses.md)。
///
# 响应 - 更改状态码 { #response-change-status-code }
-你可能之前已经了解到,你可以设置默认的[响应状态码](../tutorial/response-status-code.md){.internal-link target=_blank}。
+你可能之前已经了解到,你可以设置默认的[响应状态码](../tutorial/response-status-code.md)。
但在某些情况下,你需要返回一个不同于默认值的状态码。
你还可以在直接响应`Response`时直接创建cookies。
-ä½ å\8f¯ä»¥å\8f\82è\80\83[ç\9b´æ\8e¥è¿\94å\9b\9e Response](response-directly.md){.internal-link target=_blank}æ\9d¥å\88\9b建response
+为æ¤ï¼\8cä½ å\8f¯ä»¥æ\8c\89ç\85§[ç\9b´æ\8e¥è¿\94å\9b\9e Response](response-directly.md)ä¸ç\9a\84说æ\98\8eå\88\9b建ä¸\80个å\93\8dåº\94ã\80\82
然后设置Cookies,并返回:
///
-如果你想查看所有可用的参数和选项,可以参考 <a href="https://www.starlette.dev/responses/#set-cookie" class="external-link" target="_blank">Starlette帮助文档</a>
+如果你想查看所有可用的参数和选项,可以参考 [Starlette 文档](https://www.starlette.dev/responses/#set-cookie)。
当你创建一个 **FastAPI** *路径操作* 时,你可以正常返回以下任意一种数据:`dict`,`list`,Pydantic 模型,数据库模型等等。
-**FastAPI** 默认会使用 `jsonable_encoder` 将这些类型的返回值转换成 JSON 格式,`jsonable_encoder` 在 [JSON 兼容编码器](../tutorial/encoder.md){.internal-link target=_blank} 中有阐述。
+如果你声明了 [响应模型](../tutorial/response-model.md),FastAPI 会使用它通过 Pydantic 将数据序列化为 JSON。
+如果你没有声明响应模型,**FastAPI** 会使用在 [JSON 兼容编码器](../tutorial/encoder.md) 中阐述的 `jsonable_encoder`。
然后,**FastAPI** 会在后台将这些兼容 JSON 的数据(比如字典)放到一个 `JSONResponse` 中,该 `JSONResponse` 会用来发送响应给客户端。
但是你可以在你的 *路径操作* 中直接返回一个 `JSONResponse`。
-直接返回响应可能会有用处,比如返回自定义的响应头和 cookies。
+/// tip | 提示
+
+通常使用 [响应模型](../tutorial/response-model.md) 会比直接返回 `JSONResponse` 拥有更好的性能,因为它会在 Rust 中使用 Pydantic 序列化数据。
+
+///
## 返回 `Response` { #return-a-response }
事实上,你可以返回任意 `Response` 或者任意 `Response` 的子类。
-/// tip | 提示
+/// info | 信息
`JSONResponse` 本身是一个 `Response` 的子类。
这种特性给你极大的可扩展性。你可以返回任何数据类型,重写任何数据声明或者校验,等等。
+这也带来了很大的责任。你必须确保你返回的数据是正确的、格式正确、可被序列化,等等。
+
## 在 `Response` 中使用 `jsonable_encoder` { #using-the-jsonable-encoder-in-a-response }
由于 **FastAPI** 并未对你返回的 `Response` 做任何改变,你必须确保你已经准备好响应内容。
现在,让我们看看你如何才能返回一个自定义的响应。
-假设你想要返回一个 <a href="https://en.wikipedia.org/wiki/XML" class="external-link" target="_blank">XML</a> 响应。
+假设你想要返回一个 [XML](https://en.wikipedia.org/wiki/XML) 响应。
你可以把你的 XML 内容放到一个字符串中,放到一个 `Response` 中,然后返回:
{* ../../docs_src/response_directly/tutorial002_py310.py hl[1,18] *}
+## 响应模型如何工作 { #how-a-response-model-works }
+
+当你在路径操作中声明一个 [响应模型 - 返回类型](../tutorial/response-model.md) 时,**FastAPI** 会使用它通过 Pydantic 将数据序列化为 JSON。
+
+{* ../../docs_src/response_model/tutorial001_01_py310.py hl[16,21] *}
+
+由于这些工作会在 Rust 侧完成,性能将比在常规 Python 中配合 `JSONResponse` 类完成要好得多。
+
+当使用 `response_model` 或返回类型时,FastAPI 不会使用 `jsonable_encoder` 来转换数据(那样会更慢),也不会使用 `JSONResponse` 类。
+
+相反,它会采用使用该响应模型(或返回类型)由 Pydantic 生成的 JSON 字节,并直接返回一个具有正确 JSON 媒体类型(`application/json`)的 `Response`。
+
## 说明 { #notes }
当你直接返回 `Response` 时,它的数据既没有校验,又不会进行转换(序列化),也不会自动生成文档。
-但是你仍可以参考 [OpenAPI 中的额外响应](additional-responses.md){.internal-link target=_blank} 给响应编写文档。
+但是你仍可以参考 [OpenAPI 中的额外响应](additional-responses.md) 给响应编写文档。
在后续的章节中你可以了解到如何使用/声明这些自定义的 `Response` 的同时还保留自动化的数据转换和文档等。
你也可以在直接返回 `Response` 时添加头部。
-按照[直接返回响应](response-directly.md){.internal-link target=_blank}中所述创建响应,并将头部作为附加参数传递:
+按照[直接返回响应](response-directly.md)中所述创建响应,并将头部作为附加参数传递:
{* ../../docs_src/response_headers/tutorial001_py310.py hl[10:12] *}
## 自定义头部 { #custom-headers }
-请注意,可以通过<a href="https://developer.mozilla.org/en-US/docs/Web/HTTP/Headers" class="external-link" target="_blank">使用 `X-` 前缀</a>添加自定义专有头部。
+请注意,可以通过[使用 `X-` 前缀](https://developer.mozilla.org/en-US/docs/Web/HTTP/Headers)添加自定义专有头部。
-但是,如果你有自定义头部,并希望浏览器中的客户端能够看到它们,你需要将它们添加到你的 CORS 配置中(在 [CORS(跨源资源共享)](../tutorial/cors.md){.internal-link target=_blank} 中阅读更多),使用在 <a href="https://www.starlette.dev/middleware/#corsmiddleware" class="external-link" target="_blank">Starlette 的 CORS 文档</a>中记录的 `expose_headers` 参数。
+但是,如果你有自定义头部,并希望浏览器中的客户端能够看到它们,你需要将它们添加到你的 CORS 配置中(在 [CORS(跨源资源共享)](../tutorial/cors.md) 中阅读更多),使用在 [Starlette 的 CORS 文档](https://www.starlette.dev/middleware/#corsmiddleware)中记录的 `expose_headers` 参数。
使用依赖项检查用户名与密码是否正确。
-为此要使用 Python 标准模块 <a href="https://docs.python.org/3/library/secrets.html" class="external-link" target="_blank">`secrets`</a> 检查用户名与密码。
+为此要使用 Python 标准模块 [`secrets`](https://docs.python.org/3/library/secrets.html) 检查用户名与密码。
`secrets.compare_digest()` 需要仅包含 ASCII 字符(英语字符)的 `bytes` 或 `str`,这意味着它不适用于像`á`一样的字符,如 `Sebastián`。
## 附加特性 { #additional-features }
-除 [教程 - 用户指南: 安全性](../../tutorial/security/index.md){.internal-link target=_blank} 中涵盖的功能之外,还有一些额外的功能来处理安全性。
+除 [教程 - 用户指南: 安全性](../../tutorial/security/index.md) 中涵盖的功能之外,还有一些额外的功能来处理安全性。
/// tip | 提示
## 先阅读教程 { #read-the-tutorial-first }
-接下来的部分假设你已经阅读了主要的 [教程 - 用户指南: 安全性](../../tutorial/security/index.md){.internal-link target=_blank}。
+接下来的部分假设你已经阅读了主要的 [教程 - 用户指南: 安全性](../../tutorial/security/index.md)。
它们都基于相同的概念,但支持一些额外的功能。
## 全局纵览 { #global-view }
-首先,让我们快速看看与**用户指南**中 [OAuth2 实现密码(含哈希)、Bearer + JWT 令牌](../../tutorial/security/oauth2-jwt.md){.internal-link target=_blank} 示例相比有哪些变化。现在开始使用 OAuth2 作用域:
+首先,让我们快速看看与**用户指南**中 [OAuth2 实现密码(含哈希)、Bearer + JWT 令牌](../../tutorial/security/oauth2-jwt.md) 示例相比有哪些变化。现在开始使用 OAuth2 作用域:
{* ../../docs_src/security/tutorial005_an_py310.py hl[5,9,13,47,65,106,108:116,122:126,130:136,141,157] *}
## 装饰器 `dependencies` 中的 `Security` { #security-in-decorator-dependencies }
-就像你可以在装饰器的 `dependencies` 参数中定义 `Depends` 的 `list`(详见[路径操作装饰器依赖项](../../tutorial/dependencies/dependencies-in-path-operation-decorators.md){.internal-link target=_blank}),你也可以在那儿配合 `Security` 使用 `scopes`。
+就像你可以在装饰器的 `dependencies` 参数中定义 `Depends` 的 `list`(详见[路径操作装饰器依赖项](../../tutorial/dependencies/dependencies-in-path-operation-decorators.md)),你也可以在那儿配合 `Security` 使用 `scopes`。
/// tip | 提示
-要理解环境变量,你可以阅读[环境变量](../environment-variables.md){.internal-link target=_blank}。
+要理解环境变量,你可以阅读[环境变量](../environment-variables.md)。
///
## Pydantic 的 `Settings` { #pydantic-settings }
-幸运的是,Pydantic 提供了一个很好的工具来处理来自环境变量的这些设置:<a href="https://docs.pydantic.dev/latest/concepts/pydantic_settings/" class="external-link" target="_blank">Pydantic: Settings management</a>。
+幸运的是,Pydantic 提供了一个很好的工具来处理来自环境变量的这些设置:[Pydantic:Settings 管理](https://docs.pydantic.dev/latest/concepts/pydantic_settings/)。
### 安装 `pydantic-settings` { #install-pydantic-settings }
-首先,确保你创建并激活了[虚拟环境](../virtual-environments.md){.internal-link target=_blank},然后安装 `pydantic-settings` 包:
+首先,确保你创建并激活了[虚拟环境](../virtual-environments.md),然后安装 `pydantic-settings` 包:
<div class="termy">
## 在另一个模块中放置设置 { #settings-in-another-module }
-你可以把这些设置放在另一个模块文件中,就像你在[更大的应用 - 多个文件](../tutorial/bigger-applications.md){.internal-link target=_blank}中看到的那样。
+你可以把这些设置放在另一个模块文件中,就像你在[更大的应用 - 多个文件](../tutorial/bigger-applications.md)中看到的那样。
例如,可以有一个 `config.py` 文件:
/// tip | 提示
-你还需要一个 `__init__.py` 文件,就像你在[更大的应用 - 多个文件](../tutorial/bigger-applications.md){.internal-link target=_blank}中看到的那样。
+你还需要一个 `__init__.py` 文件,就像你在[更大的应用 - 多个文件](../tutorial/bigger-applications.md)中看到的那样。
///
///
-Pydantic 支持使用一个外部库来从这类文件中读取。你可以在 <a href="https://docs.pydantic.dev/latest/concepts/pydantic_settings/#dotenv-env-support" class="external-link" target="_blank">Pydantic Settings: Dotenv (.env) support</a> 中阅读更多信息。
+Pydantic 支持使用一个外部库来从这类文件中读取。你可以在 [Pydantic Settings:Dotenv(.env)支持](https://docs.pydantic.dev/latest/concepts/pydantic_settings/#dotenv-env-support) 中阅读更多信息。
/// tip | 提示
/// tip | 提示
-`model_config` 属性仅用于 Pydantic 配置。你可以在 <a href="https://docs.pydantic.dev/latest/concepts/config/" class="external-link" target="_blank">Pydantic: Concepts: Configuration</a> 中阅读更多信息。
+`model_config` 属性仅用于 Pydantic 配置。你可以在 [Pydantic:概念:配置](https://docs.pydantic.dev/latest/concepts/config/) 中阅读更多信息。
///
这样,它的行为几乎就像是一个全局变量。但由于它使用了依赖项函数,我们可以在测试时很容易地覆盖它。
-`@lru_cache` 是 `functools` 的一部分,它属于 Python 标准库。你可以在 <a href="https://docs.python.org/3/library/functools.html#functools.lru_cache" class="external-link" target="_blank">Python 文档中关于 `@lru_cache` 的章节</a>阅读更多信息。
+`@lru_cache` 是 `functools` 的一部分,它属于 Python 标准库。你可以在 [Python 文档中关于 `@lru_cache` 的章节](https://docs.python.org/3/library/functools.html#functools.lru_cache)阅读更多信息。
## 小结 { #recap }
### 查看自动 API 文档 { #check-the-automatic-api-docs }
-现在,使用你的文件运行 `fastapi` 命令:
+现在,运行 `fastapi` 命令:
<div class="termy">
```console
-$ fastapi dev main.py
+$ fastapi dev
<span style="color: green;">INFO</span>: Uvicorn running on http://127.0.0.1:8000 (Press CTRL+C to quit)
```
</div>
-然后在 <a href="http://127.0.0.1:8000/docs" class="external-link" target="_blank">http://127.0.0.1:8000/docs</a> 打开文档。
+然后在 [http://127.0.0.1:8000/docs](http://127.0.0.1:8000/docs) 打开文档。
下图显示的是主应用 API 文档,只包括其自有的*路径操作*。
<img src="/img/tutorial/sub-applications/image01.png">
-然后查看子应用文档 <a href="http://127.0.0.1:8000/subapi/docs" class="external-link" target="_blank">http://127.0.0.1:8000/subapi/docs</a>。
+然后查看子应用文档 [http://127.0.0.1:8000/subapi/docs](http://127.0.0.1:8000/subapi/docs)。
下图显示的是子应用的 API 文档,也是只包括其自有的*路径操作*,所有这些路径操作都在 `/subapi` 子路径前缀下。
并且子应用还可以再挂载子应用,一切都会正常运行,FastAPI 可以自动处理所有 `root_path`。
-关于 `root_path` 及如何显式使用 `root_path` 的内容,详见[使用代理](behind-a-proxy.md){.internal-link target=_blank}一章。
+关于 `root_path` 及如何显式使用 `root_path` 的内容,详见[使用代理](behind-a-proxy.md)一章。
## 安装依赖项 { #install-dependencies }
-确保你创建一个[虚拟环境](../virtual-environments.md){.internal-link target=_blank},激活它,并安装 `jinja2`:
+确保你创建一个[虚拟环境](../virtual-environments.md),激活它,并安装 `jinja2`:
<div class="termy">
{* ../../docs_src/templates/tutorial001_py310.py hl[4,11,15:18] *}
-/// note
+/// note | 注意
在 FastAPI 0.108.0,Starlette 0.29.0 之前,`name` 是第一个参数。
并且,在此之前,`request` 对象是作为 context 的一部分以键值对的形式传递的。
///
-/// tip
+/// tip | 提示
通过声明 `response_class=HTMLResponse`,API 文档就能识别响应的对象是 HTML。
## 更多说明 { #more-details }
-包括测试模板等更多详情,请参阅 <a href="https://www.starlette.dev/templates/" class="external-link" target="_blank">Starlette 官方文档 - 模板</a>。
+包括如何测试模板在内的更多详情,请查看 [Starlette 的模板文档](https://www.starlette.dev/templates/)。
/// note | 注意
-更多细节请查看 Starlette 的文档:<a href="https://www.starlette.dev/testclient/#testing-websocket-sessions" class="external-link" target="_blank">测试 WebSockets</a>。
+更多细节请查看 Starlette 的文档:[测试 WebSockets](https://www.starlette.dev/testclient/#testing-websocket-sessions)。
///
## `Request` 对象的细节 { #details-about-the-request-object }
-实际上,**FastAPI** 的底层是 **Starlette**,**FastAPI** 只不过是在 **Starlette** 顶层提供了一些工具,所以能直接使用 Starlette 的 <a href="https://www.starlette.dev/requests/" class="external-link" target="_blank">`Request`</a> 对象。
+实际上,**FastAPI** 的底层是 **Starlette**,**FastAPI** 只不过是在 **Starlette** 顶层提供了一些工具,所以能直接使用 Starlette 的 [`Request`](https://www.starlette.dev/requests/) 对象。
但直接从 `Request` 对象提取数据时(例如,读取请求体),这些数据不会被 **FastAPI** 验证、转换或文档化(使用 OpenAPI,为自动的 API 用户界面)。
## `Request` 文档 { #request-documentation }
-更多细节详见 <a href="https://www.starlette.dev/requests/" class="external-link" target="_blank">Starlette 官档 - `Request` 对象</a>。
+你可以在[Starlette 官方文档站点的 `Request` 对象](https://www.starlette.dev/requests/)中阅读更多细节。
/// note | 技术细节
# WebSockets { #websockets }
-您可以在 **FastAPI** 中使用 <a href="https://developer.mozilla.org/en-US/docs/Web/API/WebSockets_API" class="external-link" target="_blank">WebSockets</a>。
+您可以在 **FastAPI** 中使用 [WebSockets](https://developer.mozilla.org/en-US/docs/Web/API/WebSockets_API)。
## 安装 `websockets` { #install-websockets }
-请确保您创建一个[虚拟环境](../virtual-environments.md){.internal-link target=_blank}、激活它,并安装 `websockets`(一个让使用“WebSocket”协议更容易的 Python 库):
+请确保您创建一个[虚拟环境](../virtual-environments.md)、激活它,并安装 `websockets`(一个让使用“WebSocket”协议更容易的 Python 库):
<div class="termy">
## 尝试一下 { #try-it }
-å¦\82æ\9e\9cæ\82¨ç\9a\84æ\96\87件å\90\8d为 `main.py`ï¼\8c请使ç\94¨ä»¥ä¸\8bå\91½ä»¤è¿\90è¡\8c应用程序:
+å°\86代ç \81æ\94¾å\9c¨ `main.py`ï¼\8cç\84¶å\90\8eè¿\90è¡\8cä½ ç\9a\84应用程序:
<div class="termy">
```console
-$ fastapi dev main.py
+$ fastapi dev
<span style="color: green;">INFO</span>: Uvicorn running on http://127.0.0.1:8000 (Press CTRL+C to quit)
```
</div>
-在浏览器中打开 <a href="http://127.0.0.1:8000" class="external-link" target="_blank">http://127.0.0.1:8000</a>。
+在浏览器中打开 [http://127.0.0.1:8000](http://127.0.0.1:8000)。
您将看到一个简单的页面,如下所示:
<img src="/img/tutorial/websockets/image02.png">
-您的 **FastAPI** 应用程序将回复:
+您的 **FastAPI** 应用程序将通过 WebSockets 回复:
<img src="/img/tutorial/websockets/image03.png">
由于这是一个 WebSocket,抛出 `HTTPException` 并不是很合理,而是抛出 `WebSocketException`。
-您可以使用<a href="https://tools.ietf.org/html/rfc6455#section-7.4.1" class="external-link" target="_blank">规范中定义的有效代码</a>。
+您可以使用[规范中定义的有效代码](https://tools.ietf.org/html/rfc6455#section-7.4.1)。
///
### 尝试带有依赖项的 WebSockets { #try-the-websockets-with-dependencies }
-如果您的文件名为 `main.py`,请使用以下命令运行应用程序:
+运行你的应用程序:
<div class="termy">
```console
-$ fastapi dev main.py
+$ fastapi dev
<span style="color: green;">INFO</span>: Uvicorn running on http://127.0.0.1:8000 (Press CTRL+C to quit)
```
</div>
-在浏览器中打开 <a href="http://127.0.0.1:8000" class="external-link" target="_blank">http://127.0.0.1:8000</a>。
+在浏览器中打开 [http://127.0.0.1:8000](http://127.0.0.1:8000)。
在页面中,您可以设置:
但请记住,由于所有内容都在内存中以单个列表的形式处理,因此它只能在进程运行时工作,并且只能使用单个进程。
-如果您需要与 FastAPI 集成更简单但更强大的功能,支持 Redis、PostgreSQL 或其他功能,请查看 <a href="https://github.com/encode/broadcaster" class="external-link" target="_blank">encode/broadcaster</a>。
+如果您需要与 FastAPI 集成更简单但更强大的功能,支持 Redis、PostgreSQL 或其他功能,请查看 [encode/broadcaster](https://github.com/encode/broadcaster)。
///
要了解更多选项,请查看 Starlette 的文档:
-* <a href="https://www.starlette.dev/websockets/" class="external-link" target="_blank">`WebSocket` 类</a>。
-* <a href="https://www.starlette.dev/endpoints/#websocketendpoint" class="external-link" target="_blank">基于类的 WebSocket 处理</a>。
+* [`WebSocket` 类](https://www.starlette.dev/websockets/)。
+* [基于类的 WebSocket 处理](https://www.starlette.dev/endpoints/#websocketendpoint)。
# 包含 WSGI - Flask,Django,其它 { #including-wsgi-flask-django-others }
-您可以挂载 WSGI 应用,正如您在 [子应用 - 挂载](sub-applications.md){.internal-link target=_blank}、[在代理之后](behind-a-proxy.md){.internal-link target=_blank} 中所看到的那样。
+您可以挂载 WSGI 应用,正如您在 [子应用 - 挂载](sub-applications.md)、[在代理之后](behind-a-proxy.md) 中所看到的那样。
为此, 您可以使用 `WSGIMiddleware` 来包装你的 WSGI 应用,如:Flask,Django,等等。
其余的请求则会被 **FastAPI** 处理。
-如果你运行它并访问 <a href="http://localhost:8000/v1/" class="external-link" target="_blank">http://localhost:8000/v1/</a>,你将会看到由 Flask 返回的响应:
+如果你运行它并访问 [http://localhost:8000/v1/](http://localhost:8000/v1/),你将会看到由 Flask 返回的响应:
```txt
Hello, World from Flask!
```
-如果你访问 <a href="http://localhost:8000/v2" class="external-link" target="_blank">http://localhost:8000/v2</a>,你将会看到由 FastAPI 返回的响应:
+如果你访问 [http://localhost:8000/v2](http://localhost:8000/v2),你将会看到由 FastAPI 返回的响应:
```JSON
{
## 先前的工具 { #previous-tools }
-### <a href="https://www.djangoproject.com/" class="external-link" target="_blank">Django</a> { #django }
+### [Django](https://www.djangoproject.com/) { #django }
它是最流行且被广泛信任的 Python 框架。被用于构建 Instagram 等系统。
它最初用于在后端生成 HTML,而不是创建由现代前端(如 React、Vue.js、Angular)或与之通信的其他系统(如 <abbr title="Internet of Things - 物联网">IoT</abbr> 设备)使用的 API。
-### <a href="https://www.django-rest-framework.org/" class="external-link" target="_blank">Django REST Framework</a> { #django-rest-framework }
+### [Django REST Framework](https://www.django-rest-framework.org/) { #django-rest-framework }
Django REST framework 作为一个灵活工具箱而创建,用于在底层使用 Django 构建 Web API,从而增强其 API 能力。
///
-### <a href="https://flask.palletsprojects.com" class="external-link" target="_blank">Flask</a> { #flask }
+### [Flask](https://flask.palletsprojects.com) { #flask }
Flask 是一个“微框架”,它不包含数据库集成,也没有像 Django 那样的许多默认内建功能。
///
-### <a href="https://requests.readthedocs.io" class="external-link" target="_blank">Requests</a> { #requests }
+### [Requests](https://requests.readthedocs.io) { #requests }
**FastAPI** 实际上不是 **Requests** 的替代品。它们的作用范围完全不同。
/// check | 启发 **FastAPI**:
-- 提供简单直观的 API。
-- 直接、自然地使用 HTTP 方法名(操作)。
-- 具备合理默认值,同时支持强大定制能力。
+* 提供简单直观的 API。
+* 直接、自然地使用 HTTP 方法名(操作)。
+* 具备合理默认值,同时支持强大定制能力。
///
-### <a href="https://swagger.io/" class="external-link" target="_blank">Swagger</a> / <a href="https://github.com/OAI/OpenAPI-Specification/" class="external-link" target="_blank">OpenAPI</a> { #swagger-openapi }
+### [Swagger](https://swagger.io/) / [OpenAPI](https://github.com/OAI/OpenAPI-Specification/) { #swagger-openapi }
我想从 Django REST Framework 得到的主要特性之一是自动 API 文档。
并集成基于标准的用户界面工具:
-- <a href="https://github.com/swagger-api/swagger-ui" class="external-link" target="_blank">Swagger UI</a>
-- <a href="https://github.com/Rebilly/ReDoc" class="external-link" target="_blank">ReDoc</a>
+* [Swagger UI](https://github.com/swagger-api/swagger-ui)
+* [ReDoc](https://github.com/Rebilly/ReDoc)
选择这两者是因为它们相当流行且稳定;但稍作搜索,你就能找到数十种 OpenAPI 的替代用户界面(都可以与 **FastAPI** 搭配使用)。
有若干基于 Flask 的 REST 框架,但在投入时间精力深入调研后,我发现许多已停止维护或被弃用,并存在多处未解决问题,不太适合采用。
-### <a href="https://marshmallow.readthedocs.io/en/stable/" class="external-link" target="_blank">Marshmallow</a> { #marshmallow }
+### [Marshmallow](https://marshmallow.readthedocs.io/en/stable/) { #marshmallow }
API 系统所需的主要特性之一是数据“<dfn title="也称为:编组、转换">序列化</dfn>”,即将代码(Python)中的数据转换为可通过网络发送的形式。例如,将包含数据库数据的对象转换为 JSON 对象、将 `datetime` 对象转换为字符串等。
///
-### <a href="https://webargs.readthedocs.io/en/latest/" class="external-link" target="_blank">Webargs</a> { #webargs }
+### [Webargs](https://webargs.readthedocs.io/en/latest/) { #webargs }
API 的另一个重要需求是从传入请求中<dfn title="读取并转换为 Python 数据">解析</dfn>数据。
///
-### <a href="https://apispec.readthedocs.io/en/stable/" class="external-link" target="_blank">APISpec</a> { #apispec }
+### [APISpec](https://apispec.readthedocs.io/en/stable/) { #apispec }
Marshmallow 与 Webargs 通过插件提供了校验、解析与序列化。
///
-### <a href="https://flask-apispec.readthedocs.io/en/latest/" class="external-link" target="_blank">Flask-apispec</a> { #flask-apispec }
+### [Flask-apispec](https://flask-apispec.readthedocs.io/en/latest/) { #flask-apispec }
这是一个 Flask 插件,将 Webargs、Marshmallow 与 APISpec 结合在一起。
使用它促成了若干 Flask 全栈脚手架的诞生。以下是我(以及若干外部团队)至今使用的主要技术栈:
-* <a href="https://github.com/tiangolo/full-stack" class="external-link" target="_blank">https://github.com/tiangolo/full-stack</a>
-* <a href="https://github.com/tiangolo/full-stack-flask-couchbase" class="external-link" target="_blank">https://github.com/tiangolo/full-stack-flask-couchbase</a>
-* <a href="https://github.com/tiangolo/full-stack-flask-couchdb" class="external-link" target="_blank">https://github.com/tiangolo/full-stack-flask-couchdb</a>
+* [https://github.com/tiangolo/full-stack](https://github.com/tiangolo/full-stack)
+* [https://github.com/tiangolo/full-stack-flask-couchbase](https://github.com/tiangolo/full-stack-flask-couchbase)
+* [https://github.com/tiangolo/full-stack-flask-couchdb](https://github.com/tiangolo/full-stack-flask-couchdb)
-这些全栈脚手架也成为了[**FastAPI** 项目脚手架](project-generation.md){.internal-link target=_blank}的基础。
+这些全栈脚手架也成为了[**FastAPI** 项目脚手架](project-generation.md)的基础。
/// info | 信息
///
-### <a href="https://nestjs.com/" class="external-link" target="_blank">NestJS</a>(以及 <a href="https://angular.io/" class="external-link" target="_blank">Angular</a>) { #nestjs-and-angular }
+### [NestJS](https://nestjs.com/)(以及 [Angular](https://angular.io/)) { #nestjs-and-angular }
这甚至不是 Python。NestJS 是一个 JavaScript(TypeScript)的 NodeJS 框架,受 Angular 启发。
///
-### <a href="https://sanic.readthedocs.io/en/latest/" class="external-link" target="_blank">Sanic</a> { #sanic }
+### [Sanic](https://sanic.readthedocs.io/en/latest/) { #sanic }
它是最早的一批基于 `asyncio` 的极速 Python 框架之一,且做得与 Flask 很相似。
/// note | 技术细节
-它使用了 <a href="https://github.com/MagicStack/uvloop" class="external-link" target="_blank">`uvloop`</a> 来替代 Python 默认的 `asyncio` 循环。这正是它如此之快的原因。
+它使用了 [`uvloop`](https://github.com/MagicStack/uvloop) 来替代 Python 默认的 `asyncio` 循环。这正是它如此之快的原因。
它显然启发了 Uvicorn 和 Starlette;在公开的基准测试中,它们目前比 Sanic 更快。
///
-### <a href="https://falconframework.org/" class="external-link" target="_blank">Falcon</a> { #falcon }
+### [Falcon](https://falconframework.org/) { #falcon }
Falcon 是另一个高性能 Python 框架,它被设计为精简且可作为 Hug 等其他框架的基础。
///
-### <a href="https://moltenframework.com/" class="external-link" target="_blank">Molten</a> { #molten }
+### [Molten](https://moltenframework.com/) { #molten }
我在构建 **FastAPI** 的早期阶段发现了 Molten。它有不少相似的想法:
///
-### <a href="https://github.com/hugapi/hug" class="external-link" target="_blank">Hug</a> { #hug }
+### [Hug](https://github.com/hugapi/hug) { #hug }
Hug 是最早使用 Python 类型提示来声明 API 参数类型的框架之一。这一绝妙想法也启发了其他工具。
/// info | 信息
-Hug 由 Timothy Crosley 创建,他也是 <a href="https://github.com/timothycrosley/isort" class="external-link" target="_blank">`isort`</a> 的作者,这是一个能自动排序 Python 文件中导入的优秀工具。
+Hug 由 Timothy Crosley 创建,他也是 [`isort`](https://github.com/timothycrosley/isort) 的作者,这是一个能自动排序 Python 文件中导入的优秀工具。
///
///
-### <a href="https://github.com/encode/apistar" class="external-link" target="_blank">APIStar</a> (<= 0.5) { #apistar-0-5 }
+### [APIStar](https://github.com/encode/apistar) (<= 0.5) { #apistar-0-5 }
就在决定动手构建 **FastAPI** 之前,我找到了 **APIStar** 服务器。它几乎具备我想要的一切,设计也很出色。
## **FastAPI** 所使用的组件 { #used-by-fastapi }
-### <a href="https://docs.pydantic.dev/" class="external-link" target="_blank">Pydantic</a> { #pydantic }
+### [Pydantic](https://docs.pydantic.dev/) { #pydantic }
Pydantic 是一个基于 Python 类型提示来定义数据校验、序列化与文档(使用 JSON Schema)的库。
///
-### <a href="https://www.starlette.dev/" class="external-link" target="_blank">Starlette</a> { #starlette }
+### [Starlette](https://www.starlette.dev/) { #starlette }
Starlette 是一个轻量级的 <dfn title="构建异步 Python Web 应用的新标准">ASGI</dfn> 框架/工具集,非常适合构建高性能的 asyncio 服务。
///
-### <a href="https://www.uvicorn.dev/" class="external-link" target="_blank">Uvicorn</a> { #uvicorn }
+### [Uvicorn](https://www.uvicorn.dev/) { #uvicorn }
Uvicorn 是一个基于 uvloop 与 httptools 构建的极速 ASGI 服务器。
你也可以使用 `--workers` 命令行选项以获得异步的多进程服务器。
-更多细节见[部署](deployment/index.md){.internal-link target=_blank}一节。
+更多细节见[部署](deployment/index.md)一节。
///
## 基准与速度 { #benchmarks-and-speed }
-要理解、比较并查看 Uvicorn、Starlette 与 FastAPI 之间的差异,请查看[基准](benchmarks.md){.internal-link target=_blank}一节。
+要理解、比较并查看 Uvicorn、Starlette 与 FastAPI 之间的差异,请查看[基准](benchmarks.md)一节。
/// info | 信息
-漂亮的插画来自 <a href="https://www.instagram.com/ketrinadrawsalot" class="external-link" target="_blank">Ketrina Thompson</a>. 🎨
+漂亮的插画来自 [Ketrina Thompson](https://www.instagram.com/ketrinadrawsalot)。🎨
///
/// info | 信息
-漂亮的插画来自 <a href="https://www.instagram.com/ketrinadrawsalot" class="external-link" target="_blank">Ketrina Thompson</a>. 🎨
+漂亮的插画来自 [Ketrina Thompson](https://www.instagram.com/ketrinadrawsalot)。🎨
///
这与 **FastAPI** 的性能水平相同。
-你可以同时拥有并行性和异步性,你可以获得比大多数经过测试的 NodeJS 框架更高的性能,并且与 Go 不相上下, Go 是一种更接近于 C 的编译语言(<a href="https://www.techempower.com/benchmarks/#section=data-r17&hw=ph&test=query&l=zijmkf-1" class="external-link" target="_blank">全部归功于 Starlette</a>)。
+你可以同时拥有并行性和异步性,你可以获得比大多数经过测试的 NodeJS 框架更高的性能,并且与 Go 不相上下, Go 是一种更接近于 C 的编译语言([全部归功于 Starlette](https://www.techempower.com/benchmarks/#section=data-r17&hw=ph&test=query&l=zijmkf-1))。
### 并发比并行好吗? { #is-concurrency-better-than-parallelism }
这一点,再加上 Python 是**数据科学**、机器学习(尤其是深度学习)的主要语言这一简单事实,使得 **FastAPI** 与数据科学/机器学习 Web API 和应用程序(以及其他许多应用程序)非常匹配。
-了解如何在生产环境中实现这种并行性,可查看此文 [部署](deployment/index.md){.internal-link target=_blank}。
+了解如何在生产环境中实现这种并行性,可查看此文 [部署](deployment/index.md)。
## `async` 和 `await` { #async-and-await }
### 编写自己的异步代码 { #write-your-own-async-code }
-Starlette (和 **FastAPI**) 是基于 <a href="https://anyio.readthedocs.io/en/stable/" class="external-link" target="_blank">AnyIO</a> 实现的,这使得它们可以兼容 Python 的标准库 <a href="https://docs.python.org/3/library/asyncio-task.html" class="external-link" target="_blank">asyncio</a> 和 <a href="https://trio.readthedocs.io/en/stable/" class="external-link" target="_blank">Trio</a>。
+Starlette (和 **FastAPI**) 是基于 [AnyIO](https://anyio.readthedocs.io/en/stable/) 实现的,这使得它们可以兼容 Python 的标准库 [asyncio](https://docs.python.org/3/library/asyncio-task.html) 和 [Trio](https://trio.readthedocs.io/en/stable/)。
-特别是,你可以直接使用 <a href="https://anyio.readthedocs.io/en/stable/" class="external-link" target="_blank">AnyIO</a> 来处理高级的并发用例,这些用例需要在自己的代码中使用更高级的模式。
+特别是,你可以直接使用 [AnyIO](https://anyio.readthedocs.io/en/stable/) 来处理高级的并发用例,这些用例需要在自己的代码中使用更高级的模式。
-即使你没有使用 **FastAPI**,你也可以使用 <a href="https://anyio.readthedocs.io/en/stable/" class="external-link" target="_blank">AnyIO</a> 编写自己的异步程序,使其拥有较高的兼容性并获得一些好处(例如, 结构化并发)。
+即使你没有使用 **FastAPI**,你也可以使用 [AnyIO](https://anyio.readthedocs.io/en/stable/) 编写自己的异步程序,使其拥有较高的兼容性并获得一些好处(例如, 结构化并发)。
-我基于 AnyIO 新建了一个库,作为一个轻量级的封装层,用来优化类型注解,同时提供了更好的**自动补全**、**内联错误提示**等功能。这个库还附带了一个友好的入门指南和教程,能帮助你**理解**并编写**自己的异步代码**:<a href="https://asyncer.tiangolo.com/" class="external-link" target="_blank">Asyncer</a>。如果你有**结合使用异步代码和常规**(阻塞/同步)代码的需求,这个库会特别有用。
+我基于 AnyIO 新建了一个库,作为一个轻量级的封装层,用来优化类型注解,同时提供了更好的**自动补全**、**内联错误提示**等功能。这个库还附带了一个友好的入门指南和教程,能帮助你**理解**并编写**自己的异步代码**:[Asyncer](https://asyncer.tiangolo.com/)。如果你有**结合使用异步代码和常规**(阻塞/同步)代码的需求,这个库会特别有用。
### 其他形式的异步代码 { #other-forms-of-asynchronous-code }
但在此之前,处理异步代码非常复杂和困难。
-在以前版本的 Python,你可以使用多线程或者 <a href="https://www.gevent.org/" class="external-link" target="_blank">Gevent</a>。但代码的理解、调试和思考都要复杂许多。
+在以前版本的 Python,你可以使用多线程或者 [Gevent](https://www.gevent.org/)。但代码的理解、调试和思考都要复杂许多。
在以前版本的 NodeJS / 浏览器 JavaScript 中,你会使用"回调",因此也可能导致“回调地狱”。
如果你使用过另一个不以上述方式工作的异步框架,并且你习惯于用普通的 `def` 定义普通的仅计算路径操作函数,以获得微小的性能增益(大约100纳秒),请注意,在 FastAPI 中,效果将完全相反。在这些情况下,最好使用 `async def`,除非路径操作函数内使用执行阻塞 <abbr title="Input/Output - 输入/输出:磁盘读写,网络通信。">I/O</abbr> 的代码。
-在这两种情况下,与你之前的框架相比,**FastAPI** 可能[仍然很快](index.md#performance){.internal-link target=_blank}。
+在这两种情况下,与你之前的框架相比,**FastAPI** 可能[仍然很快](index.md#performance)。
### 依赖 { #dependencies }
-这同样适用于[依赖](tutorial/dependencies/index.md){.internal-link target=_blank}。如果一个依赖是标准的 `def` 函数而不是 `async def`,它将被运行在外部线程池中。
+这同样适用于[依赖](tutorial/dependencies/index.md)。如果一个依赖是标准的 `def` 函数而不是 `async def`,它将被运行在外部线程池中。
### 子依赖 { #sub-dependencies }
-你可以拥有多个相互依赖的依赖以及[子依赖](tutorial/dependencies/sub-dependencies.md){.internal-link target=_blank} (作为函数的参数),它们中的一些可能是通过 `async def` 声明,也可能是通过 `def` 声明。它们仍然可以正常工作,这些通过 `def` 声明的函数将会在外部线程中调用(来自线程池),而不是"被等待"。
+你可以拥有多个相互依赖的依赖以及[子依赖](tutorial/dependencies/sub-dependencies.md) (作为函数的参数),它们中的一些可能是通过 `async def` 声明,也可能是通过 `def` 声明。它们仍然可以正常工作,这些通过 `def` 声明的函数将会在外部线程中调用(来自线程池),而不是"被等待"。
### 其他函数 { #other-utility-functions }
# 基准测试 { #benchmarks }
-第三方机构 TechEmpower 的基准测试表明在 Uvicorn 下运行的 **FastAPI** 应用程序是 <a href="https://www.techempower.com/benchmarks/#section=test&runid=7464e520-0dc2-473d-bd34-dbdfd7e85911&hw=ph&test=query&l=zijzen-7" class="external-link" target="_blank">可用的最快的 Python 框架之一</a>,仅次于 Starlette 和 Uvicorn 本身(由 FastAPI 内部使用)。
+第三方机构 TechEmpower 的基准测试表明在 Uvicorn 下运行的 **FastAPI** 应用程序是 [可用的最快的 Python 框架之一](https://www.techempower.com/benchmarks/#section=test&runid=7464e520-0dc2-473d-bd34-dbdfd7e85911&hw=ph&test=query&l=zijzen-7),仅次于 Starlette 和 Uvicorn 本身(由 FastAPI 内部使用)。
但是在查看基准得分和对比时,请注意以下几点。
## FastAPI Cloud { #fastapi-cloud }
-**<a href="https://fastapicloud.com" class="external-link" target="_blank">FastAPI Cloud</a>** 由 **FastAPI** 背后的同一作者与团队打造。
+**[FastAPI Cloud](https://fastapicloud.com)** 由 **FastAPI** 背后的同一作者与团队打造。
它简化了**构建**、**部署**和**访问** API 的流程,几乎不费力。
## 云服务商 - 赞助商 { #cloud-providers-sponsors }
-还有一些云服务商也会 ✨ [**赞助 FastAPI**](../help-fastapi.md#sponsor-the-author){.internal-link target=_blank} ✨。🙇
+还有一些云服务商也会 ✨ [**赞助 FastAPI**](../help-fastapi.md#sponsor-the-author) ✨。🙇
你也可以考虑按照他们的指南尝试他们的服务:
-* <a href="https://docs.render.com/deploy-fastapi?utm_source=deploydoc&utm_medium=referral&utm_campaign=fastapi" class="external-link" target="_blank">Render</a>
-* <a href="https://docs.railway.com/guides/fastapi?utm_medium=integration&utm_source=docs&utm_campaign=fastapi" class="external-link" target="_blank">Railway</a>
+* [Render](https://docs.render.com/deploy-fastapi?utm_source=deploydoc&utm_medium=referral&utm_campaign=fastapi)
+* [Railway](https://docs.railway.com/guides/fastapi?utm_medium=integration&utm_source=docs&utm_campaign=fastapi)
## 安全性 - HTTPS { #security-https }
-在[上一章有关 HTTPS](https.md){.internal-link target=_blank} 中,我们了解了 HTTPS 如何为您的 API 提供加密。
+在[上一章有关 HTTPS](https.md) 中,我们了解了 HTTPS 如何为您的 API 提供加密。
我们还看到,HTTPS 通常由应用程序服务器的**外部**组件(**TLS 终止代理**)提供。
### 崩溃后重新启动 { #restart-after-crash }
-但在那些严重错误导致正在运行的**进程**崩溃的情况下,您需要一个外部组件来负责**重新启动**进程,至少尝试几次......
+但在那些严重错误导致正在运行的**进程**崩溃的情况下,您需要一个外部组件来负责**重新启动**进程,至少尝试几次...
/// tip | 提示
### 工作进程和端口 { #worker-processes-and-ports }
-还记得文档 [关于 HTTPS](https.md){.internal-link target=_blank} 中只有一个进程可以侦听服务器中的端口和 IP 地址的一种组合吗?
+还记得文档 [关于 HTTPS](https.md) 中只有一个进程可以侦听服务器中的端口和 IP 地址的一种组合吗?
现在仍然是对的。
如果这些关于 **容器**、Docker 或 Kubernetes 的内容还没有多大意义,请不要担心。
-我将在以后的章节中向您详细介绍容器镜像、Docker、Kubernetes 等:[容器中的 FastAPI - Docker](docker.md){.internal-link target=_blank}。
+我将在以后的章节中向您详细介绍容器镜像、Docker、Kubernetes 等:[容器中的 FastAPI - Docker](docker.md)。
///
/// tip | 提示
-我将在以后的章节中为您提供使用容器执行此操作的更具体示例:[容器中的 FastAPI - Docker](docker.md){.internal-link target=_blank}。
+我将在以后的章节中为您提供使用容器执行此操作的更具体示例:[容器中的 FastAPI - Docker](docker.md)。
///
# 容器中的 FastAPI - Docker { #fastapi-in-containers-docker }
-部署 FastAPI 应用时,常见做法是构建一个**Linux 容器镜像**。通常使用 <a href="https://www.docker.com/" class="external-link" target="_blank">**Docker**</a> 实现。然后你可以用几种方式之一部署该镜像。
+部署 FastAPI 应用时,常见做法是构建一个**Linux 容器镜像**。通常使用 [**Docker**](https://www.docker.com/) 实现。然后你可以用几种方式之一部署该镜像。
使用 Linux 容器有多种优势,包括**安全性**、**可复制性**、**简单性**等。
CMD ["fastapi", "run", "app/main.py", "--port", "80"]
-# If running behind a proxy like Nginx or Traefik add --proxy-headers
+# 如果在 Nginx 或 Traefik 等代理后运行,请添加 --proxy-headers
# CMD ["fastapi", "run", "app/main.py", "--port", "80", "--proxy-headers"]
```
Docker 一直是创建和管理**容器镜像**与**容器**的主要工具之一。
-还有一个公共的 <a href="https://hub.docker.com/" class="external-link" target="_blank">Docker Hub</a>,其中为许多工具、环境、数据库和应用提供了预制的**官方容器镜像**。
+还有一个公共的 [Docker Hub](https://hub.docker.com/),其中为许多工具、环境、数据库和应用提供了预制的**官方容器镜像**。
-例如,有官方的 <a href="https://hub.docker.com/_/python" class="external-link" target="_blank">Python 镜像</a>。
+例如,有官方的 [Python 镜像](https://hub.docker.com/_/python)。
还有许多用于不同目的(如数据库)的镜像,例如:
-* <a href="https://hub.docker.com/_/postgres" class="external-link" target="_blank">PostgreSQL</a>
-* <a href="https://hub.docker.com/_/mysql" class="external-link" target="_blank">MySQL</a>
-* <a href="https://hub.docker.com/_/mongo" class="external-link" target="_blank">MongoDB</a>
-* <a href="https://hub.docker.com/_/redis" class="external-link" target="_blank">Redis</a> 等。
+* [PostgreSQL](https://hub.docker.com/_/postgres)
+* [MySQL](https://hub.docker.com/_/mysql)
+* [MongoDB](https://hub.docker.com/_/mongo)
+* [Redis](https://hub.docker.com/_/redis) 等。
通过使用预制的容器镜像,可以很容易地**组合**并使用不同工具。例如,试用一个新的数据库。在大多数情况下,你可以直接使用**官方镜像**,只需通过环境变量配置即可。
最常见的方式是使用 `requirements.txt` 文件,每行一个包名及其版本范围。
-当然,你也可以参考你在[关于 FastAPI 版本](versions.md){.internal-link target=_blank}中读到的思路来设置版本范围。
+当然,你也可以参考你在[关于 FastAPI 版本](versions.md)中读到的思路来设置版本范围。
例如,你的 `requirements.txt` 可能是:
#### 使用 `CMD` - Exec 形式 { #use-cmd-exec-form }
-<a href="https://docs.docker.com/reference/dockerfile/#cmd" class="external-link" target="_blank">`CMD`</a> 指令有两种写法:
+[`CMD`](https://docs.docker.com/reference/dockerfile/#cmd) 指令有两种写法:
✅ **Exec** 形式:
CMD fastapi run app/main.py --port 80
```
-务必使用**exec** 形式,以确保 FastAPI 可以优雅停机并触发[生命周期事件](../advanced/events.md){.internal-link target=_blank}。
+务必使用**exec** 形式,以确保 FastAPI 可以优雅停机并触发[生命周期事件](../advanced/events.md)。
-你可以在 <a href="https://docs.docker.com/reference/dockerfile/#shell-and-exec-form" class="external-link" target="_blank">Docker 文档(Shell 与 Exec 形式)</a>中了解更多。
+你可以在 [Docker 文档(Shell 与 Exec 形式)](https://docs.docker.com/reference/dockerfile/#shell-and-exec-form)中了解更多。
-在使用 `docker compose` 时这一点尤为明显。更多技术细节参见该 FAQ:<a href="https://docs.docker.com/compose/faq/#why-do-my-services-take-10-seconds-to-recreate-or-stop" class="external-link" target="_blank">为什么我的服务需要 10 秒才能重新创建或停止?</a>
+在使用 `docker compose` 时这一点尤为明显。更多技术细节参见该 FAQ:[为什么我的服务需要 10 秒才能重新创建或停止?](https://docs.docker.com/compose/faq/#why-do-my-services-take-10-seconds-to-recreate-or-stop)
#### 目录结构 { #directory-structure }
## 检查一下 { #check-it }
-你应该能在容器暴露的 URL 访问它,例如:<a href="http://192.168.99.100/items/5?q=somequery" class="external-link" target="_blank">http://192.168.99.100/items/5?q=somequery</a> 或 <a href="http://127.0.0.1/items/5?q=somequery" class="external-link" target="_blank">http://127.0.0.1/items/5?q=somequery</a>(或其他等价地址,取决于你的 Docker 主机)。
+你应该能在容器暴露的 URL 访问它,例如:[http://192.168.99.100/items/5?q=somequery](http://192.168.99.100/items/5?q=somequery) 或 [http://127.0.0.1/items/5?q=somequery](http://127.0.0.1/items/5?q=somequery)(或其他等价地址,取决于你的 Docker 主机)。
你会看到类似内容:
## 交互式 API 文档 { #interactive-api-docs }
-现在你可以访问 <a href="http://192.168.99.100/docs" class="external-link" target="_blank">http://192.168.99.100/docs</a> 或 <a href="http://127.0.0.1/docs" class="external-link" target="_blank">http://127.0.0.1/docs</a>(或其他等价地址,取决于你的 Docker 主机)。
+现在你可以访问 [http://192.168.99.100/docs](http://192.168.99.100/docs) 或 [http://127.0.0.1/docs](http://127.0.0.1/docs)(或其他等价地址,取决于你的 Docker 主机)。
-你将看到自动生成的交互式 API 文档(由 <a href="https://github.com/swagger-api/swagger-ui" class="external-link" target="_blank">Swagger UI</a> 提供):
+你将看到自动生成的交互式 API 文档(由 [Swagger UI](https://github.com/swagger-api/swagger-ui) 提供):

## 备选 API 文档 { #alternative-api-docs }
-你还可以访问 <a href="http://192.168.99.100/redoc" class="external-link" target="_blank">http://192.168.99.100/redoc</a> 或 <a href="http://127.0.0.1/redoc" class="external-link" target="_blank">http://127.0.0.1/redoc</a>(或其他等价地址,取决于你的 Docker 主机)。
+你还可以访问 [http://192.168.99.100/redoc](http://192.168.99.100/redoc) 或 [http://127.0.0.1/redoc](http://127.0.0.1/redoc)(或其他等价地址,取决于你的 Docker 主机)。
-你将看到备选的自动文档(由 <a href="https://github.com/Rebilly/ReDoc" class="external-link" target="_blank">ReDoc</a> 提供):
+你将看到备选的自动文档(由 [ReDoc](https://github.com/Rebilly/ReDoc) 提供):

## 部署概念 { #deployment-concepts }
-我们再从容器的角度讨论一些相同的[部署概念](concepts.md){.internal-link target=_blank}。
+我们再从容器的角度讨论一些相同的[部署概念](concepts.md)。
容器主要是简化应用**构建与部署**流程的工具,但它们并不强制采用某种特定方式来处理这些**部署概念**,可选策略有多种。
如果我们只关注 FastAPI 应用的**容器镜像**(以及后续运行的**容器**),HTTPS 通常由**外部**的其他工具处理。
-它可以是另一个容器,例如使用 <a href="https://traefik.io/" class="external-link" target="_blank">Traefik</a>,处理 **HTTPS** 并**自动**获取**证书**。
+它可以是另一个容器,例如使用 [Traefik](https://traefik.io/),处理 **HTTPS** 并**自动**获取**证书**。
/// tip | 提示
/// info | 信息
-如果你使用 Kubernetes,这通常会是一个 <a href="https://kubernetes.io/docs/concepts/workloads/pods/init-containers/" class="external-link" target="_blank">Init Container</a>。
+如果你使用 Kubernetes,这通常会是一个 [Init Container](https://kubernetes.io/docs/concepts/workloads/pods/init-containers/)。
///
### 基础 Docker 镜像 { #base-docker-image }
-曾经有一个官方的 FastAPI Docker 镜像:<a href="https://github.com/tiangolo/uvicorn-gunicorn-fastapi-docker" class="external-link" target="_blank">tiangolo/uvicorn-gunicorn-fastapi</a>。但它现在已被弃用。⛔️
+曾经有一个官方的 FastAPI Docker 镜像:[tiangolo/uvicorn-gunicorn-fastapi](https://github.com/tiangolo/uvicorn-gunicorn-fastapi-docker)。但它现在已被弃用。⛔️
你大概率**不应该**使用这个基础镜像(或任何其它类似的镜像)。
## 使用 `uv` 的 Docker 镜像 { #docker-image-with-uv }
-如果你使用 <a href="https://github.com/astral-sh/uv" class="external-link" target="_blank">uv</a> 来安装和管理项目,可以参考他们的 <a href="https://docs.astral.sh/uv/guides/integration/docker/" class="external-link" target="_blank">uv Docker 指南</a>。
+如果你使用 [uv](https://github.com/astral-sh/uv) 来安装和管理项目,可以参考他们的 [uv Docker 指南](https://docs.astral.sh/uv/guides/integration/docker/)。
## 回顾 { #recap }
# FastAPI Cloud { #fastapi-cloud }
-你可以用**一条命令**将你的 FastAPI 应用部署到 <a href="https://fastapicloud.com" class="external-link" target="_blank">FastAPI Cloud</a>,如果还没有,去加入候补名单吧。🚀
+你可以用**一条命令**将你的 FastAPI 应用部署到 [FastAPI Cloud](https://fastapicloud.com),如果还没有,去加入候补名单吧。🚀
## 登录 { #login }
## 关于 FastAPI Cloud { #about-fastapi-cloud }
-**<a href="https://fastapicloud.com" class="external-link" target="_blank">FastAPI Cloud</a>** 由 **FastAPI** 背后的作者与团队打造。
+**[FastAPI Cloud](https://fastapicloud.com)** 由 **FastAPI** 背后的作者与团队打造。
它让你以最小的投入完成 API 的**构建**、**部署**与**访问**。
///
-要从用户的视角**了解 HTTPS 的基础知识**,请查看 <a href="https://howhttps.works/" class="external-link" target="_blank">https://howhttps.works/</a>。
+要从用户的视角**了解 HTTPS 的基础知识**,请查看 [https://howhttps.works/](https://howhttps.works/)。
现在,从**开发人员的视角**,在了解 HTTPS 时需要记住以下几点:
* **默认情况下**,这意味着你**每个 IP 地址只能拥有一个 HTTPS 证书**。
* 无论你的服务器有多大,或者服务器上的每个应用程序有多小。
* 不过,对此有一个**解决方案**。
-* **TLS** 协议(在 HTTP 之下的 TCP 层处理加密的协议)有一个**扩展**,称为 **<a href="https://en.wikipedia.org/wiki/Server_Name_Indication" class="external-link" target="_blank"><abbr title="Server Name Indication - 服务器名称指示">SNI</abbr></a>**。
+* **TLS** 协议(在 HTTP 之下的 TCP 层处理加密的协议)有一个**扩展**,称为 **[<abbr title="Server Name Indication - 服务器名称指示">SNI</abbr>](https://en.wikipedia.org/wiki/Server_Name_Indication)**。
* SNI 扩展允许一台服务器(具有 **单个 IP 地址**)拥有 **多个 HTTPS 证书** 并提供 **多个 HTTPS 域名/应用程序**。
* 为此,服务器上会有**单独**的一个组件(程序)侦听**公共 IP 地址**,这个组件必须拥有服务器中的**所有 HTTPS 证书**。
* **获得安全连接后**,通信协议**仍然是HTTP**。
* 内容是 **加密过的**,即使它们是通过 **HTTP 协议** 发送的。
-通常的做法是在服务器上运行**一个程序/HTTP 服务器**并**管理所有 HTTPS 部分**:接收**加密的 HTTPS 请求**, 将 **解密的 HTTP 请求** 发送到在同一服务器中运行的实际 HTTP 应用程序(在本例中为 **FastAPI** 应用程序),从应用程序中获取 **HTTP 响应**, 使用适当的 **HTTPS 证书**对其进行加密并使用 **HTTPS** 将其发送回客户端。 此服务器通常被称为 **<a href="https://en.wikipedia.org/wiki/TLS_termination_proxy" class="external-link" target="_blank">TLS 终止代理(TLS Termination Proxy)</a>**。
+通常的做法是在服务器上运行**一个程序/HTTP 服务器**并**管理所有 HTTPS 部分**:接收**加密的 HTTPS 请求**, 将 **解密的 HTTP 请求** 发送到在同一服务器中运行的实际 HTTP 应用程序(在本例中为 **FastAPI** 应用程序),从应用程序中获取 **HTTP 响应**, 使用适当的 **HTTPS 证书**对其进行加密并使用 **HTTPS** 将其发送回客户端。 此服务器通常被称为 **[TLS 终止代理(TLS Termination Proxy)](https://en.wikipedia.org/wiki/TLS_termination_proxy)**。
你可以用作 TLS 终止代理的一些选项包括:
过去,获得这些证书的过程非常繁琐,需要大量的文书工作,而且证书非常昂贵。
-但随后 **<a href="https://letsencrypt.org/" class="external-link" target="_blank">Let's Encrypt</a>** 创建了。
+但随后 **[Let's Encrypt](https://letsencrypt.org/)** 创建了。
它是 Linux 基金会的一个项目。 它以自动方式免费提供 **HTTPS 证书**。 这些证书可以使用所有符合标准的安全加密,并且有效期很短(大约 3 个月),因此**安全性实际上更好**,因为它们的生命周期缩短了。
这些代理请求头包括:
-* <a href="https://developer.mozilla.org/en-US/docs/Web/HTTP/Reference/Headers/X-Forwarded-For" class="external-link" target="_blank">X-Forwarded-For</a>
-* <a href="https://developer.mozilla.org/en-US/docs/Web/HTTP/Reference/Headers/X-Forwarded-Proto" class="external-link" target="_blank">X-Forwarded-Proto</a>
-* <a href="https://developer.mozilla.org/en-US/docs/Web/HTTP/Reference/Headers/X-Forwarded-Host" class="external-link" target="_blank">X-Forwarded-Host</a>
+* [X-Forwarded-For](https://developer.mozilla.org/en-US/docs/Web/HTTP/Reference/Headers/X-Forwarded-For)
+* [X-Forwarded-Proto](https://developer.mozilla.org/en-US/docs/Web/HTTP/Reference/Headers/X-Forwarded-Proto)
+* [X-Forwarded-Host](https://developer.mozilla.org/en-US/docs/Web/HTTP/Reference/Headers/X-Forwarded-Host)
///
/// tip | 提示
-你可以在文档中了解更多:[在代理之后 - 启用代理转发请求头](../advanced/behind-a-proxy.md#enable-proxy-forwarded-headers){.internal-link target=_blank}
+你可以在文档中了解更多:[在代理之后 - 启用代理转发请求头](../advanced/behind-a-proxy.md#enable-proxy-forwarded-headers)
///
你可以使用一些工具自行**部署服务器**,你也可以使用能为你完成部分工作的**云服务**,或其他可能的选项。
-例如,我们(FastAPI 团队)构建了 <a href="https://fastapicloud.com" class="external-link" target="_blank">**FastAPI Cloud**</a>,让将 FastAPI 应用部署到云端尽可能流畅,并且保持与使用 FastAPI 开发时相同的开发者体验。
+例如,我们(FastAPI 团队)构建了 [**FastAPI Cloud**](https://fastapicloud.com),让将 FastAPI 应用部署到云端尽可能流畅,并且保持与使用 FastAPI 开发时相同的开发者体验。
我将向你展示在部署 **FastAPI** 应用程序时你可能应该记住的一些主要概念(尽管其中大部分适用于任何其他类型的 Web 应用程序)。
除此之外,还有其他一些可选的 ASGI 服务器,例如:
-* <a href="https://www.uvicorn.dev/" class="external-link" target="_blank">Uvicorn</a>:高性能 ASGI 服务器。
-* <a href="https://hypercorn.readthedocs.io/" class="external-link" target="_blank">Hypercorn</a>:与 HTTP/2 和 Trio 等兼容的 ASGI 服务器。
-* <a href="https://github.com/django/daphne" class="external-link" target="_blank">Daphne</a>:为 Django Channels 构建的 ASGI 服务器。
-* <a href="https://github.com/emmett-framework/granian" class="external-link" target="_blank">Granian</a>:基于 Rust 的 HTTP 服务器,专为 Python 应用设计。
-* <a href="https://unit.nginx.org/howto/fastapi/" class="external-link" target="_blank">NGINX Unit</a>:NGINX Unit 是一个轻量级且灵活的 Web 应用运行时环境。
+* [Uvicorn](https://www.uvicorn.dev/): 高性能 ASGI 服务器。
+* [Hypercorn](https://hypercorn.readthedocs.io/): 与 HTTP/2 和 Trio 等兼容的 ASGI 服务器。
+* [Daphne](https://github.com/django/daphne): 为 Django Channels 构建的 ASGI 服务器。
+* [Granian](https://github.com/emmett-framework/granian): 基于 Rust 的 HTTP 服务器,专为 Python 应用设计。
+* [NGINX Unit](https://unit.nginx.org/howto/fastapi/): NGINX Unit 是一个轻量级且灵活的 Web 应用运行时环境。
## 服务器主机和服务器程序 { #server-machine-and-server-program }
不过,您也可以手动安装 ASGI 服务器。
-请确保您创建并激活一个[虚拟环境](../virtual-environments.md){.internal-link target=_blank},然后再安装服务器应用程序。
+请确保您创建并激活一个[虚拟环境](../virtual-environments.md),然后再安装服务器应用程序。
例如,要安装 Uvicorn,可以运行以下命令:
部署应用程序时,您可能希望进行一些**进程复制**,以利用**多核** CPU 并能够处理更多请求。
-正如您在上一章有关[部署概念](concepts.md){.internal-link target=_blank}中看到的,您可以使用多种策略。
+正如您在上一章有关[部署概念](concepts.md)中看到的,您可以使用多种策略。
在本章节中,我将向您展示如何使用 `fastapi` 命令或直接使用 `uvicorn` 命令以**多工作进程模式**运行 **Uvicorn**。
/// info | 信息
-如果您正在使用容器,例如 Docker 或 Kubernetes,我将在下一章中告诉您更多相关信息:[容器中的 FastAPI - Docker](docker.md){.internal-link target=_blank}。
+如果您正在使用容器,例如 Docker 或 Kubernetes,我将在下一章中告诉您更多相关信息:[容器中的 FastAPI - Docker](docker.md)。
比较特别的是,在 **Kubernetes** 环境中运行时,您通常**不需要**使用多个工作进程,而是**每个容器运行一个 Uvicorn 进程**。不过,我会在本章节的后续部分详细介绍这一点。
## 容器和 Docker { #containers-and-docker }
-在关于 [容器中的 FastAPI - Docker](docker.md){.internal-link target=_blank} 的下一章中,我将介绍一些可用于处理其他**部署概念**的策略。
+在关于 [容器中的 FastAPI - Docker](docker.md) 的下一章中,我将介绍一些可用于处理其他**部署概念**的策略。
我将向您展示如何**从零开始构建自己的镜像**,以运行一个单独的 Uvicorn 进程。这个过程相对简单,并且在使用 **Kubernetes** 等分布式容器管理系统时,这通常是您需要采取的方法。
经常添加新功能,定期修复错误,并且代码仍在持续改进。
-这就是为什么当前版本仍然是`0.x.x`,这反映出每个版本都可能有Breaking changes。 这遵循<a href="https://semver.org/" class="external-link" target="_blank">语义版本控制</a>的约定。
+这就是为什么当前版本仍然是`0.x.x`,这反映出每个版本都可能有Breaking changes。 这遵循[语义版本控制](https://semver.org/)的约定。
你现在就可以使用 **FastAPI** 创建生产环境应用程序(你可能已经这样做了一段时间),你只需确保使用的版本可以与其余代码正确配合即可。
## 可用版本 { #available-versions }
-你可以在[发行说明](../release-notes.md){.internal-link target=_blank}中查看可用版本(例如查看当前最新版本)。
+你可以在[发行说明](../release-notes.md)中查看可用版本(例如查看当前最新版本)。
## 关于版本 { #about-versions }
你应该为你的应用程序添加测试。
-使用 **FastAPI** 编写测试非常简单(感谢 Starlette),请参考文档:[测试](../tutorial/testing.md){.internal-link target=_blank}
+使用 **FastAPI** 编写测试非常简单(感谢 Starlette),请参考文档:[测试](../tutorial/testing.md)
添加测试后,你可以将 **FastAPI** 版本升级到更新版本,并通过运行测试来确保所有代码都能正常工作。
/// tip | 提示
-第二个参数是 <a href="https://docs.python.org/3.8/library/os.html#os.getenv" class="external-link" target="_blank">`os.getenv()`</a> 的默认返回值。
+第二个参数是 [`os.getenv()`](https://docs.python.org/3.8/library/os.html#os.getenv) 的默认返回值。
如果没有提供,默认值为 `None`,这里我们提供 `"World"` 作为默认值。
/// tip | 提示
-你可以在 <a href="https://12factor.net/config" class="external-link" target="_blank">The Twelve-Factor App: 配置</a>中了解更多信息。
+你可以在 [The Twelve-Factor App: 配置](https://12factor.net/config) 中了解更多信息。
///
这意味着从环境变量中读取的**任何值**在 Python 中都将是一个 `str`,任何类型转换或验证都必须在代码中完成。
-你将在[高级用户指南 - 设置和环境变量](./advanced/settings.md){.internal-link target=_blank}中了解更多关于使用环境变量处理**应用程序设置**的信息。
+你将在[高级用户指南 - 设置和环境变量](./advanced/settings.md)中了解更多关于使用环境变量处理**应用程序设置**的信息。
## `PATH` 环境变量 { #path-environment-variable }
////
-当学习[虚拟环境](virtual-environments.md){.internal-link target=_blank}时,这些信息将会很有用。
+当学习[虚拟环境](virtual-environments.md)时,这些信息将会很有用。
## 结论 { #conclusion }
通过这个教程,你应该对**环境变量**是什么以及如何在 Python 中使用它们有了基本的了解。
-你也可以在<a href="https://en.wikipedia.org/wiki/Environment_variable" class="external-link" target="_blank">环境变量 - 维基百科</a>中了解更多关于它们的信息。
+你也可以在[环境变量 - 维基百科](https://en.wikipedia.org/wiki/Environment_variable)中了解更多关于它们的信息。
在许多情况下,环境变量的用途和适用性并不是很明显。但是在开发过程中,它们会在许多不同的场景中出现,因此了解它们是很有必要的。
# FastAPI CLI { #fastapi-cli }
-**FastAPI CLI** 是一个命令行程序,你可以用它来部署和运行你的 FastAPI 应用程序,管理你的 FastAPI 项目,等等。
+**FastAPI <abbr title="command line interface - 命令行接口">CLI</abbr>** 是一个命令行程序,你可以用它来部署和运行你的 FastAPI 应用、管理 FastAPI 项目,等等。
-当你安装 FastAPI 时(例如使用 `pip install "fastapi[standard]"`),会包含一个名为 `fastapi-cli` 的软件包,该软件包在终端中提供 `fastapi` 命令。
+当你安装 FastAPI(例如使用 `pip install "fastapi[standard]"`)时,会附带一个可以在终端中运行的命令行程序。
-要在开发环境中运行你的 FastAPI 应用,你可以使用 `fastapi dev` 命令:
+要在开发环境中运行你的 FastAPI 应用,可以使用 `fastapi dev` 命令:
<div class="termy">
```console
-$ <font color="#4E9A06">fastapi</font> dev <u style="text-decoration-style:solid">main.py</u>
+$ <font color="#4E9A06">fastapi</font> dev
<span style="background-color:#009485"><font color="#D3D7CF"> FastAPI </font></span> Starting development server 🚀
</div>
-该命令行程序 `fastapi` 就是 **FastAPI CLI**。
+/// tip | 提示
+
+在生产环境中,你会使用 `fastapi run` 而不是 `fastapi dev`。🚀
+
+///
+
+在内部,**FastAPI CLI** 使用 [Uvicorn](https://www.uvicorn.dev),这是一个高性能、适用于生产环境的 ASGI 服务器。😎
+
+`fastapi` CLI 会尝试自动检测要运行的 FastAPI 应用,默认假设它是文件 `main.py` 中名为 `app` 的对象(或少数其他变体)。
+
+但你也可以显式配置要使用的应用。
+
+## 在 `pyproject.toml` 中配置应用的 `entrypoint` { #configure-the-app-entrypoint-in-pyproject-toml }
+
+你可以在 `pyproject.toml` 文件中配置应用的位置,例如:
+
+```toml
+[tool.fastapi]
+entrypoint = "main:app"
+```
+
+这个 `entrypoint` 会告诉 `fastapi` 命令按如下方式导入应用:
+
+```python
+from main import app
+```
-FastAPI CLI 接收你的 Python 程序路径(例如 `main.py`),自动检测 `FastAPI` 实例(通常命名为 `app`),确定正确的导入方式,然后启动服务。
+如果你的代码结构如下:
+
+```
+.
+├── backend
+│ ├── main.py
+│ ├── __init__.py
+```
+
+那么你可以将 `entrypoint` 设置为:
+
+```toml
+[tool.fastapi]
+entrypoint = "backend.main:app"
+```
+
+这等价于:
+
+```python
+from backend.main import app
+```
+
+### 带路径的 `fastapi dev` { #fastapi-dev-with-path }
+
+你也可以把文件路径传给 `fastapi dev` 命令,它会猜测要使用的 FastAPI 应用对象:
+
+```console
+$ fastapi dev main.py
+```
-在生产环境中,你应该使用 `fastapi run` 命令。🚀
+但每次运行 `fastapi` 命令都需要记得传入正确的路径。
-å\9c¨å\86\85é\83¨ï¼\8c**FastAPI CLI** 使ç\94¨äº\86 <a href="https://www.uvicorn.dev" class="external-link" target="_blank">Uvicorn</a>ï¼\8cè¿\99æ\98¯ä¸\80个é«\98æ\80§è\83½ã\80\81é\80\82ç\94¨äº\8eç\94\9f产ç\8e¯å¢\83ç\9a\84 ASGI æ\9c\8då\8a¡å\99¨ã\80\82ð\9f\98\8e
+å\8f¦å¤\96ï¼\8cå\85¶ä»\96å·¥å\85·å\8f¯è\83½æ\89¾ä¸\8då\88°å®\83ï¼\8cä¾\8bå¦\82 [VS Code æ\89©å±\95](editor-support.md) æ\88\96 [FastAPI Cloud](https://fastapicloud.com)ï¼\8cå\9b æ¤æ\8e¨è\8d\90å\9c¨ `pyproject.toml` ä¸ä½¿ç\94¨ `entrypoint`ã\80\82
## `fastapi dev` { #fastapi-dev }
/// tip | 提示
-你可以在[部署文档](deployment/index.md){.internal-link target=_blank}中了解更多。
+你可以在[部署文档](deployment/index.md)中了解更多。
///
### 基于开放标准 { #based-on-open-standards }
-* 用于创建 API 的 <a href="https://github.com/OAI/OpenAPI-Specification" class="external-link" target="_blank"><strong>OpenAPI</strong></a>,包含对<dfn title="也称为:端点、路由">路径</dfn> <dfn title="也称为 HTTP 方法,如 POST、GET、PUT、DELETE">操作</dfn>、参数、请求体、安全等的声明。
-* 使用 <a href="https://json-schema.org/" class="external-link" target="_blank"><strong>JSON Schema</strong></a> 自动生成数据模型文档(因为 OpenAPI 本身就是基于 JSON Schema 的)。
+* [**OpenAPI**](https://github.com/OAI/OpenAPI-Specification) 用于创建 API,包含对<dfn title="也称为:端点、路由">路径</dfn> <dfn title="也称为 HTTP 方法,如 POST、GET、PUT、DELETE">操作</dfn>、参数、请求体、安全等的声明。
+* 使用 [**JSON Schema**](https://json-schema.org/) 自动生成数据模型文档(因为 OpenAPI 本身就是基于 JSON Schema 的)。
* 经过了缜密的研究后围绕这些标准而设计。并非狗尾续貂。
* 这也允许了在很多语言中自动**生成客户端代码**。
交互式 API 文档以及具探索性 web 界面。因为该框架是基于 OpenAPI,所以有很多可选项,FastAPI 默认自带两个交互式 API 文档。
-* <a href="https://github.com/swagger-api/swagger-ui" class="external-link" target="_blank"><strong>Swagger UI</strong></a>,可交互式操作,能在浏览器中直接调用和测试你的 API。
+* [**Swagger UI**](https://github.com/swagger-api/swagger-ui),可交互式操作,能在浏览器中直接调用和测试你的 API。

-* 另外的 API 文档:<a href="https://github.com/Rebilly/ReDoc" class="external-link" target="_blank"><strong>ReDoc</strong></a>
+* 另外的 API 文档:[**ReDoc**](https://github.com/Rebilly/ReDoc)

全部都基于标准的 **Python 类型** 声明(感谢 Pydantic)。没有新的语法需要学习。只需要标准的现代 Python。
-如果你需要2分钟来学习如何使用 Python 类型(即使你不使用 FastAPI),看看这个简短的教程:[Python Types](python-types.md){.internal-link target=_blank}。
+如果你需要2分钟来学习如何使用 Python 类型(即使你不使用 FastAPI),看看这个简短的教程:[Python 类型](python-types.md)。
编写带有类型标注的标准 Python:
整个框架都被设计得易于使用且直观,所有的决定都在开发之前就在多个编辑器上进行了测试,来确保最佳的开发体验。
-在最近的 Python 开发者调查中,我们能看到 <a href="https://www.jetbrains.com/research/python-developers-survey-2017/#tools-and-features" class="external-link" target="_blank">被使用最多的功能是“自动补全”</a>。
+在 Python 开发者调查中,我们能看到[被使用最多的功能之一是“自动补全”](https://www.jetbrains.com/research/python-developers-survey-2017/#tools-and-features)。
整个 **FastAPI** 框架就是基于这一点的。任何地方都可以进行自动补全。
在这里,你的编辑器可能会这样帮助你:
-* 在 <a href="https://code.visualstudio.com/" class="external-link" target="_blank">Visual Studio Code</a> 中:
+* 在 [Visual Studio Code](https://code.visualstudio.com/) 中:

-* 在 <a href="https://www.jetbrains.com/pycharm/" class="external-link" target="_blank">PyCharm</a> 中:
+* 在 [PyCharm](https://www.jetbrains.com/pycharm/) 中:
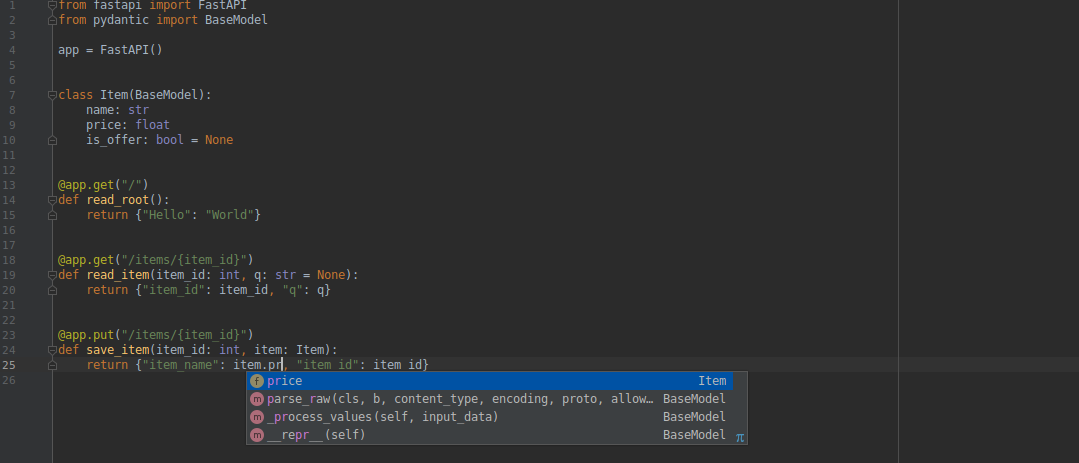
OpenAPI 中定义的安全模式,包括:
* HTTP 基本认证。
-* **OAuth2**(也使用 **JWT tokens**)。在 [OAuth2 with JWT](tutorial/security/oauth2-jwt.md){.internal-link target=_blank}查看教程。
+* **OAuth2**(也使用 **JWT tokens**)。在 [使用 JWT 的 OAuth2](tutorial/security/oauth2-jwt.md) 查看教程。
* API 密钥,在:
* 请求头。
* 查询参数。
* 甚至依赖也可以有依赖,创建一个层级或者**“图”依赖**。
* 所有**自动化处理**都由框架完成。
* 所有的依赖关系都可以从请求中获取数据,并且**增加了路径操作**约束和自动文档生成。
-* 即使在依赖项中被定义的*路径操作* 也会**自动验证**。
+* 即使是在依赖项中定义的路径操作参数也会**自动验证**。
* 支持复杂的用户身份认证系统,**数据库连接**等等。
* **不依赖**数据库,前端等。但是和它们集成很简单。
## Starlette 特性 { #starlette-features }
-**FastAPI** 和 <a href="https://www.starlette.dev/" class="external-link" target="_blank"><strong>Starlette</strong></a> 完全兼容(并基于)。所以,你有的其他的 Starlette 代码也能正常工作。`FastAPI` 实际上是 `Starlette` 的一个子类。所以,如果你已经知道或者使用 Starlette,大部分的功能会以相同的方式工作。
+**FastAPI** 和 [**Starlette**](https://www.starlette.dev/) 完全兼容(并基于)。所以,你有的其他的 Starlette 代码也能正常工作。`FastAPI` 实际上是 `Starlette` 的一个子类。所以,如果你已经知道或者使用 Starlette,大部分的功能会以相同的方式工作。
通过 **FastAPI** 你可以获得所有 **Starlette** 的特性(FastAPI 就像加强版的 Starlette):
-* 令人惊叹的性能。它是 <a href="https://github.com/encode/starlette#performance" class="external-link" target="_blank">Python 可用的最快的框架之一,和 **NodeJS** 及 **Go** 相当</a>。
+* 令人惊叹的性能。它是[Python 可用的最快的框架之一,和 **NodeJS** 及 **Go** 相当](https://github.com/encode/starlette#performance)。
* **支持 WebSocket**。
* 进程内后台任务。
* Startup 和 shutdown 事件。
## Pydantic 特性 { #pydantic-features }
-**FastAPI** 和 <a href="https://docs.pydantic.dev/" class="external-link" target="_blank"><strong>Pydantic</strong></a> 完全兼容(并基于)。所以,你有的其他的 Pydantic 代码也能正常工作。
+**FastAPI** 和 [**Pydantic**](https://docs.pydantic.dev/) 完全兼容(并基于)。所以,你有的其他的 Pydantic 代码也能正常工作。
兼容包括基于 Pydantic 的外部库,例如用于数据库的 <abbr title="Object-Relational Mapper - 对象关系映射">ORM</abbr>s、<abbr title="Object-Document Mapper - 对象文档映射">ODM</abbr>s。
## 订阅新闻邮件 { #subscribe-to-the-newsletter }
-你可以订阅(不频繁的)[**FastAPI and friends** 新闻邮件](newsletter.md){.internal-link target=_blank},获取如下更新:
+你可以订阅(不频繁的)[**FastAPI and friends** 新闻邮件](newsletter.md),获取如下更新:
* FastAPI 及其小伙伴的新闻 🚀
* 指南 📝
## 在 X (Twitter) 上关注 FastAPI { #follow-fastapi-on-x-twitter }
-<a href="https://x.com/fastapi" class="external-link" target="_blank">在 **X (Twitter)** 上关注 @fastapi</a> 获取 **FastAPI** 的最新动态。🐦
+[在 **X (Twitter)** 上关注 @fastapi](https://x.com/fastapi) 获取 **FastAPI** 的最新动态。🐦
## 在 GitHub 上为 **FastAPI** 加星 { #star-fastapi-in-github }
-你可以在 GitHub 上为 FastAPI 点亮「星标」(点击右上角的星形按钮):<a href="https://github.com/fastapi/fastapi" class="external-link" target="_blank">https://github.com/fastapi/fastapi</a>。⭐️
+你可以在 GitHub 上为 FastAPI 点亮「星标」(点击右上角的星形按钮):[https://github.com/fastapi/fastapi](https://github.com/fastapi/fastapi)。⭐️
点亮星标后,其他用户更容易发现它,并看到它已经对许多人有帮助。
## 关注 GitHub 资源库的版本发布 { #watch-the-github-repository-for-releases }
-你可以在 GitHub 上「关注」FastAPI(点击右上角的「watch」按钮):<a href="https://github.com/fastapi/fastapi" class="external-link" target="_blank">https://github.com/fastapi/fastapi</a>。👀
+你可以在 GitHub 上「关注」FastAPI(点击右上角的「watch」按钮):[https://github.com/fastapi/fastapi](https://github.com/fastapi/fastapi)。👀
在那里你可以选择「Releases only」。
## 联系作者 { #connect-with-the-author }
-你可以联系<a href="https://tiangolo.com" class="external-link" target="_blank">我(Sebastián Ramírez / `tiangolo`)</a>,作者本人。
+你可以联系[我(Sebastián Ramírez / `tiangolo`)](https://tiangolo.com),作者本人。
你可以:
-* <a href="https://github.com/tiangolo" class="external-link" target="_blank">在 **GitHub** 上关注我</a>。
+* [在 **GitHub** 上关注我](https://github.com/tiangolo)。
* 了解我创建的其他开源项目,也许对你有帮助。
* 关注我何时创建新的开源项目。
-* 关注我在 <a href="https://x.com/tiangolo" class="external-link" target="_blank">**X (Twitter)**</a> 或 <a href="https://fosstodon.org/@tiangolo" class="external-link" target="_blank">Mastodon</a>。
+* 关注我在 [**X (Twitter)**](https://x.com/tiangolo) 或 [Mastodon](https://fosstodon.org/@tiangolo)。
* 告诉我你如何使用 FastAPI(我很喜欢听这些)。
* 获取我发布公告或新工具的消息。
- * 你也可以<a href="https://x.com/fastapi" class="external-link" target="_blank">关注 @fastapi on X (Twitter)</a>(独立账号)。
-* <a href="https://www.linkedin.com/in/tiangolo/" class="external-link" target="_blank">在 **LinkedIn** 上关注我</a>。
+ * 你也可以[在 X (Twitter) 上关注 @fastapi](https://x.com/fastapi)(独立账号)。
+* [在 **LinkedIn** 上关注我](https://www.linkedin.com/in/tiangolo/)。
* 获取我发布公告或新工具的消息(不过我更常用 X (Twitter) 🤷♂)。
-* 阅读我在 <a href="https://dev.to/tiangolo" class="external-link" target="_blank">**Dev.to**</a> 或 <a href="https://medium.com/@tiangolo" class="external-link" target="_blank">**Medium**</a> 上的文章(或关注我)。
+* 阅读我在 [**Dev.to**](https://dev.to/tiangolo) 或 [**Medium**](https://medium.com/@tiangolo) 上的文章(或关注我)。
* 阅读我的其他想法、文章,以及我创建的工具。
* 关注我,这样当我发布新文章时你会第一时间看到。
## 发推谈谈 **FastAPI** { #tweet-about-fastapi }
-<a href="https://x.com/compose/tweet?text=I'm loving @fastapi because... https://github.com/fastapi/fastapi" class="external-link" target="_blank">发推谈谈 **FastAPI**</a>,告诉我和大家你为什么喜欢它。🎉
+[发推谈谈 **FastAPI**](https://x.com/compose/tweet?text=I'm loving @fastapi because... https://github.com/fastapi/fastapi),告诉我和大家你为什么喜欢它。🎉
我很高兴听到 **FastAPI** 的使用情况、你喜欢它的哪些点、你在哪个项目/公司使用它,等等。
## 为 FastAPI 投票 { #vote-for-fastapi }
-* <a href="https://www.slant.co/options/34241/~fastapi-review" class="external-link" target="_blank">在 Slant 上为 **FastAPI** 投票</a>。
-* <a href="https://alternativeto.net/software/fastapi/about/" class="external-link" target="_blank">在 AlternativeTo 上为 **FastAPI** 投票</a>。
-* <a href="https://stackshare.io/pypi-fastapi" class="external-link" target="_blank">在 StackShare 上标注你在用 **FastAPI**</a>。
+* [在 Slant 上为 **FastAPI** 投票](https://www.slant.co/options/34241/~fastapi-review)。
+* [在 AlternativeTo 上为 **FastAPI** 投票](https://alternativeto.net/software/fastapi/about/)。
+* [在 StackShare 上标注你在用 **FastAPI**](https://stackshare.io/pypi-fastapi)。
## 在 GitHub 上帮别人解答问题 { #help-others-with-questions-in-github }
你可以尝试在以下地方帮助他人解答问题:
-* <a href="https://github.com/fastapi/fastapi/discussions/categories/questions?discussions_q=category%3AQuestions+is%3Aunanswered" class="external-link" target="_blank">GitHub Discussions</a>
-* <a href="https://github.com/fastapi/fastapi/issues?q=is%3Aissue+is%3Aopen+sort%3Aupdated-desc+label%3Aquestion+-label%3Aanswered+" class="external-link" target="_blank">GitHub Issues</a>
+* [GitHub Discussions](https://github.com/fastapi/fastapi/discussions/categories/questions?discussions_q=category%3AQuestions+is%3Aunanswered)
+* [GitHub Issues](https://github.com/fastapi/fastapi/issues?q=is%3Aissue+is%3Aopen+sort%3Aupdated-desc+label%3Aquestion+-label%3Aanswered+)
很多情况下,你也许已经知道这些问题的答案了。🤓
-如果你帮助了很多人解答问题,你会成为官方的 [FastAPI 专家](fastapi-people.md#fastapi-experts){.internal-link target=_blank}。🎉
+如果你帮助了很多人解答问题,你会成为官方的 [FastAPI 专家](fastapi-people.md#fastapi-experts)。🎉
只要记住,最重要的一点是:尽量友善。人们带着挫败感而来,很多时候他们的提问方式并不理想,但请尽你所能地友好对待。🤗
很多时候他们只会粘贴一小段代码,但这不足以**复现问题**。
-* 你可以请他们提供一个<a href="https://stackoverflow.com/help/minimal-reproducible-example" class="external-link" target="_blank">可最小复现的示例</a>,你可以**复制粘贴**并在本地运行,看到与他们相同的错误或行为,或者更好地理解他们的用例。
+* 你可以请他们提供一个[可最小复现的示例](https://stackoverflow.com/help/minimal-reproducible-example),你可以**复制粘贴**并在本地运行,看到与他们相同的错误或行为,或者更好地理解他们的用例。
* 如果你非常热心,你也可以尝试仅根据问题描述自己**构造一个示例**。不过要记住,这可能会花很多时间,通常先请他们澄清问题会更好。
## 关注 GitHub 资源库 { #watch-the-github-repository }
-你可以在 GitHub 上「关注」FastAPI(点击右上角的「watch」按钮):<a href="https://github.com/fastapi/fastapi" class="external-link" target="_blank">https://github.com/fastapi/fastapi</a>。👀
+你可以在 GitHub 上「关注」FastAPI(点击右上角的「watch」按钮):[https://github.com/fastapi/fastapi](https://github.com/fastapi/fastapi)。👀
如果你选择「Watching」而非「Releases only」,当有人创建新的 issue 或问题时你会收到通知。你也可以指定只通知新 issues、discussions、PR 等。
## 提问 { #ask-questions }
-你可以在 GitHub 资源库中<a href="https://github.com/fastapi/fastapi/discussions/new?category=questions" class="external-link" target="_blank">创建一个新问题(Question)</a>,例如:
+你可以在 GitHub 资源库中[创建一个新问题(Question)](https://github.com/fastapi/fastapi/discussions/new?category=questions),例如:
* 提出一个**问题**或关于某个**问题**的求助。
* 建议一个新的**功能**。
## 创建 Pull Request { #create-a-pull-request }
-你可以通过 Pull Request 为源代码[做贡献](contributing.md){.internal-link target=_blank},例如:
+你可以通过 Pull Request 为源代码[做贡献](contributing.md),例如:
* 修正文档中的一个错别字。
-* 通过<a href="https://github.com/fastapi/fastapi/edit/master/docs/en/data/external_links.yml" class="external-link" target="_blank">编辑这个文件</a>分享你创建或发现的关于 FastAPI 的文章、视频或播客。
+* 通过[编辑这个文件](https://github.com/fastapi/fastapi/edit/master/docs/en/data/external_links.yml)分享你创建或发现的关于 FastAPI 的文章、视频或播客。
* 请确保把你的链接添加到相应区块的开头。
-* 帮助把[文档翻译](contributing.md#translations){.internal-link target=_blank}成你的语言。
+* 帮助把[文档翻译](contributing.md#translations)成你的语言。
* 你也可以审阅他人创建的翻译。
* 提议新增文档章节。
* 修复现有 issue/bug。
你现在就能做的主要事情有:
-* [在 GitHub 上帮别人解答问题](#help-others-with-questions-in-github){.internal-link target=_blank}(见上面的章节)。
-* [审阅 Pull Request](#review-pull-requests){.internal-link target=_blank}(见上面的章节)。
+* [在 GitHub 上帮别人解答问题](#help-others-with-questions-in-github)(见上面的章节)。
+* [审阅 Pull Request](#review-pull-requests)(见上面的章节)。
这两项工作是**最耗时**的。这也是维护 FastAPI 的主要工作。
## 加入聊天 { #join-the-chat }
-加入 👥 <a href="https://discord.gg/VQjSZaeJmf" class="external-link" target="_blank">Discord 聊天服务器</a> 👥,和 FastAPI 社区的小伙伴们一起交流。
+加入 👥 [Discord 聊天服务器](https://discord.gg/VQjSZaeJmf) 👥,和 FastAPI 社区的小伙伴们一起交流。
/// tip | 提示
-关于提问,请在 <a href="https://github.com/fastapi/fastapi/discussions/new?category=questions" class="external-link" target="_blank">GitHub Discussions</a> 中发布,这样更有机会得到 [FastAPI 专家](fastapi-people.md#fastapi-experts){.internal-link target=_blank} 的帮助。
+关于提问,请在 [GitHub Discussions](https://github.com/fastapi/fastapi/discussions/new?category=questions) 中发布,这样更有机会得到 [FastAPI 专家](fastapi-people.md#fastapi-experts) 的帮助。
聊天仅用于其他日常交流。
在 GitHub 中,模板会引导你写出恰当的问题,从而更容易获得好的回答,甚至在提问之前就能自己解决。而且在 GitHub 里,我能尽量确保最终回复每个问题,即使这需要一些时间。对聊天系统来说,我个人做不到这一点。😅
-聊天系统中的对话也不像 GitHub 那样容易搜索,因此问答可能在聊天中淹没。而且只有在 GitHub 中的问答才会计入成为 [FastAPI 专家](fastapi-people.md#fastapi-experts){.internal-link target=_blank} 的贡献,所以你在 GitHub 上更可能获得关注。
+聊天系统中的对话也不像 GitHub 那样容易搜索,因此问答可能在聊天中淹没。而且只有在 GitHub 中的问答才会计入成为 [FastAPI 专家](fastapi-people.md#fastapi-experts) 的贡献,所以你在 GitHub 上更可能获得关注。
另一方面,聊天系统里有成千上万的用户,你几乎随时都能在那里找到聊得来的人。😄
## 赞助作者 { #sponsor-the-author }
-如果你的**产品/公司**依赖或与 **FastAPI** 相关,并且你想触达它的用户,你可以通过 <a href="https://github.com/sponsors/tiangolo" class="external-link" target="_blank">GitHub sponsors</a> 赞助作者(我)。根据赞助层级,你还可能获得一些额外福利,比如在文档中展示徽章。🎁
+如果你的**产品/公司**依赖或与 **FastAPI** 相关,并且你想触达它的用户,你可以通过 [GitHub sponsors](https://github.com/sponsors/tiangolo) 赞助作者(我)。根据赞助层级,你还可能获得一些额外福利,比如在文档中展示徽章。🎁
---
# 历史、设计、未来 { #history-design-and-future }
-不久前,<a href="https://github.com/fastapi/fastapi/issues/3#issuecomment-454956920" class="external-link" target="_blank">曾有 **FastAPI** 用户问过</a>:
+不久前,[曾有 **FastAPI** 用户问过](https://github.com/fastapi/fastapi/issues/3#issuecomment-454956920):
> 这个项目有怎样的历史?好像它只用了几周就从默默无闻变得众所周知...
**FastAPI** 其实只是延续了这些前辈的历史。
-正如[备选方案](alternatives.md){.internal-link target=_blank}一章所述:
+正如[备选方案](alternatives.md)一章所述:
<blockquote markdown="1">
没有大家之前所做的工作,**FastAPI** 就不会存在。
同时,我还在最流行的 Python 代码编辑器中测试了很多思路,包括 PyCharm、VS Code、基于 Jedi 的编辑器。
-根据最新 <a href="https://www.jetbrains.com/research/python-developers-survey-2018/#development-tools" class="external-link" target="_blank">Python 开发者调研报告</a>显示,这几种编辑器覆盖了约 80% 的用户。
+根据最新 [Python 开发者调研报告](https://www.jetbrains.com/research/python-developers-survey-2018/#development-tools)显示,这几种编辑器覆盖了约 80% 的用户。
也就是说,**FastAPI** 针对差不多 80% 的 Python 开发者使用的编辑器进行了测试,而且其它大多数编辑器的工作方式也与之类似,因此,**FastAPI** 的优势几乎能在所有编辑器上体现。
## 需求项 { #requirements }
-经过测试多种备选方案,我最终决定使用 <a href="https://docs.pydantic.dev/" class="external-link" target="_blank">**Pydantic**</a>,并充分利用它的优势。
+经过测试多种备选方案,我最终决定使用 [**Pydantic**](https://docs.pydantic.dev/),并充分利用它的优势。
我甚至为它做了不少贡献,让它完美兼容了 JSON Schema,支持多种方式定义约束声明,并基于多个编辑器,改进了它对编辑器支持(类型检查、自动补全)。
-在开发期间,我还为 <a href="https://www.starlette.dev/" class="external-link" target="_blank">**Starlette**</a> 做了不少贡献,这是另一个关键需求项。
+在开发期间,我还为 [**Starlette**](https://www.starlette.dev/) 做了不少贡献,这是另一个关键需求项。
## 开发 { #development }
**FastAPI** 前景光明。
-在此,我们衷心感谢[您的帮助](help-fastapi.md){.internal-link target=_blank}。
+在此,我们衷心感谢[你的帮助](help-fastapi.md)。
在 FastAPI `0.122.0` 版本之前,当内置的安全工具在认证失败后向客户端返回错误时,会使用 HTTP 状态码 `403 Forbidden`。
-从 FastAPI `0.122.0` 版本开始,它们改用更合适的 HTTP 状态码 `401 Unauthorized`,并在响应中返回合理的 `WWW-Authenticate` 头,遵循 HTTP 规范,<a href="https://datatracker.ietf.org/doc/html/rfc7235#section-3.1" class="external-link" target="_blank">RFC 7235</a>、<a href="https://datatracker.ietf.org/doc/html/rfc9110#name-401-unauthorized" class="external-link" target="_blank">RFC 9110</a>。
+从 FastAPI `0.122.0` 版本开始,它们改用更合适的 HTTP 状态码 `401 Unauthorized`,并在响应中返回合理的 `WWW-Authenticate` 头,遵循 HTTP 规范,[RFC 7235](https://datatracker.ietf.org/doc/html/rfc7235#section-3.1)、[RFC 9110](https://datatracker.ietf.org/doc/html/rfc9110#name-401-unauthorized)。
但如果由于某些原因你的客户端依赖旧行为,你可以在你的安全类中重写方法 `make_not_authenticated_error` 来回退到旧行为。
如果你的代码里有安全漏洞,它仍然存在。
-隐藏文档只会让理解如何与 API 交互变得更困难,也可能让你在生产环境中调试更困难。这大体上可以被视为一种 <a href="https://en.wikipedia.org/wiki/Security_through_obscurity" class="external-link" target="_blank">通过隐藏实现安全</a> 的做法。
+隐藏文档只会让理解如何与 API 交互变得更困难,也可能让你在生产环境中调试更困难。这大体上可以被视为一种 [通过隐藏实现安全](https://en.wikipedia.org/wiki/Security_through_obscurity) 的做法。
如果你想保护你的 API,有很多更好的措施,例如:
# 配置 Swagger UI { #configure-swagger-ui }
-你可以配置一些额外的 <a href="https://swagger.io/docs/open-source-tools/swagger-ui/usage/configuration/" class="external-link" target="_blank">Swagger UI 参数</a>.
+你可以配置一些额外的 [Swagger UI 参数](https://swagger.io/docs/open-source-tools/swagger-ui/usage/configuration/)。
如果需要配置它们,可以在创建 `FastAPI()` 应用对象时或调用 `get_swagger_ui_html()` 函数时传递 `swagger_ui_parameters` 参数。
-`swagger_ui_parameters` 接受一个直接传递给 Swagger UI的字典,包含配置参数键值对。
+`swagger_ui_parameters` 接受一个字典,该字典会直接传递给 Swagger UI。
FastAPI会将这些配置转换为 **JSON**,使其与 JavaScript 兼容,因为这是 Swagger UI 需要的。
## 其他 Swagger UI 参数 { #other-swagger-ui-parameters }
-查看所有其他可用的配置,请阅读 <a href="https://swagger.io/docs/open-source-tools/swagger-ui/usage/configuration/" class="external-link" target="_blank">Swagger UI 参数文档</a>。
+查看所有其他可用的配置,请阅读官方的 [Swagger UI 参数文档](https://swagger.io/docs/open-source-tools/swagger-ui/usage/configuration/)。
## JavaScript-only 配置 { #javascript-only-settings }
### 测试 { #test-it }
-现在,你应该可以访问 <a href="http://127.0.0.1:8000/docs" class="external-link" target="_blank">http://127.0.0.1:8000/docs</a>,并刷新页面,页面会从新的 CDN 加载这些资源。
+现在,你应该可以访问 [http://127.0.0.1:8000/docs](http://127.0.0.1:8000/docs),并刷新页面,页面会从新的 CDN 加载这些资源。
## 为文档自托管 JavaScript 和 CSS { #self-hosting-javascript-and-css-for-docs }
Swagger UI 使用以下文件:
-- <a href="https://cdn.jsdelivr.net/npm/swagger-ui-dist@5/swagger-ui-bundle.js" class="external-link" target="_blank">`swagger-ui-bundle.js`</a>
-- <a href="https://cdn.jsdelivr.net/npm/swagger-ui-dist@5/swagger-ui.css" class="external-link" target="_blank">`swagger-ui.css`</a>
+- [`swagger-ui-bundle.js`](https://cdn.jsdelivr.net/npm/swagger-ui-dist@5/swagger-ui-bundle.js)
+- [`swagger-ui.css`](https://cdn.jsdelivr.net/npm/swagger-ui-dist@5/swagger-ui.css)
而 ReDoc 使用以下文件:
-- <a href="https://cdn.jsdelivr.net/npm/redoc@2/bundles/redoc.standalone.js" class="external-link" target="_blank">`redoc.standalone.js`</a>
+- [`redoc.standalone.js`](https://cdn.jsdelivr.net/npm/redoc@2/bundles/redoc.standalone.js)
之后,你的文件结构可能如下:
### 测试静态文件 { #test-the-static-files }
-启动你的应用,并访问 <a href="http://127.0.0.1:8000/static/redoc.standalone.js" class="external-link" target="_blank">http://127.0.0.1:8000/static/redoc.standalone.js</a>。
+启动你的应用,并访问 [http://127.0.0.1:8000/static/redoc.standalone.js](http://127.0.0.1:8000/static/redoc.standalone.js)。
你应该会看到一个非常长的 **ReDoc** 的 JavaScript 文件。
### 测试静态文件 UI { #test-static-files-ui }
-现在,你可以断开 WiFi,访问 <a href="http://127.0.0.1:8000/docs" class="external-link" target="_blank">http://127.0.0.1:8000/docs</a>,并刷新页面。
+现在,你可以断开 WiFi,访问 [http://127.0.0.1:8000/docs](http://127.0.0.1:8000/docs),并刷新页面。
即使没有互联网,你也能看到 API 的文档并与之交互。
一些使用场景包括:
-* 将非 JSON 的请求体转换为 JSON(例如 <a href="https://msgpack.org/index.html" class="external-link" target="_blank">`msgpack`</a>)。
+* 将非 JSON 的请求体转换为 JSON(例如 [`msgpack`](https://msgpack.org/index.html))。
* 解压缩使用 gzip 压缩的请求体。
* 自动记录所有请求体日志。
/// tip | 提示
-这是一个演示工作原理的示例。如果你需要 Gzip 支持,可以直接使用提供的 [`GzipMiddleware`](../advanced/middleware.md#gzipmiddleware){.internal-link target=_blank}。
+这是一个演示工作原理的示例。如果你需要 Gzip 支持,可以直接使用提供的 [`GzipMiddleware`](../advanced/middleware.md#gzipmiddleware)。
///
创建一个新的 `Request` 实例需要这两样:`scope` 和 `receive`。
-想了解更多关于 `Request` 的信息,请查看 <a href="https://www.starlette.dev/requests/" class="external-link" target="_blank">Starlette 的 Request 文档</a>。
+想了解更多关于 `Request` 的信息,请查看 [Starlette 的 Request 文档](https://www.starlette.dev/requests/)。
///
/// tip | 提示
-要解决类似问题,使用 `RequestValidationError` 的自定义处理器中的 `body` 往往更简单([处理错误](../tutorial/handling-errors.md#use-the-requestvalidationerror-body){.internal-link target=_blank})。
+要解决类似问题,使用 `RequestValidationError` 的自定义处理器中的 `body` 往往更简单([处理错误](../tutorial/handling-errors.md#use-the-requestvalidationerror-body))。
但本示例同样有效,并展示了如何与内部组件交互。
基于以上信息,你可以用同一个工具函数生成 OpenAPI 架构,并按需覆盖其中的各个部分。
-例如,让我们添加 <a href="https://github.com/Rebilly/ReDoc/blob/master/docs/redoc-vendor-extensions.md#x-logo" class="external-link" target="_blank">ReDoc 的 OpenAPI 扩展以包含自定义 Logo</a>。
+例如,让我们添加 [ReDoc 的 OpenAPI 扩展以包含自定义 Logo](https://github.com/Rebilly/ReDoc/blob/master/docs/redoc-vendor-extensions.md#x-logo)。
### 常规 **FastAPI** { #normal-fastapi }
### 验证 { #check-it }
-当你访问 <a href="http://127.0.0.1:8000/redoc" class="external-link" target="_blank">http://127.0.0.1:8000/redoc</a> 时,你会看到已使用你的自定义 Logo(本例中为 **FastAPI** 的 Logo):
+当你访问 [http://127.0.0.1:8000/redoc](http://127.0.0.1:8000/redoc) 时,你会看到已使用你的自定义 Logo(本例中为 **FastAPI** 的 Logo):
<img src="/img/tutorial/extending-openapi/image01.png">
## 数据过滤 - 安全性 { #filter-data-security }
-为确保不返回超过需要的数据,请阅读 [教程 - 响应模型 - 返回类型](../tutorial/response-model.md){.internal-link target=_blank} 文档。
+为确保不返回超过需要的数据,请阅读 [教程 - 响应模型 - 返回类型](../tutorial/response-model.md) 文档。
+
+## 优化响应性能 - 响应模型 - 返回类型 { #optimize-response-performance-response-model-return-type }
+
+在返回 JSON 数据时优化性能,请使用返回类型或响应模型,这样 Pydantic 会在 Rust 侧处理到 JSON 的序列化,而无需经过 Python。更多内容请阅读 [教程 - 响应模型 - 返回类型](../tutorial/response-model.md) 文档。
## 文档的标签 - OpenAPI { #documentation-tags-openapi }
-在文档界面中添加**路径操作**的标签和进行分组,请阅读 [教程 - 路径操作配置 - Tags 参数](../tutorial/path-operation-configuration.md#tags){.internal-link target=_blank} 文档。
+在文档界面中添加**路径操作**的标签和进行分组,请阅读 [教程 - 路径操作配置 - Tags](../tutorial/path-operation-configuration.md#tags) 文档。
## 文档的概要和描述 - OpenAPI { #documentation-summary-and-description-openapi }
-在文档界面中添加**路径操作**的概要和描述,请阅读 [教程 - 路径操作配置 - Summary 和 Description 参数](../tutorial/path-operation-configuration.md#summary-and-description){.internal-link target=_blank} 文档。
+在文档界面中添加**路径操作**的概要和描述,请阅读 [教程 - 路径操作配置 - Summary 和 Description](../tutorial/path-operation-configuration.md#summary-and-description) 文档。
## 文档的响应描述 - OpenAPI { #documentation-response-description-openapi }
-在文档界面中定义并显示响应描述,请阅读 [教程 - 路径操作配置 - 响应描述](../tutorial/path-operation-configuration.md#response-description){.internal-link target=_blank} 文档。
+在文档界面中定义并显示响应描述,请阅读 [教程 - 路径操作配置 - 响应描述](../tutorial/path-operation-configuration.md#response-description) 文档。
## 文档弃用**路径操作** - OpenAPI { #documentation-deprecate-a-path-operation-openapi }
-在文档界面中显示弃用的**路径操作**,请阅读 [教程 - 路径操作配置 - 弃用](../tutorial/path-operation-configuration.md#deprecate-a-path-operation){.internal-link target=_blank} 文档。
+在文档界面中显示弃用的**路径操作**,请阅读 [教程 - 路径操作配置 - 弃用](../tutorial/path-operation-configuration.md#deprecate-a-path-operation) 文档。
## 将任何数据转换为 JSON 兼容格式 { #convert-any-data-to-json-compatible }
-要将任何数据转换为 JSON 兼容格式,请阅读 [教程 - JSON 兼容编码器](../tutorial/encoder.md){.internal-link target=_blank} 文档。
+要将任何数据转换为 JSON 兼容格式,请阅读 [教程 - JSON 兼容编码器](../tutorial/encoder.md) 文档。
## OpenAPI 元数据 - 文档 { #openapi-metadata-docs }
-要添加 OpenAPI 的元数据,包括许可证、版本、联系方式等,请阅读 [教程 - 元数据和文档 URL](../tutorial/metadata.md){.internal-link target=_blank} 文档。
+要添加 OpenAPI 的元数据,包括许可证、版本、联系方式等,请阅读 [教程 - 元数据和文档 URL](../tutorial/metadata.md) 文档。
## OpenAPI 自定义 URL { #openapi-custom-url }
-要自定义 OpenAPI 的 URL(或删除它),请阅读 [教程 - 元数据和文档 URL](../tutorial/metadata.md#openapi-url){.internal-link target=_blank} 文档。
+要自定义 OpenAPI 的 URL(或删除它),请阅读 [教程 - 元数据和文档 URL](../tutorial/metadata.md#openapi-url) 文档。
## OpenAPI 文档 URL { #openapi-docs-urls }
-要更改自动生成的文档用户界面所使用的 URL,请阅读 [教程 - 元数据和文档 URL](../tutorial/metadata.md#docs-urls){.internal-link target=_blank}。
+要更改自动生成的文档用户界面所使用的 URL,请阅读 [教程 - 元数据和文档 URL](../tutorial/metadata.md#docs-urls)。
以下是一些支持 **ASGI** 的 **GraphQL** 库。你可以将它们与 **FastAPI** 一起使用:
-* <a href="https://strawberry.rocks/" class="external-link" target="_blank">Strawberry</a> 🍓
- * 提供 <a href="https://strawberry.rocks/docs/integrations/fastapi" class="external-link" target="_blank">面向 FastAPI 的文档</a>
-* <a href="https://ariadnegraphql.org/" class="external-link" target="_blank">Ariadne</a>
- * 提供 <a href="https://ariadnegraphql.org/docs/fastapi-integration" class="external-link" target="_blank">面向 FastAPI 的文档</a>
-* <a href="https://tartiflette.io/" class="external-link" target="_blank">Tartiflette</a>
- * 提供用于 ASGI 集成的 <a href="https://tartiflette.github.io/tartiflette-asgi/" class="external-link" target="_blank">Tartiflette ASGI</a>
-* <a href="https://graphene-python.org/" class="external-link" target="_blank">Graphene</a>
- * 可配合 <a href="https://github.com/ciscorn/starlette-graphene3" class="external-link" target="_blank">starlette-graphene3</a> 使用
+* [Strawberry](https://strawberry.rocks/) 🍓
+ * 提供 [面向 FastAPI 的文档](https://strawberry.rocks/docs/integrations/fastapi)
+* [Ariadne](https://ariadnegraphql.org/)
+ * 提供 [面向 FastAPI 的文档](https://ariadnegraphql.org/docs/fastapi-integration)
+* [Tartiflette](https://tartiflette.io/)
+ * 提供用于 ASGI 集成的 [Tartiflette ASGI](https://tartiflette.github.io/tartiflette-asgi/)
+* [Graphene](https://graphene-python.org/)
+ * 可配合 [starlette-graphene3](https://github.com/ciscorn/starlette-graphene3) 使用
## 使用 Strawberry 的 GraphQL { #graphql-with-strawberry }
-如果你需要或想要使用 **GraphQL**,<a href="https://strawberry.rocks/" class="external-link" target="_blank">**Strawberry**</a> 是**推荐**的库,因为它的设计与 **FastAPI** 最为接近,全部基于**类型注解**。
+如果你需要或想要使用 **GraphQL**,[**Strawberry**](https://strawberry.rocks/) 是**推荐**的库,因为它的设计与 **FastAPI** 最为接近,全部基于**类型注解**。
根据你的用例,你可能会更喜欢其他库,但如果你问我,我大概率会建议你先试试 **Strawberry**。
{* ../../docs_src/graphql_/tutorial001_py310.py hl[3,22,25] *}
-你可以在 <a href="https://strawberry.rocks/" class="external-link" target="_blank">Strawberry 文档</a>中了解更多信息。
+你可以在 [Strawberry 文档](https://strawberry.rocks/) 中了解更多信息。
-还有关于 <a href="https://strawberry.rocks/docs/integrations/fastapi" class="external-link" target="_blank">将 Strawberry 与 FastAPI 结合使用</a>的文档。
+还有关于 [将 Strawberry 与 FastAPI 结合使用](https://strawberry.rocks/docs/integrations/fastapi) 的文档。
## Starlette 中较早的 `GraphQLApp` { #older-graphqlapp-from-starlette }
-早期版本的 Starlette 包含一个 `GraphQLApp` 类,用于与 <a href="https://graphene-python.org/" class="external-link" target="_blank">Graphene</a> 集成。
+早期版本的 Starlette 包含一个 `GraphQLApp` 类,用于与 [Graphene](https://graphene-python.org/) 集成。
-它已在 Starlette 中被弃用,但如果你的代码使用了它,你可以轻松**迁移**到 <a href="https://github.com/ciscorn/starlette-graphene3" class="external-link" target="_blank">starlette-graphene3</a>,它覆盖相同的用例,且接口**几乎完全一致**。
+它已在 Starlette 中被弃用,但如果你的代码使用了它,你可以轻松**迁移**到 [starlette-graphene3](https://github.com/ciscorn/starlette-graphene3),它覆盖相同的用例,且接口**几乎完全一致**。
/// tip | 提示
-如果你需要 GraphQL,我仍然建议看看 <a href="https://strawberry.rocks/" class="external-link" target="_blank">Strawberry</a>,因为它基于类型注解而不是自定义类和类型。
+如果你需要 GraphQL,我仍然建议看看 [Strawberry](https://strawberry.rocks/),因为它基于类型注解而不是自定义类和类型。
///
## 了解更多 { #learn-more }
-你可以在 <a href="https://graphql.org/" class="external-link" target="_blank">GraphQL 官方文档</a>中了解更多关于 **GraphQL** 的内容。
+你可以在 [GraphQL 官方文档](https://graphql.org/) 中了解更多关于 **GraphQL** 的内容。
你也可以通过上面的链接阅读各个库的更多信息。
/// tip | 提示
-如果你想以系统的方式**学习 FastAPI**(推荐),请阅读 [教程 - 用户指南](../tutorial/index.md){.internal-link target=_blank} 的每一章节。
+如果你想以系统的方式**学习 FastAPI**(推荐),请阅读 [教程 - 用户指南](../tutorial/index.md) 的每一章节。
///
## 官方指南 { #official-guide }
-Pydantic 有一份从 v1 迁移到 v2 的官方 <a href="https://docs.pydantic.dev/latest/migration/" class="external-link" target="_blank">迁移指南</a>。
+Pydantic 有一份从 v1 迁移到 v2 的官方[迁移指南](https://docs.pydantic.dev/latest/migration/)。
其中包含变更内容、校验如何更准确更严格、可能的注意事项等。
## 测试 { #tests }
-请确保你的应用有[测试](../tutorial/testing.md){.internal-link target=_blank},并在持续集成(CI)中运行它们。
+请确保你的应用有[测试](../tutorial/testing.md),并在持续集成(CI)中运行它们。
这样你就可以升级并确保一切仍按预期工作。
在很多情况下,如果你使用的是未做自定义的常规 Pydantic 模型,可以将从 Pydantic v1 迁移到 v2 的大部分过程自动化。
-你可以使用同一 Pydantic 团队提供的 <a href="https://github.com/pydantic/bump-pydantic" class="external-link" target="_blank">`bump-pydantic`</a>。
+你可以使用同一 Pydantic 团队提供的[`bump-pydantic`](https://github.com/pydantic/bump-pydantic)。
该工具会帮助你自动修改大部分需要变更的代码。
# 测试数据库 { #testing-a-database }
-你可以在 <a href="https://sqlmodel.tiangolo.com/" class="external-link" target="_blank">SQLModel 文档</a> 中学习数据库、SQL 和 SQLModel。🤓
+你可以在[SQLModel 文档](https://sqlmodel.tiangolo.com/)中学习数据库、SQL 和 SQLModel。🤓
-这里有一个关于在 FastAPI 中使用 SQLModel 的小教程:<a href="https://sqlmodel.tiangolo.com/tutorial/fastapi/" class="external-link" target="_blank">使用 SQLModel 搭配 FastAPI 的教程</a>。✨
+这里有一个[在 FastAPI 中使用 SQLModel 的小教程](https://sqlmodel.tiangolo.com/tutorial/fastapi/)。✨
-该教程包含一个关于 <a href="https://sqlmodel.tiangolo.com/tutorial/fastapi/tests/" class="external-link" target="_blank">测试 SQL 数据库</a> 的章节。😎
+该教程包含一个关于[测试 SQL 数据库](https://sqlmodel.tiangolo.com/tutorial/fastapi/tests/)的章节。😎
<em>FastAPI 框架,高性能,易于学习,高效编码,生产可用</em>
</p>
<p align="center">
-<a href="https://github.com/fastapi/fastapi/actions?query=workflow%3ATest+event%3Apush+branch%3Amaster" target="_blank">
+<a href="https://github.com/fastapi/fastapi/actions?query=workflow%3ATest+event%3Apush+branch%3Amaster">
<img src="https://github.com/fastapi/fastapi/actions/workflows/test.yml/badge.svg?event=push&branch=master" alt="Test">
</a>
-<a href="https://coverage-badge.samuelcolvin.workers.dev/redirect/fastapi/fastapi" target="_blank">
+<a href="https://coverage-badge.samuelcolvin.workers.dev/redirect/fastapi/fastapi">
<img src="https://coverage-badge.samuelcolvin.workers.dev/fastapi/fastapi.svg" alt="Coverage">
</a>
-<a href="https://pypi.org/project/fastapi" target="_blank">
+<a href="https://pypi.org/project/fastapi">
<img src="https://img.shields.io/pypi/v/fastapi?color=%2334D058&label=pypi%20package" alt="Package version">
</a>
-<a href="https://pypi.org/project/fastapi" target="_blank">
+<a href="https://pypi.org/project/fastapi">
<img src="https://img.shields.io/pypi/pyversions/fastapi.svg?color=%2334D058" alt="Supported Python versions">
</a>
</p>
---
-**文档**: <a href="https://fastapi.tiangolo.com/zh" target="_blank">https://fastapi.tiangolo.com</a>
+**文档**: [https://fastapi.tiangolo.com/zh](https://fastapi.tiangolo.com/zh)
-**源码**: <a href="https://github.com/fastapi/fastapi" target="_blank">https://github.com/fastapi/fastapi</a>
+**源码**: [https://github.com/fastapi/fastapi](https://github.com/fastapi/fastapi)
---
* **易用**:为易用和易学而设计。更少的文档阅读时间。
* **简短**:最小化代码重复。一次参数声明即可获得多种功能。更少的 bug。
* **健壮**:生产可用级代码。并带有自动生成的交互式文档。
-* **标准化**:基于(并完全兼容)API 的开放标准:<a href="https://github.com/OAI/OpenAPI-Specification" class="external-link" target="_blank">OpenAPI</a>(以前称为 Swagger)和 <a href="https://json-schema.org/" class="external-link" target="_blank">JSON Schema</a>。
+* **标准化**:基于(并完全兼容)API 的开放标准:[OpenAPI](https://github.com/OAI/OpenAPI-Specification)(以前称为 Swagger)和 [JSON Schema](https://json-schema.org/)。
<small>* 基于某内部开发团队在构建生产应用时的测试估算。</small>
### Keystone 赞助商 { #keystone-sponsor }
{% for sponsor in sponsors.keystone -%}
-<a href="{{ sponsor.url }}" target="_blank" title="{{ sponsor.title }}"><img src="{{ sponsor.img }}" style="border-radius:15px"></a>
+<a href="{{ sponsor.url }}" title="{{ sponsor.title }}"><img src="{{ sponsor.img }}" style="border-radius:15px"></a>
{% endfor -%}
### 金牌和银牌赞助商 { #gold-and-silver-sponsors }
{% for sponsor in sponsors.gold -%}
-<a href="{{ sponsor.url }}" target="_blank" title="{{ sponsor.title }}"><img src="{{ sponsor.img }}" style="border-radius:15px"></a>
+<a href="{{ sponsor.url }}" title="{{ sponsor.title }}"><img src="{{ sponsor.img }}" style="border-radius:15px"></a>
{% endfor -%}
{%- for sponsor in sponsors.silver -%}
-<a href="{{ sponsor.url }}" target="_blank" title="{{ sponsor.title }}"><img src="{{ sponsor.img }}" style="border-radius:15px"></a>
+<a href="{{ sponsor.url }}" title="{{ sponsor.title }}"><img src="{{ sponsor.img }}" style="border-radius:15px"></a>
{% endfor %}
<!-- /sponsors -->
-<a href="https://fastapi.tiangolo.com/zh/fastapi-people/#sponsors" class="external-link" target="_blank">其他赞助商</a>
+[其他赞助商](https://fastapi.tiangolo.com/zh/fastapi-people/#sponsors)
## 评价 { #opinions }
「_[...] 最近我大量使用 **FastAPI**。[...] 我实际上计划把它用于我团队在 **微软** 的所有 **机器学习服务**。其中一些正在集成进核心 **Windows** 产品以及一些 **Office** 产品。_」
-<div style="text-align: right; margin-right: 10%;">Kabir Khan - <strong>Microsoft</strong> <a href="https://github.com/fastapi/fastapi/pull/26" target="_blank"><small>(ref)</small></a></div>
+<div style="text-align: right; margin-right: 10%;">Kabir Khan - <strong>Microsoft</strong> <a href="https://github.com/fastapi/fastapi/pull/26"><small>(ref)</small></a></div>
---
「_我们采用 **FastAPI** 来构建可查询以获取**预测结果**的 **REST** 服务器。[用于 Ludwig]_」
-<div style="text-align: right; margin-right: 10%;">Piero Molino,Yaroslav Dudin,Sai Sumanth Miryala - <strong>Uber</strong> <a href="https://eng.uber.com/ludwig-v0-2/" target="_blank"><small>(ref)</small></a></div>
+<div style="text-align: right; margin-right: 10%;">Piero Molino,Yaroslav Dudin,Sai Sumanth Miryala - <strong>Uber</strong> <a href="https://eng.uber.com/ludwig-v0-2/"><small>(ref)</small></a></div>
---
「_**Netflix** 很高兴宣布开源我们的**危机管理**编排框架:**Dispatch**![使用 **FastAPI** 构建]_」
-<div style="text-align: right; margin-right: 10%;">Kevin Glisson,Marc Vilanova,Forest Monsen - <strong>Netflix</strong> <a href="https://netflixtechblog.com/introducing-dispatch-da4b8a2a8072" target="_blank"><small>(ref)</small></a></div>
+<div style="text-align: right; margin-right: 10%;">Kevin Glisson,Marc Vilanova,Forest Monsen - <strong>Netflix</strong> <a href="https://netflixtechblog.com/introducing-dispatch-da4b8a2a8072"><small>(ref)</small></a></div>
---
「_我对 **FastAPI** 兴奋到飞起。它太有趣了!_」
-<div style="text-align: right; margin-right: 10%;">Brian Okken - <strong><a href="https://pythonbytes.fm/episodes/show/123/time-to-right-the-py-wrongs?time_in_sec=855" target="_blank">Python Bytes</a> 播客主持人</strong> <a href="https://x.com/brianokken/status/1112220079972728832" target="_blank"><small>(ref)</small></a></div>
+<div style="text-align: right; margin-right: 10%;">Brian Okken - <strong>[Python Bytes](https://pythonbytes.fm/episodes/show/123/time-to-right-the-py-wrongs?time_in_sec=855) 播客主持人</strong> <a href="https://x.com/brianokken/status/1112220079972728832"><small>(ref)</small></a></div>
---
「_老实说,你构建的东西非常稳健而且打磨得很好。从很多方面看,这就是我想让 **Hug** 成为的样子 —— 看到有人把它做出来真的很鼓舞人心。_」
-<div style="text-align: right; margin-right: 10%;">Timothy Crosley - <strong><a href="https://github.com/hugapi/hug" target="_blank">Hug</a> 作者</strong> <a href="https://news.ycombinator.com/item?id=19455465" target="_blank"><small>(ref)</small></a></div>
+<div style="text-align: right; margin-right: 10%;">Timothy Crosley - <strong>[Hug](https://github.com/hugapi/hug) 作者</strong> <a href="https://news.ycombinator.com/item?id=19455465"><small>(ref)</small></a></div>
---
「_我们已经把我们的 **API** 切换到 **FastAPI** [...] 我想你会喜欢它 [...]_」
-<div style="text-align: right; margin-right: 10%;">Ines Montani - Matthew Honnibal - <strong><a href="https://explosion.ai" target="_blank">Explosion AI</a> 创始人 - <a href="https://spacy.io" target="_blank">spaCy</a> 作者</strong> <a href="https://x.com/_inesmontani/status/1144173225322143744" target="_blank"><small>(ref)</small></a> - <a href="https://x.com/honnibal/status/1144031421859655680" target="_blank"><small>(ref)</small></a></div>
+<div style="text-align: right; margin-right: 10%;">Ines Montani - Matthew Honnibal - <strong>[Explosion AI](https://explosion.ai) 创始人 - [spaCy](https://spacy.io) 作者</strong> <a href="https://x.com/_inesmontani/status/1144173225322143744"><small>(ref)</small></a> - <a href="https://x.com/honnibal/status/1144031421859655680"><small>(ref)</small></a></div>
---
「_如果有人正在构建生产级的 Python API,我强烈推荐 **FastAPI**。它**设计优雅**、**使用简单**且**高度可扩展**,已经成为我们 API 优先开发战略中的**关键组件**,并驱动了许多自动化和服务,比如我们的 Virtual TAC Engineer。_」
-<div style="text-align: right; margin-right: 10%;">Deon Pillsbury - <strong>Cisco</strong> <a href="https://www.linkedin.com/posts/deonpillsbury_cisco-cx-python-activity-6963242628536487936-trAp/" target="_blank"><small>(ref)</small></a></div>
+<div style="text-align: right; margin-right: 10%;">Deon Pillsbury - <strong>Cisco</strong> <a href="https://www.linkedin.com/posts/deonpillsbury_cisco-cx-python-activity-6963242628536487936-trAp/"><small>(ref)</small></a></div>
---
## FastAPI 迷你纪录片 { #fastapi-mini-documentary }
-在 2025 年末发布了一部<a href="https://www.youtube.com/watch?v=mpR8ngthqiE" class="external-link" target="_blank">FastAPI 迷你纪录片</a>,你可以在线观看:
+在 2025 年末发布了一部 [FastAPI 迷你纪录片](https://www.youtube.com/watch?v=mpR8ngthqiE),你可以在线观看:
-<a href="https://www.youtube.com/watch?v=mpR8ngthqiE" target="_blank"><img src="https://fastapi.tiangolo.com/img/fastapi-documentary.jpg" alt="FastAPI Mini Documentary"></a>
+<a href="https://www.youtube.com/watch?v=mpR8ngthqiE"><img src="https://fastapi.tiangolo.com/img/fastapi-documentary.jpg" alt="FastAPI Mini Documentary"></a>
## **Typer**,命令行中的 FastAPI { #typer-the-fastapi-of-clis }
-<a href="https://typer.tiangolo.com" target="_blank"><img src="https://typer.tiangolo.com/img/logo-margin/logo-margin-vector.svg" style="width: 20%;"></a>
+<a href="https://typer.tiangolo.com"><img src="https://typer.tiangolo.com/img/logo-margin/logo-margin-vector.svg" style="width: 20%;"></a>
-如果你要开发一个用于终端的 <abbr title="Command Line Interface">命令行</abbr>应用而不是 Web API,看看 <a href="https://typer.tiangolo.com/" class="external-link" target="_blank">**Typer**</a>。
+如果你要开发一个用于终端的 <abbr title="Command Line Interface - 命令行界面">命令行</abbr>应用而不是 Web API,看看 [**Typer**](https://typer.tiangolo.com/)。
**Typer** 是 FastAPI 的小同胞。它的目标是成为**命令行中的 FastAPI**。⌨️ 🚀
FastAPI 站在巨人的肩膀之上:
-* <a href="https://www.starlette.dev/" class="external-link" target="_blank">Starlette</a> 负责 Web 部分。
-* <a href="https://docs.pydantic.dev/" class="external-link" target="_blank">Pydantic</a> 负责数据部分。
+* [Starlette](https://www.starlette.dev/) 负责 Web 部分。
+* [Pydantic](https://docs.pydantic.dev/) 负责数据部分。
## 安装 { #installation }
-创建并激活一个<a href="https://fastapi.tiangolo.com/zh/virtual-environments/" class="external-link" target="_blank">虚拟环境</a>,然后安装 FastAPI:
+创建并激活一个 [虚拟环境](https://fastapi.tiangolo.com/zh/virtual-environments/),然后安装 FastAPI:
<div class="termy">
**Note**:
-如果你不确定,请查看文档中 _"In a hurry?"_ 章节的<a href="https://fastapi.tiangolo.com/zh/async/#in-a-hurry" target="_blank">`async` 和 `await`</a>部分。
+如果你不确定,请查看文档中 _"In a hurry?"_ 章节的 [`async` 和 `await`](https://fastapi.tiangolo.com/zh/async/#in-a-hurry) 部分。
</details>
<div class="termy">
```console
-$ fastapi dev main.py
+$ fastapi dev
╭────────── FastAPI CLI - Development mode ───────────╮
│ │
</div>
<details markdown="1">
-<summary>关于命令 <code>fastapi dev main.py</code>...</summary>
+<summary>关于命令 <code>fastapi dev</code>...</summary>
-`fastapi dev` 命令会读取你的 `main.py` 文件,检测其中的 **FastAPI** 应用,并使用 <a href="https://www.uvicorn.dev" class="external-link" target="_blank">Uvicorn</a> 启动服务器。
+`fastapi dev` 命令会读取你的 `main.py` 文件,检测其中的 **FastAPI** 应用,并使用 [Uvicorn](https://www.uvicorn.dev) 启动服务器。
默认情况下,`fastapi dev` 会在本地开发时启用自动重载。
-你可以在 <a href="https://fastapi.tiangolo.com/zh/fastapi-cli/" target="_blank">FastAPI CLI 文档</a>中了解更多。
+你可以在 [FastAPI CLI 文档](https://fastapi.tiangolo.com/zh/fastapi-cli/) 中了解更多。
</details>
### 检查 { #check-it }
-用浏览器打开 <a href="http://127.0.0.1:8000/items/5?q=somequery" class="external-link" target="_blank">http://127.0.0.1:8000/items/5?q=somequery</a>。
+用浏览器打开 [http://127.0.0.1:8000/items/5?q=somequery](http://127.0.0.1:8000/items/5?q=somequery)。
你会看到如下 JSON 响应:
### 交互式 API 文档 { #interactive-api-docs }
-现在访问 <a href="http://127.0.0.1:8000/docs" class="external-link" target="_blank">http://127.0.0.1:8000/docs</a>。
+现在访问 [http://127.0.0.1:8000/docs](http://127.0.0.1:8000/docs)。
-你会看到自动生成的交互式 API 文档(由 <a href="https://github.com/swagger-api/swagger-ui" class="external-link" target="_blank">Swagger UI</a> 提供):
+你会看到自动生成的交互式 API 文档(由 [Swagger UI](https://github.com/swagger-api/swagger-ui) 提供):

### 可选的 API 文档 { #alternative-api-docs }
-然后访问 <a href="http://127.0.0.1:8000/redoc" class="external-link" target="_blank">http://127.0.0.1:8000/redoc</a>。
+然后访问 [http://127.0.0.1:8000/redoc](http://127.0.0.1:8000/redoc)。
-你会看到另一个自动生成的文档(由 <a href="https://github.com/Rebilly/ReDoc" class="external-link" target="_blank">ReDoc</a> 提供):
+你会看到另一个自动生成的文档(由 [ReDoc](https://github.com/Rebilly/ReDoc) 提供):

### 交互式 API 文档升级 { #interactive-api-docs-upgrade }
-现在访问 <a href="http://127.0.0.1:8000/docs" class="external-link" target="_blank">http://127.0.0.1:8000/docs</a>。
+现在访问 [http://127.0.0.1:8000/docs](http://127.0.0.1:8000/docs)。
* 交互式 API 文档会自动更新,并包含新的请求体:
### 可选文档升级 { #alternative-api-docs-upgrade }
-再访问 <a href="http://127.0.0.1:8000/redoc" class="external-link" target="_blank">http://127.0.0.1:8000/redoc</a>。
+再访问 [http://127.0.0.1:8000/redoc](http://127.0.0.1:8000/redoc)。
* 可选文档同样会体现新的查询参数和请求体:
* 功能强大且易用的 **<dfn title="也被称为:组件、资源、提供者、服务、可注入项">依赖注入</dfn>** 系统。
* 安全与认证,包括对 **OAuth2**、**JWT tokens** 和 **HTTP Basic** 认证的支持。
* 更高级(但同样简单)的 **多层嵌套 JSON 模型** 声明技巧(得益于 Pydantic)。
-* 通过 <a href="https://strawberry.rocks" class="external-link" target="_blank">Strawberry</a> 等库进行 **GraphQL** 集成。
+* 通过 [Strawberry](https://strawberry.rocks) 等库进行 **GraphQL** 集成。
* 许多额外特性(归功于 Starlette),例如:
* **WebSockets**
* 基于 HTTPX 和 `pytest` 的极其简单的测试
### 部署你的应用(可选) { #deploy-your-app-optional }
-你可以选择把 FastAPI 应用部署到 <a href="https://fastapicloud.com" class="external-link" target="_blank">FastAPI Cloud</a>,如果还没有的话去加入候补名单吧。🚀
+你可以选择把 FastAPI 应用部署到 [FastAPI Cloud](https://fastapicloud.com),如果还没有的话去加入候补名单吧。🚀
如果你已经有 **FastAPI Cloud** 账号(我们从候补名单邀请了你 😉),你可以用一个命令部署你的应用。
-部署前,先确认已登录:
-
-<div class="termy">
-
-```console
-$ fastapi login
-
-You are logged in to FastAPI Cloud 🚀
-```
-
-</div>
-
-然后部署你的应用:
-
<div class="termy">
```console
#### 关于 FastAPI Cloud { #about-fastapi-cloud }
-**<a href="https://fastapicloud.com" class="external-link" target="_blank">FastAPI Cloud</a>** 由 **FastAPI** 的同一位作者和团队打造。
+**[FastAPI Cloud](https://fastapicloud.com)** 由 **FastAPI** 的同一位作者和团队打造。
它让你以最小的工作量就能**构建**、**部署**并**访问**一个 API。
## 性能 { #performance }
-独立机构 TechEmpower 的基准测试显示,运行在 Uvicorn 下的 **FastAPI** 应用是<a href="https://www.techempower.com/benchmarks/#section=test&runid=7464e520-0dc2-473d-bd34-dbdfd7e85911&hw=ph&test=query&l=zijzen-7" class="external-link" target="_blank">最快的 Python 框架之一</a>,仅次于 Starlette 和 Uvicorn 本身(FastAPI 内部使用它们)。(*)
+独立机构 TechEmpower 的基准测试显示,运行在 Uvicorn 下的 **FastAPI** 应用是 [最快的 Python 框架之一](https://www.techempower.com/benchmarks/#section=test&runid=7464e520-0dc2-473d-bd34-dbdfd7e85911&hw=ph&test=query&l=zijzen-7),仅次于 Starlette 和 Uvicorn 本身(FastAPI 内部使用它们)。(*)
-想了解更多,请参阅<a href="https://fastapi.tiangolo.com/zh/benchmarks/" class="internal-link" target="_blank">基准测试</a>章节。
+想了解更多,请参阅 [基准测试](https://fastapi.tiangolo.com/zh/benchmarks/) 章节。
## 依赖项 { #dependencies }
Pydantic 使用:
-* <a href="https://github.com/JoshData/python-email-validator" target="_blank"><code>email-validator</code></a> - 用于 email 校验。
+* [`email-validator`](https://github.com/JoshData/python-email-validator) - 用于 email 校验。
Starlette 使用:
-* <a href="https://www.python-httpx.org" target="_blank"><code>httpx</code></a> - 使用 `TestClient` 时需要。
-* <a href="https://jinja.palletsprojects.com" target="_blank"><code>jinja2</code></a> - 使用默认模板配置时需要。
-* <a href="https://github.com/Kludex/python-multipart" target="_blank"><code>python-multipart</code></a> - 使用 `request.form()` 支持表单<dfn title="将 HTTP 请求中的字符串转换为 Python 数据">「解析」</dfn>时需要。
+* [`httpx`](https://www.python-httpx.org) - 使用 `TestClient` 时需要。
+* [`jinja2`](https://jinja.palletsprojects.com) - 使用默认模板配置时需要。
+* [`python-multipart`](https://github.com/Kludex/python-multipart) - 使用 `request.form()` 支持表单<dfn title="将 HTTP 请求中的字符串转换为 Python 数据">「解析」</dfn>时需要。
FastAPI 使用:
-* <a href="https://www.uvicorn.dev" target="_blank"><code>uvicorn</code></a> - 加载并提供你的应用的服务器。包含 `uvicorn[standard]`,其中包含高性能服务所需的一些依赖(例如 `uvloop`)。
+* [`uvicorn`](https://www.uvicorn.dev) - 加载并提供你的应用的服务器。包含 `uvicorn[standard]`,其中包含高性能服务所需的一些依赖(例如 `uvloop`)。
* `fastapi-cli[standard]` - 提供 `fastapi` 命令。
- * 其中包含 `fastapi-cloud-cli`,它允许你将 FastAPI 应用部署到 <a href="https://fastapicloud.com" class="external-link" target="_blank">FastAPI Cloud</a>。
+ * 其中包含 `fastapi-cloud-cli`,它允许你将 FastAPI 应用部署到 [FastAPI Cloud](https://fastapicloud.com)。
### 不包含 `standard` 依赖 { #without-standard-dependencies }
额外的 Pydantic 可选依赖:
-* <a href="https://docs.pydantic.dev/latest/usage/pydantic_settings/" target="_blank"><code>pydantic-settings</code></a> - 用于配置管理。
-* <a href="https://docs.pydantic.dev/latest/usage/types/extra_types/extra_types/" target="_blank"><code>pydantic-extra-types</code></a> - 用于在 Pydantic 中使用的额外类型。
+* [`pydantic-settings`](https://docs.pydantic.dev/latest/usage/pydantic_settings/) - 用于配置管理。
+* [`pydantic-extra-types`](https://docs.pydantic.dev/latest/usage/types/extra_types/extra_types/) - 用于在 Pydantic 中使用的额外类型。
额外的 FastAPI 可选依赖:
-* <a href="https://github.com/ijl/orjson" target="_blank"><code>orjson</code></a> - 使用 `ORJSONResponse` 时需要。
-* <a href="https://github.com/esnme/ultrajson" target="_blank"><code>ujson</code></a> - 使用 `UJSONResponse` 时需要。
+* [`orjson`](https://github.com/ijl/orjson) - 使用 `ORJSONResponse` 时需要。
+* [`ujson`](https://github.com/esnme/ultrajson) - 使用 `UJSONResponse` 时需要。
## 许可协议 { #license }
你可以使用此模板开始,它已经为你完成了大量的初始设置、安全性、数据库以及一些 API 端点。
-GitHub 仓库: <a href="https://github.com/tiangolo/full-stack-fastapi-template" class="external-link" target="_blank">Full Stack FastAPI Template</a>
+GitHub 仓库:[Full Stack FastAPI Template](https://github.com/tiangolo/full-stack-fastapi-template)
## FastAPI全栈模板 - 技术栈和特性 { #full-stack-fastapi-template-technology-stack-and-features }
## Pydantic 模型 { #pydantic-models }
-<a href="https://docs.pydantic.dev/" class="external-link" target="_blank">Pydantic</a> 是一个用于执行数据校验的 Python 库。
+[Pydantic](https://docs.pydantic.dev/) 是一个用于执行数据校验的 Python 库。
你将数据的“结构”声明为带有属性的类。
/// info | 信息
-想了解更多关于 <a href="https://docs.pydantic.dev/" class="external-link" target="_blank">Pydantic 的信息,请查看其文档</a>。
+想了解更多关于 [Pydantic](https://docs.pydantic.dev/) 的信息,请查看其文档。
///
**FastAPI** 完全建立在 Pydantic 之上。
-你会在[教程 - 用户指南](tutorial/index.md){.internal-link target=_blank}中看到更多的实战示例。
+你会在[教程 - 用户指南](tutorial/index.md)中看到更多的实战示例。
## 带元数据注解的类型提示 { #type-hints-with-metadata-annotations }
* 使用 OpenAPI 记录 API:
* 然后用于自动生成交互式文档界面。
-这些听起来可能有点抽象。别担心。你会在[教程 - 用户指南](tutorial/index.md){.internal-link target=_blank}中看到所有这些的实际效果。
+这些听起来可能有点抽象。别担心。你会在[教程 - 用户指南](tutorial/index.md)中看到所有这些的实际效果。
重要的是,通过使用标准的 Python 类型,而且只在一个地方声明(而不是添加更多类、装饰器等),**FastAPI** 会为你完成大量工作。
/// info | 信息
-如果你已经读完所有教程,又回来想进一步了解类型,一个不错的资源是 <a href="https://mypy.readthedocs.io/en/latest/cheat_sheet_py3.html" class="external-link" target="_blank">`mypy` 的“速查表”</a>。
+如果你已经读完所有教程,又回来想进一步了解类型,一个不错的资源是 [`mypy` 的“速查表”](https://mypy.readthedocs.io/en/latest/cheat_sheet_py3.html)。
///
## 技术细节 { #technical-details }
-`BackgroundTasks` 类直接来自 <a href="https://www.starlette.dev/background/" class="external-link" target="_blank">`starlette.background`</a>。
+`BackgroundTasks` 类直接来自 [`starlette.background`](https://www.starlette.dev/background/)。
它被直接导入/包含到FastAPI以便你可以从 `fastapi` 导入,并避免意外从 `starlette.background` 导入备用的 `BackgroundTask` (后面没有 `s`)。
在FastAPI中仍然可以单独使用 `BackgroundTask`,但您必须在代码中创建对象,并返回包含它的Starlette `Response`。
-更多细节查看 <a href="https://www.starlette.dev/background/" class="external-link" target="_blank">Starlette 后台任务的官方文档</a>.
+更多细节查看 [Starlette 后台任务的官方文档](https://www.starlette.dev/background/)。
## 告诫 { #caveat }
-如果您需要执行繁重的后台计算,并且不一定需要由同一进程运行(例如,您不需要共享内存、变量等),那么使用其他更大的工具(如 <a href="https://docs.celeryq.dev" class="external-link" target="_blank">Celery</a>)可能更好。
+如果您需要执行繁重的后台计算,并且不一定需要由同一进程运行(例如,您不需要共享内存、变量等),那么使用其他更大的工具(如 [Celery](https://docs.celeryq.dev))可能更好。
它们往往需要更复杂的配置,即消息/作业队列管理器,如RabbitMQ或Redis,但它们允许您在多个进程中运行后台任务,甚至是在多个服务器中。
我们正在使用虚构的请求首部来简化此示例。
-但在实际情况下,使用集成的[安全性实用工具](security/index.md){.internal-link target=_blank}会得到更好的效果。
+但在实际情况下,使用集成的[安全性实用工具](security/index.md)会得到更好的效果。
///
/// tip | 提示
-请注意,和[*路径操作装饰器*中的依赖项](dependencies/dependencies-in-path-operation-decorators.md){.internal-link target=_blank}很类似,没有值会被传递给你的*路径操作函数*。
+请注意,和[*路径操作装饰器*中的依赖项](dependencies/dependencies-in-path-operation-decorators.md)很类似,没有值会被传递给你的*路径操作函数*。
///
* 所有的路径操作都将包含预定义的 `responses`。
* 所有的这些*路径操作*都将在自身之前计算/执行 `dependencies` 列表。
* 如果你还在一个具体的*路径操作*中声明了依赖项,**它们也会被执行**。
- * 路由器的依赖项最先执行,然后是[装饰器中的 `dependencies`](dependencies/dependencies-in-path-operation-decorators.md){.internal-link target=_blank},再然后是普通的参数依赖项。
- * 你还可以添加[具有 `scopes` 的 `Security` 依赖项](../advanced/security/oauth2-scopes.md){.internal-link target=_blank}。
+ * 路由器的依赖项最先执行,然后是[装饰器中的 `dependencies`](dependencies/dependencies-in-path-operation-decorators.md),再然后是普通的参数依赖项。
+ * 你还可以添加[具有 `scopes` 的 `Security` 依赖项](../advanced/security/oauth2-scopes.md)。
/// tip | 提示
你可以像平常一样导入并创建一个 `FastAPI` 类。
-我们甚至可以声明[全局依赖项](dependencies/global-dependencies.md){.internal-link target=_blank},它会和每个 `APIRouter` 的依赖项组合在一起:
+我们甚至可以声明[全局依赖项](dependencies/global-dependencies.md),它会和每个 `APIRouter` 的依赖项组合在一起:
{* ../../docs_src/bigger_applications/app_an_py310/main.py hl[1,3,7] title["app/main.py"] *}
from app.routers import items, users
```
-要了解有关 Python 包和模块的更多信息,请查阅<a href="https://docs.python.org/3/tutorial/modules.html" class="external-link" target="_blank">关于 Modules 的 Python 官方文档</a>。
+要了解有关 Python 包和模块的更多信息,请查阅[关于 Modules 的 Python 官方文档](https://docs.python.org/3/tutorial/modules.html)。
///
它将与通过 `app.include_router()` 添加的所有其他*路径操作*一起正常运行。
-/// info | 特别的技术细节
+/// info | 非常技术细节
**注意**:这是一个非常技术性的细节,你也许可以**直接跳过**。
///
+## 在 `pyproject.toml` 中配置 `entrypoint` { #configure-the-entrypoint-in-pyproject-toml }
+
+因为你的 FastAPI `app` 对象位于 `app/main.py` 中,你可以在 `pyproject.toml` 中这样配置 `entrypoint`:
+
+```toml
+[tool.fastapi]
+entrypoint = "app.main:app"
+```
+
+等价于像这样导入:
+
+```python
+from app.main import app
+```
+
+这样 `fastapi` 命令就知道到哪里去找到你的应用了。
+
+/// Note | 注意
+
+你也可以把路径传给命令,比如:
+
+```console
+$ fastapi dev app/main.py
+```
+
+但是每次调用 `fastapi` 命令时,你都需要记得传入正确的路径。
+
+另外,其他工具可能找不到它,比如 [VS Code 扩展](../editor-support.md) 或 [FastAPI Cloud](https://fastapicloud.com),因此推荐在 `pyproject.toml` 中使用 `entrypoint`。
+
+///
+
## 查看自动化的 API 文档 { #check-the-automatic-api-docs }
现在,运行你的应用:
<div class="termy">
```console
-$ fastapi dev app/main.py
+$ fastapi dev
<span style="color: green;">INFO</span>: Uvicorn running on http://127.0.0.1:8000 (Press CTRL+C to quit)
```
</div>
-然后打开位于 <a href="http://127.0.0.1:8000/docs" class="external-link" target="_blank">http://127.0.0.1:8000/docs</a> 的文档。
+然后打开位于 [http://127.0.0.1:8000/docs](http://127.0.0.1:8000/docs) 的文档。
你将看到使用了正确路径(和前缀)和正确标签的自动化 API 文档,包括了来自所有子模块的路径:
除了普通的单一值类型(如 `str`、`int`、`float` 等)外,你还可以使用从 `str` 继承的更复杂的单一值类型。
-要了解所有的可用选项,请查看 <a href="https://docs.pydantic.dev/latest/concepts/types/" class="external-link" target="_blank">Pydantic 的类型概览</a>。你将在下一章节中看到一些示例。
+要了解所有的可用选项,请查看 [Pydantic 的类型概览](https://docs.pydantic.dev/latest/concepts/types/)。你将在下一章节中看到一些示例。
例如,在 `Image` 模型中我们有一个 `url` 字段,我们可以把它声明为 Pydantic 的 `HttpUrl`,而不是 `str`:
## 用 `PUT` 替换式更新 { #update-replacing-with-put }
-更新数据可以使用 <a href="https://developer.mozilla.org/en-US/docs/Web/HTTP/Methods/PUT" class="external-link" target="_blank">HTTP `PUT`</a> 操作。
+更新数据可以使用 [HTTP `PUT`](https://developer.mozilla.org/en-US/docs/Web/HTTP/Methods/PUT) 操作。
把输入数据转换为以 JSON 格式存储的数据(比如,使用 NoSQL 数据库时),可以使用 `jsonable_encoder`。例如,把 `datetime` 转换为 `str`。
## 用 `PATCH` 进行部分更新 { #partial-updates-with-patch }
-也可以使用 <a href="https://developer.mozilla.org/en-US/docs/Web/HTTP/Methods/PATCH" class="external-link" target="_blank">HTTP `PATCH`</a> 操作对数据进行*部分*更新。
+也可以使用 [HTTP `PATCH`](https://developer.mozilla.org/en-US/docs/Web/HTTP/Methods/PATCH) 操作对数据进行*部分*更新。
也就是说,你只需发送想要更新的数据,其余数据保持不变。
因此,如果希望接收的部分更新可以省略所有属性,则需要一个所有属性都标记为可选(带默认值或 `None`)的模型。
-为了区分用于**更新**(全部可选)和用于**创建**(必填)的模型,可以参考[更多模型](extra-models.md){.internal-link target=_blank} 中介绍的思路。
+为了区分用于**更新**(全部可选)和用于**创建**(必填)的模型,可以参考[更多模型](extra-models.md) 中介绍的思路。
///
你的 API 几乎总是需要发送**响应体**。但客户端不一定总是要发送**请求体**,有时它们只请求某个路径,可能带一些查询参数,但不会发送请求体。
-使用 <a href="https://docs.pydantic.dev/" class="external-link" target="_blank">Pydantic</a> 模型来声明**请求体**,能充分利用它的功能和优点。
+使用 [Pydantic](https://docs.pydantic.dev/) 模型来声明**请求体**,能充分利用它的功能和优点。
/// info | 信息
* 数据无效时返回清晰的错误信息,并指出错误数据的确切位置和内容。
* 把接收的数据赋值给参数 `item`。
* 因为你把函数中的参数类型声明为 `Item`,所以还能获得所有属性及其类型的编辑器支持(补全等)。
-* 为你的模型生成 <a href="https://json-schema.org" class="external-link" target="_blank">JSON Schema</a> 定义,如果对你的项目有意义,还可以在其他地方使用它们。
+* 为你的模型生成 [JSON Schema](https://json-schema.org) 定义,如果对你的项目有意义,还可以在其他地方使用它们。
* 这些 schema 会成为生成的 OpenAPI Schema 的一部分,并被自动文档的 <abbr title="User Interfaces - 用户界面">UIs</abbr> 使用。
## 自动文档 { #automatic-docs }
我们甚至对 Pydantic 本身做了一些改动以支持这些功能。
-上面的截图来自 <a href="https://code.visualstudio.com" class="external-link" target="_blank">Visual Studio Code</a>。
+上面的截图来自 [Visual Studio Code](https://code.visualstudio.com)。
-但使用 <a href="https://www.jetbrains.com/pycharm/" class="external-link" target="_blank">PyCharm</a> 和大多数其他 Python 编辑器,你也会获得相同的编辑器支持:
+但使用 [PyCharm](https://www.jetbrains.com/pycharm/) 和大多数其他 Python 编辑器,你也会获得相同的编辑器支持:
<img src="/img/tutorial/body/image05.png">
/// tip | 提示
-如果你使用 <a href="https://www.jetbrains.com/pycharm/" class="external-link" target="_blank">PyCharm</a> 作为编辑器,可以使用 <a href="https://github.com/koxudaxi/pydantic-pycharm-plugin/" class="external-link" target="_blank">Pydantic PyCharm 插件</a>。
+如果你使用 [PyCharm](https://www.jetbrains.com/pycharm/) 作为编辑器,可以使用 [Pydantic PyCharm 插件](https://github.com/koxudaxi/pydantic-pycharm-plugin/)。
它能改进对 Pydantic 模型的编辑器支持,包括:
## 不使用 Pydantic { #without-pydantic }
-即便不使用 Pydantic 模型也能使用 **Body** 参数。详见[请求体 - 多参数:请求体中的单值](body-multiple-params.md#singular-values-in-body){.internal-link target=_blank}。
+即便不使用 Pydantic 模型也能使用 **Body** 参数。详见[请求体 - 多参数:请求体中的单值](body-multiple-params.md#singular-values-in-body)。
# CORS(跨域资源共享) { #cors-cross-origin-resource-sharing }
-<a href="https://developer.mozilla.org/en-US/docs/Web/HTTP/CORS" class="external-link" target="_blank">CORS 或者「跨域资源共享」</a> 指浏览器中运行的前端拥有与后端通信的 JavaScript 代码,而后端处于与前端不同的「源」的情况。
+[CORS 或者「跨域资源共享」](https://developer.mozilla.org/en-US/docs/Web/HTTP/CORS) 指浏览器中运行的前端拥有与后端通信的 JavaScript 代码,而后端处于与前端不同的「源」的情况。
## 源 { #origin }
* `allow_origins` - 一个允许跨域请求的源列表。例如 `['https://example.org', 'https://www.example.org']`。你可以使用 `['*']` 允许任何源。
* `allow_origin_regex` - 一个正则表达式字符串,匹配的源允许跨域请求。例如 `'https://.*\.example\.org'`。
* `allow_methods` - 一个允许跨域请求的 HTTP 方法列表。默认为 `['GET']`。你可以使用 `['*']` 来允许所有标准方法。
-* `allow_headers` - 一个允许跨域请求的 HTTP 请求头列表。默认为 `[]`。你可以使用 `['*']` 允许所有的请求头。`Accept`、`Accept-Language`、`Content-Language` 以及 `Content-Type` 这几个请求头在<a href="https://developer.mozilla.org/en-US/docs/Web/HTTP/CORS#simple_requests" class="external-link" rel="noopener" target="_blank">简单 CORS 请求</a>中总是被允许。
+* `allow_headers` - 一个允许跨域请求的 HTTP 请求头列表。默认为 `[]`。你可以使用 `['*']` 允许所有的请求头。`Accept`、`Accept-Language`、`Content-Language` 以及 `Content-Type` 这几个请求头在[简单 CORS 请求](https://developer.mozilla.org/en-US/docs/Web/HTTP/CORS#simple_requests)中总是被允许。
* `allow_credentials` - 指示跨域请求支持 cookies。默认是 `False`。
- 当 `allow_credentials` 设为 `True` 时,`allow_origins`、`allow_methods` 和 `allow_headers` 都不能设为 `['*']`。它们必须<a href="https://developer.mozilla.org/en-US/docs/Web/HTTP/CORS#credentialed_requests_and_wildcards" class="external-link" rel="noopener" target="_blank">显式指定</a>。
+ 当 `allow_credentials` 设为 `True` 时,`allow_origins`、`allow_methods` 和 `allow_headers` 都不能设为 `['*']`。它们必须[显式指定](https://developer.mozilla.org/en-US/docs/Web/HTTP/CORS#credentialed_requests_and_wildcards)。
* `expose_headers` - 指示可以被浏览器访问的响应头。默认为 `[]`。
* `max_age` - 设定浏览器缓存 CORS 响应的最长时间,单位是秒。默认为 `600`。
## 更多信息 { #more-info }
-更多关于 <abbr title="Cross-Origin Resource Sharing - 跨域资源共享">CORS</abbr> 的信息,请查看 <a href="https://developer.mozilla.org/en-US/docs/Web/HTTP/CORS" class="external-link" target="_blank">Mozilla CORS 文档</a>。
+更多关于 <abbr title="Cross-Origin Resource Sharing - 跨域资源共享">CORS</abbr> 的信息,请查看 [Mozilla CORS 文档](https://developer.mozilla.org/en-US/docs/Web/HTTP/CORS)。
/// note | 技术细节
/// info | 信息
-更多信息请检查 <a href="https://docs.python.org/3/library/__main__.html" class="external-link" target="_blank">Python 官方文档</a>.
+更多信息请检查 [Python 官方文档](https://docs.python.org/3/library/__main__.html).
///
本例中,使用的是自定义响应头 `X-Key` 和 `X-Token`。
-但实际开发中,尤其是在实现安全措施时,最好使用 FastAPI 内置的[安全工具](../security/index.md){.internal-link target=_blank}(详见下一章)。
+但实际开发中,尤其是在实现安全措施时,最好使用 FastAPI 内置的[安全工具(下一章)](../security/index.md)。
///
## 为一组路径操作定义依赖项 { #dependencies-for-a-group-of-path-operations }
-稍后,[大型应用 - 多文件](../../tutorial/bigger-applications.md){.internal-link target=_blank}一章中会介绍如何使用多个文件创建大型应用程序,在这一章中,您将了解到如何为一组*路径操作*声明单个 `dependencies` 参数。
+稍后,[大型应用 - 多文件](../../tutorial/bigger-applications.md)一章中会介绍如何使用多个文件创建大型应用程序,在这一章中,您将了解到如何为一组*路径操作*声明单个 `dependencies` 参数。
## 全局依赖项 { #global-dependencies }
任何可以与以下装饰器一起使用的函数:
-* <a href="https://docs.python.org/3/library/contextlib.html#contextlib.contextmanager" class="external-link" target="_blank">`@contextlib.contextmanager`</a> 或
-* <a href="https://docs.python.org/3/library/contextlib.html#contextlib.asynccontextmanager" class="external-link" target="_blank">`@contextlib.asynccontextmanager`</a>
+* [`@contextlib.contextmanager`](https://docs.python.org/3/library/contextlib.html#contextlib.contextmanager) 或
+* [`@contextlib.asynccontextmanager`](https://docs.python.org/3/library/contextlib.html#contextlib.asynccontextmanager)
都可以作为 **FastAPI** 的依赖项。
/// note | 技术细节
-这要归功于 Python 的<a href="https://docs.python.org/3/library/contextlib.html" class="external-link" target="_blank">上下文管理器</a>。
+这要归功于 Python 的[上下文管理器](https://docs.python.org/3/library/contextlib.html)。
**FastAPI** 在内部使用它们来实现这一点。
{* ../../docs_src/dependencies/tutorial008b_an_py310.py hl[18:22,31] *}
-如果你想捕获异常并基于它创建一个自定义响应,请创建一个[自定义异常处理器](../handling-errors.md#install-custom-exception-handlers){.internal-link target=_blank}。
+如果你想捕获异常并基于它创建一个自定义响应,请创建一个[自定义异常处理器](../handling-errors.md#install-custom-exception-handlers)。
## 同时使用 `yield` 和 `except` 的依赖项 { #dependencies-with-yield-and-except }
带有 `yield` 的依赖项随着时间演进以涵盖不同的用例并修复了一些问题。
-如果你想了解在不同 FastAPI 版本中发生了哪些变化,可以在进阶指南中阅读更多:[高级依赖项 —— 包含 `yield`、`HTTPException`、`except` 和后台任务的依赖项](../../advanced/advanced-dependencies.md#dependencies-with-yield-httpexception-except-and-background-tasks){.internal-link target=_blank}。
+如果你想了解在不同 FastAPI 版本中发生了哪些变化,可以在进阶指南中阅读更多:[高级依赖项 —— 包含 `yield`、`HTTPException`、`except` 和后台任务的依赖项](../../advanced/advanced-dependencies.md#dependencies-with-yield-httpexception-except-and-background-tasks)。
## 上下文管理器 { #context-managers }
“上下文管理器”是你可以在 `with` 语句中使用的任意 Python 对象。
-例如,<a href="https://docs.python.org/3/tutorial/inputoutput.html#reading-and-writing-files" class="external-link" target="_blank">你可以用 `with` 来读取文件</a>:
+例如,[你可以用 `with` 来读取文件](https://docs.python.org/3/tutorial/inputoutput.html#reading-and-writing-files):
```Python
with open("./somefile.txt") as f:
///
-在 Python 中,你可以通过<a href="https://docs.python.org/3/reference/datamodel.html#context-managers" class="external-link" target="_blank">创建一个带有 `__enter__()` 和 `__exit__()` 方法的类</a>来创建上下文管理器。
+在 Python 中,你可以通过[创建一个带有 `__enter__()` 和 `__exit__()` 方法的类](https://docs.python.org/3/reference/datamodel.html#context-managers)来创建上下文管理器。
你也可以在 **FastAPI** 的带有 `yield` 的依赖中,使用依赖函数内部的 `with` 或 `async with` 语句来使用它们:
另一种创建上下文管理器的方式是:
-* <a href="https://docs.python.org/3/library/contextlib.html#contextlib.contextmanager" class="external-link" target="_blank">`@contextlib.contextmanager`</a> 或
-* <a href="https://docs.python.org/3/library/contextlib.html#contextlib.asynccontextmanager" class="external-link" target="_blank">`@contextlib.asynccontextmanager`</a>
+* [`@contextlib.contextmanager`](https://docs.python.org/3/library/contextlib.html#contextlib.contextmanager) 或
+* [`@contextlib.asynccontextmanager`](https://docs.python.org/3/library/contextlib.html#contextlib.asynccontextmanager)
用它们去装饰一个只包含单个 `yield` 的函数。
有时,我们要为整个应用添加依赖项。
-通过与[将 `dependencies` 添加到*路径操作装饰器*](dependencies-in-path-operation-decorators.md){.internal-link target=_blank} 类似的方式,可以把依赖项添加至整个 `FastAPI` 应用。
+通过与[将 `dependencies` 添加到*路径操作装饰器*](dependencies-in-path-operation-decorators.md) 类似的方式,可以把依赖项添加至整个 `FastAPI` 应用。
这样一来,就可以为所有*路径操作*应用该依赖项:
{* ../../docs_src/dependencies/tutorial012_an_py310.py hl[17] *}
-[将 `dependencies` 添加到*路径操作装饰器*](dependencies-in-path-operation-decorators.md){.internal-link target=_blank} 一章的思路均适用于全局依赖项, 在本例中,这些依赖项可以用于应用中的所有*路径操作*。
+[将 `dependencies` 添加到*路径操作装饰器*](dependencies-in-path-operation-decorators.md) 一章的思路均适用于全局依赖项, 在本例中,这些依赖项可以用于应用中的所有*路径操作*。
## 为一组路径操作定义依赖项 { #dependencies-for-groups-of-path-operations }
-稍后,[大型应用 - 多文件](../../tutorial/bigger-applications.md){.internal-link target=_blank}一章中会介绍如何使用多个文件创建大型应用程序,在这一章中,您将了解到如何为一组*路径操作*声明单个 `dependencies` 参数。
+稍后,[大型应用 - 多文件](../../tutorial/bigger-applications.md)一章中会介绍如何使用多个文件创建大型应用程序,在这一章中,你将了解到如何为一组*路径操作*声明单个 `dependencies` 参数。
如果你的版本较旧,尝试使用 `Annotated` 会报错。
-在使用 `Annotated` 之前,请确保[升级 FastAPI 版本](../../deployment/versions.md#upgrading-the-fastapi-versions){.internal-link target=_blank}到至少 0.95.1。
+在使用 `Annotated` 之前,请确保[升级 FastAPI 版本](../../deployment/versions.md#upgrading-the-fastapi-versions)到至少 0.95.1。
///
/// note | 注意
-如果不了解异步,请参阅文档中关于 `async` 和 `await` 的章节:[异步:*“着急了?”*](../../async.md#in-a-hurry){.internal-link target=_blank}。
+如果不了解异步,请参阅文档中关于 `async` 和 `await` 的章节:[异步:*“着急了?”*](../../async.md#in-a-hurry)。
///
例如,它不接收`datetime`这类的对象,因为这些对象与JSON不兼容。
-因此,`datetime`对象必须转换为包含<a href="https://en.wikipedia.org/wiki/ISO_8601" class="external-link" target="_blank">ISO 格式</a>的`str`类型对象。
+因此,`datetime`对象必须转换为包含[ISO 格式](https://en.wikipedia.org/wiki/ISO_8601)的`str`类型对象。
同样,这个数据库也不会接收Pydantic模型(带有属性的对象),而只接收`dict`。
在这个例子中,它将Pydantic模型转换为`dict`,并将`datetime`转换为`str`。
-调用它的结果后就可以使用Python标准编码中的<a href="https://docs.python.org/3/library/json.html#json.dumps" class="external-link" target="_blank">`json.dumps()`</a>。
+调用它的结果后就可以使用Python标准编码中的[`json.dumps()`](https://docs.python.org/3/library/json.html#json.dumps)。
这个操作不会返回一个包含JSON格式(作为字符串)数据的庞大的`str`。它将返回一个Python标准数据结构(例如`dict`),其值和子值都与JSON兼容。
* `datetime.timedelta`:
* 一个 Python `datetime.timedelta`.
* 在请求和响应中将表示为 `float` 代表总秒数。
- * Pydantic 也允许将其表示为 "ISO 8601 时间差异编码", <a href="https://docs.pydantic.dev/latest/concepts/serialization/#custom-serializers" class="external-link" target="_blank">查看文档了解更多信息</a>。
+ * Pydantic 也允许将其表示为 "ISO 8601 时间差异编码", [查看文档了解更多信息](https://docs.pydantic.dev/latest/concepts/serialization/#custom-serializers)。
* `frozenset`:
* 在请求和响应中,作为 `set` 对待:
* 在请求中,列表将被读取,消除重复,并将其转换为一个 `set`。
* `Decimal`:
* 标准的 Python `Decimal`。
* 在请求和响应中被当做 `float` 一样处理。
-* 您可以在这里检查所有有效的 Pydantic 数据类型: <a href="https://docs.pydantic.dev/latest/usage/types/types/" class="external-link" target="_blank">Pydantic data types</a>.
+* 您可以在这里检查所有有效的 Pydantic 数据类型: [Pydantic data types](https://docs.pydantic.dev/latest/usage/types/types/)。
## 例子 { #example }
不要存储用户的明文密码。始终只存储之后可用于校验的“安全哈希”。
-如果你还不了解,可以在[安全性章节](security/simple-oauth2.md#password-hashing){.internal-link target=_blank}中学习什么是“密码哈希”。
+如果你还不了解,可以在[安全性章节](security/simple-oauth2.md#password-hashing)中学习什么是“密码哈希”。
///
UserInDB(**user_in.model_dump())
```
-……因为 `user_in.model_dump()` 是 `dict`,在传递给 `UserInDB` 时,把 `**` 加在 `user_in.model_dump()` 前,可以让 Python 进行解包。
+...因为 `user_in.model_dump()` 是 `dict`,在传递给 `UserInDB` 时,把 `**` 加在 `user_in.model_dump()` 前,可以让 Python 进行解包。
这样,就可以用其它 Pydantic 模型中的数据生成 Pydantic 模型。
UserInDB(**user_in.model_dump(), hashed_password=hashed_password)
```
-……输出结果如下:
+...输出结果如下:
```Python
UserInDB(
在 OpenAPI 中会用 `anyOf` 表示。
-为此,请使用 Python 标准类型提示 <a href="https://docs.python.org/3/library/typing.html#typing.Union" class="external-link" target="_blank">`typing.Union`</a>:
+为此,请使用 Python 标准类型提示 [`typing.Union`](https://docs.python.org/3/library/typing.html#typing.Union):
/// note | 注意
-定义 <a href="https://docs.pydantic.dev/latest/concepts/types/#unions" class="external-link" target="_blank">`Union`</a> 类型时,要把更具体的类型写在前面,然后是不太具体的类型。下例中,更具体的 `PlaneItem` 位于 `Union[PlaneItem, CarItem]` 中的 `CarItem` 之前。
+定义 [`Union`](https://docs.pydantic.dev/latest/concepts/types/#unions) 类型时,要把更具体的类型写在前面,然后是不太具体的类型。下例中,更具体的 `PlaneItem` 位于 `Union[PlaneItem, CarItem]` 中的 `CarItem` 之前。
///
<div class="termy">
```console
-$ <font color="#4E9A06">fastapi</font> dev <u style="text-decoration-style:solid">main.py</u>
+$ <font color="#4E9A06">fastapi</font> dev
<span style="background-color:#009485"><font color="#D3D7CF"> FastAPI </font></span> Starting development server 🚀
### 查看 { #check-it }
-打开浏览器访问 <a href="http://127.0.0.1:8000" class="external-link" target="_blank">http://127.0.0.1:8000</a>。
+打开浏览器访问 [http://127.0.0.1:8000](http://127.0.0.1:8000)。
你将看到如下的 JSON 响应:
### 交互式 API 文档 { #interactive-api-docs }
-跳转到 <a href="http://127.0.0.1:8000/docs" class="external-link" target="_blank">http://127.0.0.1:8000/docs</a>。
+跳转到 [http://127.0.0.1:8000/docs](http://127.0.0.1:8000/docs)。
-你将会看到自动生成的交互式 API 文档(由 <a href="https://github.com/swagger-api/swagger-ui" class="external-link" target="_blank">Swagger UI</a> 提供):
+你将会看到自动生成的交互式 API 文档(由 [Swagger UI](https://github.com/swagger-api/swagger-ui) 提供):

### 可选的 API 文档 { #alternative-api-docs }
-前往 <a href="http://127.0.0.1:8000/redoc" class="external-link" target="_blank">http://127.0.0.1:8000/redoc</a>。
+前往 [http://127.0.0.1:8000/redoc](http://127.0.0.1:8000/redoc)。
-你将会看到可选的自动生成文档 (由 <a href="https://github.com/Rebilly/ReDoc" class="external-link" target="_blank">ReDoc</a> 提供):
+你将会看到可选的自动生成文档 (由 [ReDoc](https://github.com/Rebilly/ReDoc) 提供):

#### API「模式」 { #api-schema }
-在这种场景下,<a href="https://github.com/OAI/OpenAPI-Specification" class="external-link" target="_blank">OpenAPI</a> 是一种规定如何定义 API 模式的规范。
+在这种场景下,[OpenAPI](https://github.com/OAI/OpenAPI-Specification) 是一种规定如何定义 API 模式的规范。
「模式」的定义包括你的 API 路径,以及它们可能使用的参数等等。
如果你对原始的 OpenAPI 模式长什么样子感到好奇,FastAPI 自动生成了包含所有 API 描述的 JSON(模式)。
-你可以直接在:<a href="http://127.0.0.1:8000/openapi.json" class="external-link" target="_blank">http://127.0.0.1:8000/openapi.json</a> 看到它。
+你可以直接在:[http://127.0.0.1:8000/openapi.json](http://127.0.0.1:8000/openapi.json) 看到它。
它将显示以如下内容开头的 JSON:
你还可以使用它自动生成与你的 API 进行通信的客户端代码。例如 web 前端,移动端或物联网嵌入程序。
+### 在 `pyproject.toml` 中配置应用 `entrypoint` { #configure-the-app-entrypoint-in-pyproject-toml }
+
+你可以在 `pyproject.toml` 文件中配置应用的位置,例如:
+
+```toml
+[tool.fastapi]
+entrypoint = "main:app"
+```
+
+该 `entrypoint` 会告诉 `fastapi` 命令按如下方式导入应用:
+
+```python
+from main import app
+```
+
+如果你的代码结构如下:
+
+```
+.
+├── backend
+│ ├── main.py
+│ ├── __init__.py
+```
+
+那么你可以将 `entrypoint` 设置为:
+
+```toml
+[tool.fastapi]
+entrypoint = "backend.main:app"
+```
+
+这等价于:
+
+```python
+from backend.main import app
+```
+
+### `fastapi dev` 带路径 { #fastapi-dev-with-path }
+
+你也可以把文件路径传给 `fastapi dev` 命令,它会尝试推断要使用的 FastAPI 应用对象:
+
+```console
+$ fastapi dev main.py
+```
+
+但这样每次调用 `fastapi` 命令时都需要记得传入正确的路径。
+
+另外,其他工具可能无法找到它,例如 [VS Code 扩展](../editor-support.md) 或 [FastAPI Cloud](https://fastapicloud.com),因此推荐在 `pyproject.toml` 中使用 `entrypoint`。
+
### 部署你的应用(可选) { #deploy-your-app-optional }
-你可以选择将 FastAPI 应用部署到 <a href="https://fastapicloud.com" class="external-link" target="_blank">FastAPI Cloud</a>,如果还没有,先去加入候补名单。🚀
+你可以选择将 FastAPI 应用部署到 [FastAPI Cloud](https://fastapicloud.com),如果还没有,先去加入候补名单。🚀
如果你已经拥有 **FastAPI Cloud** 账户(我们从候补名单邀请了你 😉),你可以用一条命令部署应用。
`FastAPI` 是直接从 `Starlette` 继承的类。
-你可以通过 `FastAPI` 使用所有的 <a href="https://www.starlette.dev/" class="external-link" target="_blank">Starlette</a> 的功能。
+你可以通过 `FastAPI` 使用所有的 [Starlette](https://www.starlette.dev/) 的功能。
///
* 请求路径为 `/`
* 使用 <dfn title="一种 HTTP GET 方法"><code>get</code> 操作</dfn>
-/// info | `@decorator` Info
+/// info | `@decorator` 信息
`@something` 语法在 Python 中被称为「装饰器」。
/// note
-如果你不知道两者的区别,请查阅 [并发: *赶时间吗?*](../async.md#in-a-hurry){.internal-link target=_blank}。
+如果你不知道两者的区别,请查阅 [并发: *赶时间吗?*](../async.md#in-a-hurry)。
///
### 步骤 6:部署 { #step-6-deploy-it }
-用一条命令将你的应用部署到 **<a href="https://fastapicloud.com" class="external-link" target="_blank">FastAPI Cloud</a>**:`fastapi deploy`。🎉
+用一条命令将你的应用部署到 **[FastAPI Cloud](https://fastapicloud.com)**:`fastapi deploy`。🎉
#### 关于 FastAPI Cloud { #about-fastapi-cloud }
-**<a href="https://fastapicloud.com" class="external-link" target="_blank">FastAPI Cloud</a>** 由 **FastAPI** 的作者和团队打造。
+**[FastAPI Cloud](https://fastapicloud.com)** 由 **FastAPI** 的作者和团队打造。
它以最小的投入简化了 **构建**、**部署** 和 **访问** API 的流程。
## 安装自定义异常处理器 { #install-custom-exception-handlers }
-可以使用<a href="https://www.starlette.dev/exceptions/" class="external-link" target="_blank">与 Starlette 相同的异常处理工具</a>添加自定义异常处理器。
+可以使用[与 Starlette 相同的异常处理工具](https://www.starlette.dev/exceptions/)添加自定义异常处理器。
假设有一个自定义异常 `UnicornException`(你自己或你使用的库可能会 `raise` 它)。
所有代码片段都可以复制后直接使用(它们实际上是经过测试的 Python 文件)。
-要运行任何示例,请将代码复制到 `main.py` 文件中,然后使用以下命令启动 `fastapi dev`:
+要运行任何示例,请将代码复制到 `main.py` 文件中,然后启动 `fastapi dev`:
<div class="termy">
```console
-$ <font color="#4E9A06">fastapi</font> dev <u style="text-decoration-style:solid">main.py</u>
+$ <font color="#4E9A06">fastapi</font> dev
<span style="background-color:#009485"><font color="#D3D7CF"> FastAPI </font></span> Starting development server 🚀
第一个步骤是安装 FastAPI.
-请确保您创建并激活一个[虚拟环境](../virtual-environments.md){.internal-link target=_blank},然后**安装 FastAPI**:
+请确保您创建并激活一个[虚拟环境](../virtual-environments.md),然后**安装 FastAPI**:
<div class="termy">
/// note | 注意
-当您使用 `pip install "fastapi[standard]"` 安装时,它会附带一些默认的可选标准依赖项,其中包括 `fastapi-cloud-cli`,它可以让您部署到 <a href="https://fastapicloud.com" class="external-link" target="_blank">FastAPI Cloud</a>。
+当您使用 `pip install "fastapi[standard]"` 安装时,它会附带一些默认的可选标准依赖项,其中包括 `fastapi-cloud-cli`,它可以让您部署到 [FastAPI Cloud](https://fastapicloud.com)。
如果您不想安装这些可选依赖,可以选择安装 `pip install fastapi`。
///
+/// tip | 提示
+
+FastAPI 提供了一个[VS Code 官方扩展](https://marketplace.visualstudio.com/items?itemName=FastAPILabs.fastapi-vscode)(也支持 Cursor),包含众多功能,例如路径操作浏览器、路径操作搜索、测试中的 CodeLens 导航(从测试跳转到定义),以及从编辑器内进行 FastAPI Cloud 部署和查看日志。
+
+///
+
## 进阶用户指南 { #advanced-user-guide }
在本**教程-用户指南**之后,您可以阅读**进阶用户指南**。
| `version` | `string` | API 的版本。这是您自己的应用程序的版本,而不是 OpenAPI 的版本。例如 `2.5.0`。 |
| `terms_of_service` | `str` | API 服务条款的 URL。如果提供,则必须是 URL。 |
| `contact` | `dict` | 公开的 API 的联系信息。它可以包含多个字段。<details><summary><code>contact</code> 字段</summary><table><thead><tr><th>参数</th><th>类型</th><th>描述</th></tr></thead><tbody><tr><td><code>name</code></td><td><code>str</code></td><td>联系人/组织的识别名称。</td></tr><tr><td><code>url</code></td><td><code>str</code></td><td>指向联系信息的 URL。必须采用 URL 格式。</td></tr><tr><td><code>email</code></td><td><code>str</code></td><td>联系人/组织的电子邮件地址。必须采用电子邮件地址的格式。</td></tr></tbody></table></details> |
-| `license_info` | `dict` | 公开的 API 的许可证信息。它可以包含多个字段。<details><summary><code>license_info</code> 字段</summary><table><thead><tr><th>参数</th><th>类型</th><th>描述</th></tr></thead><tbody><tr><td><code>name</code></td><td><code>str</code></td><td><strong>必须</strong>(如果设置了 <code>license_info</code>)。用于 API 的许可证名称。</td></tr><tr><td><code>identifier</code></td><td><code>str</code></td><td>API 的 <a href="https://spdx.org/licenses/" class="external-link" target="_blank">SPDX</a> 许可证表达式。字段 <code>identifier</code> 与字段 <code>url</code> 互斥。<small>自 OpenAPI 3.1.0、FastAPI 0.99.0 起可用。</small></td></tr><tr><td><code>url</code></td><td><code>str</code></td><td>用于 API 的许可证的 URL。必须采用 URL 格式。</td></tr></tbody></table></details> |
+| `license_info` | `dict` | 公开的 API 的许可证信息。它可以包含多个字段。<details><summary><code>license_info</code> 字段</summary><table><thead><tr><th>参数</th><th>类型</th><th>描述</th></tr></thead><tbody><tr><td><code>name</code></td><td><code>str</code></td><td><strong>必须</strong>(如果设置了 <code>license_info</code>)。用于 API 的许可证名称。</td></tr><tr><td><code>identifier</code></td><td><code>str</code></td><td>API 的 [SPDX](https://spdx.org/licenses/) 许可证表达式。字段 <code>identifier</code> 与字段 <code>url</code> 互斥。<small>自 OpenAPI 3.1.0、FastAPI 0.99.0 起可用。</small></td></tr><tr><td><code>url</code></td><td><code>str</code></td><td>用于 API 的许可证的 URL。必须采用 URL 格式。</td></tr></tbody></table></details> |
你可以按如下方式设置它们:
/// info | 信息
-阅读更多关于标签的信息[路径操作配置](path-operation-configuration.md#tags){.internal-link target=_blank}。
+阅读更多关于标签的信息[路径操作配置](path-operation-configuration.md#tags)。
///
如果你有使用 `yield` 的依赖,依赖中的退出代码会在中间件之后运行。
-如果有任何后台任务(会在[后台任务](background-tasks.md){.internal-link target=_blank}一节中介绍,你稍后会看到),它们会在所有中间件之后运行。
+如果有任何后台任务(会在[后台任务](background-tasks.md)一节中介绍,你稍后会看到),它们会在所有中间件之后运行。
///
/// tip
-请记住可以<a href="https://developer.mozilla.org/en-US/docs/Web/HTTP/Headers" class="external-link" target="_blank">使用 `X-` 前缀</a>添加专有自定义请求头。
+请记住可以[使用 `X-` 前缀](https://developer.mozilla.org/en-US/docs/Web/HTTP/Headers)添加专有自定义请求头。
-但是如果你有希望让浏览器中的客户端可见的自定义请求头,你需要把它们加到你的 CORS 配置([CORS (Cross-Origin Resource Sharing)](cors.md){.internal-link target=_blank})的 `expose_headers` 参数中,参见 <a href="https://www.starlette.dev/middleware/#corsmiddleware" class="external-link" target="_blank">Starlette 的 CORS 文档</a>。
+但是如果你有希望让浏览器中的客户端可见的自定义请求头,你需要把它们加到你的 CORS 配置([CORS(跨域资源共享)](cors.md))的 `expose_headers` 参数中,参见 [Starlette 的 CORS 文档](https://www.starlette.dev/middleware/#corsmiddleware)。
///
/// tip
-这里我们使用 <a href="https://docs.python.org/3/library/time.html#time.perf_counter" class="external-link" target="_blank">`time.perf_counter()`</a> 而不是 `time.time()`,因为在这类场景中它可能更精确。🤓
+这里我们使用 [`time.perf_counter()`](https://docs.python.org/3/library/time.html#time.perf_counter) 而不是 `time.time()`,因为在这类场景中它可能更精确。🤓
///
## 其他中间件 { #other-middlewares }
-你可以稍后在[高级用户指南:高级中间件](../advanced/middleware.md){.internal-link target=_blank}中阅读更多关于其他中间件的内容。
+你可以稍后在[高级用户指南:高级中间件](../advanced/middleware.md)中阅读更多关于其他中间件的内容。
你将在下一节中了解如何使用中间件处理 <abbr title="Cross-Origin Resource Sharing - 跨域资源共享">CORS</abbr>。
描述内容比较长且占用多行时,可以在函数的 <dfn title="作为函数内部的第一个表达式(不赋给任何变量)的多行字符串,用于文档用途">docstring</dfn> 中声明*路径操作*的描述,**FastAPI** 会从中读取。
-文档字符串支持 <a href="https://en.wikipedia.org/wiki/Markdown" class="external-link" target="_blank">Markdown</a>,能正确解析和显示 Markdown 的内容,但要注意文档字符串的缩进。
+文档字符串支持 [Markdown](https://en.wikipedia.org/wiki/Markdown),能正确解析和显示 Markdown 的内容,但要注意文档字符串的缩进。
{* ../../docs_src/path_operation_configuration/tutorial004_py310.py hl[17:25] *}
如果你使用的是更旧的版本,尝试使用 `Annotated` 会报错。
-请确保在使用 `Annotated` 之前,将 FastAPI 版本[升级](../deployment/versions.md#upgrading-the-fastapi-versions){.internal-link target=_blank}到至少 0.95.1。
+请确保在使用 `Annotated` 之前,将 FastAPI 版本[升级](../deployment/versions.md#upgrading-the-fastapi-versions)到至少 0.95.1。
///
## 总结 { #recap }
-你能够以与[查询参数和字符串校验](query-params-str-validations.md){.internal-link target=_blank}相同的方式使用 `Query`、`Path`(以及其他你还没见过的类)声明元数据和字符串校验。
+你能够以与[查询参数和字符串校验](query-params-str-validations.md)相同的方式使用 `Query`、`Path`(以及其他你还没见过的类)声明元数据和字符串校验。
而且你还可以声明数值校验:
///
-/// note | æ\8a\80æ\9c¯ç»\86è\8a\82
+/// note | 注æ\84\8f
当你从 `fastapi` 导入 `Query`、`Path` 和其他对象时,它们实际上是函数。
路径参数 `item_id` 的值会作为参数 `item_id` 传递给你的函数。
-运行示例并访问 <a href="http://127.0.0.1:8000/items/foo" class="external-link" target="_blank">http://127.0.0.1:8000/items/foo</a>,可获得如下响应:
+运行示例并访问 [http://127.0.0.1:8000/items/foo](http://127.0.0.1:8000/items/foo),可获得如下响应:
```JSON
{"item_id":"foo"}
## 数据<dfn title="也称为:序列化、解析、编组">转换</dfn> { #data-conversion }
-运行示例并访问 <a href="http://127.0.0.1:8000/items/3" class="external-link" target="_blank">http://127.0.0.1:8000/items/3</a>,返回的响应如下:
+运行示例并访问 [http://127.0.0.1:8000/items/3](http://127.0.0.1:8000/items/3),返回的响应如下:
```JSON
{"item_id":3}
## 数据校验 { #data-validation }
-通过浏览器访问 <a href="http://127.0.0.1:8000/items/foo" class="external-link" target="_blank">http://127.0.0.1:8000/items/foo</a>,接收如下 HTTP 错误信息:
+通过浏览器访问 [http://127.0.0.1:8000/items/foo](http://127.0.0.1:8000/items/foo),接收如下 HTTP 错误信息:
```JSON
{
这是因为路径参数 `item_id` 的值(`"foo"`)的类型不是 `int`。
-值的类型不是 `int` 而是浮点数(`float`)时也会显示同样的错误,比如: <a href="http://127.0.0.1:8000/items/4.2" class="external-link" target="_blank">http://127.0.0.1:8000/items/4.2</a>
+值的类型不是 `int` 而是浮点数(`float`)时也会显示同样的错误,比如: [http://127.0.0.1:8000/items/4.2](http://127.0.0.1:8000/items/4.2)
/// check | 检查
## 文档 { #documentation }
-访问 <a href="http://127.0.0.1:8000/docs" class="external-link" target="_blank">http://127.0.0.1:8000/docs</a>,查看自动生成的交互式 API 文档:
+访问 [http://127.0.0.1:8000/docs](http://127.0.0.1:8000/docs),查看自动生成的交互式 API 文档:
<img src="/img/tutorial/path-params/image01.png">
## 基于标准的好处,备选文档 { #standards-based-benefits-alternative-documentation }
-**FastAPI** 使用 <a href="https://github.com/OAI/OpenAPI-Specification/blob/master/versions/3.1.0.md" class="external-link" target="_blank">OpenAPI</a> 生成概图,所以能兼容很多工具。
+**FastAPI** 使用 [OpenAPI](https://github.com/OAI/OpenAPI-Specification/blob/master/versions/3.1.0.md) 生成概图,所以能兼容很多工具。
-因此,**FastAPI** 还内置了 ReDoc 生成的备选 API 文档,可在此查看 <a href="http://127.0.0.1:8000/redoc" class="external-link" target="_blank">http://127.0.0.1:8000/redoc</a>:
+因此,**FastAPI** 还内置了 ReDoc 生成的备选 API 文档,可在此查看 [http://127.0.0.1:8000/redoc](http://127.0.0.1:8000/redoc):
<img src="/img/tutorial/path-params/image02.png">
## Pydantic { #pydantic }
-FastAPI 充分地利用了 <a href="https://docs.pydantic.dev/" class="external-link" target="_blank">Pydantic</a> 的优势,用它在后台校验数据。众所周知,Pydantic 擅长的就是数据校验。
+FastAPI 充分地利用了 [Pydantic](https://docs.pydantic.dev/) 的优势,用它在后台校验数据。众所周知,Pydantic 擅长的就是数据校验。
同样,`str`、`float`、`bool` 以及很多复合数据类型都可以使用类型声明。
如果你的版本更旧,使用 `Annotated` 会报错。
-在使用 `Annotated` 之前,请确保先[升级 FastAPI 版本](../deployment/versions.md#upgrading-the-fastapi-versions){.internal-link target=_blank}到至少 0.95.1。
+在使用 `Annotated` 之前,请确保先[升级 FastAPI 版本](../deployment/versions.md#upgrading-the-fastapi-versions)到至少 0.95.1。
///
## 在 `q` 参数的类型中使用 `Annotated` { #use-annotated-in-the-type-for-the-q-parameter }
-还记得我之前在[Python 类型简介](../python-types.md#type-hints-with-metadata-annotations){.internal-link target=_blank}中说过可以用 `Annotated` 给参数添加元数据吗?
+还记得我之前在[Python 类型简介](../python-types.md#type-hints-with-metadata-annotations)中说过可以用 `Annotated` 给参数添加元数据吗?
现在正是与 FastAPI 搭配使用它的时候。🚀
q: str | None = Query(default=None)
```
-……会让参数变成可选,默认值为 `None`,等同于:
+...会让参数变成可选,默认值为 `None`,等同于:
```Python
q: str | None = None
q: Annotated[str, Query(default="rick")] = "morty"
```
-……因为不清楚默认值应该是 `"rick"` 还是 `"morty"`。
+...因为不清楚默认值应该是 `"rick"` 还是 `"morty"`。
因此,你应该这样用(推荐):
q: Annotated[str, Query()] = "rick"
```
-……或者在旧代码库中你会见到:
+...或者在旧代码库中你会见到:
```Python
q: str = Query(default="rick")
当你不使用 `Annotated` 而是使用**(旧的)默认值风格**时,如果你在**其他地方**不通过 FastAPI 调用该函数,你必须**记得**给函数传参,否则得到的值会和预期不同(例如得到 `QueryInfo` 之类的对象而不是 `str`)。而你的编辑器不会报错,Python 也不会在调用时报错,只有在函数内部的操作出错时才会暴露问题。
-由于 `Annotated` 可以包含多个元数据标注,你甚至可以用同一个函数与其他工具配合,例如 <a href="https://typer.tiangolo.com/" class="external-link" target="_blank">Typer</a>。🚀
+由于 `Annotated` 可以包含多个元数据标注,你甚至可以用同一个函数与其他工具配合,例如 [Typer](https://typer.tiangolo.com/)。🚀
## 添加更多校验 { #add-more-validations }
最接近的有效名称是 `item_query`。
-但你仍然需要它在 URL 中就是 `item-query`……
+但你仍然需要它在 URL 中就是 `item-query`...
这时可以用 `alias` 参数声明一个别名,FastAPI 会用该别名在 URL 中查找参数值:
在这些情况下,你可以使用**自定义校验函数**,该函数会在正常校验之后应用(例如,在先校验值是 `str` 之后)。
-你可以在 `Annotated` 中使用 <a href="https://docs.pydantic.dev/latest/concepts/validators/#field-after-validator" class="external-link" target="_blank">Pydantic 的 `AfterValidator`</a> 来实现。
+你可以在 `Annotated` 中使用 [Pydantic 的 `AfterValidator`](https://docs.pydantic.dev/latest/concepts/validators/#field-after-validator) 来实现。
/// tip | 提示
-Pydantic 还有 <a href="https://docs.pydantic.dev/latest/concepts/validators/#field-before-validator" class="external-link" target="_blank">`BeforeValidator`</a> 等。🤓
+Pydantic 还有 [`BeforeValidator`](https://docs.pydantic.dev/latest/concepts/validators/#field-before-validator) 等。🤓
///
所以,即使用户没有提供条目 ID,他们仍然会收到一个随机推荐。
-……而我们把这些都放在**一行简单的代码**里完成。🤯 你不爱 Python 吗?🐍
+...而我们把这些都放在**一行简单的代码**里完成。🤯 你不爱 Python 吗?🐍
{* ../../docs_src/query_params_str_validations/tutorial015_an_py310.py ln[22:30] hl[29] *}
# 查询参数 { #query-parameters }
-声明的参数不是路径参数时,路径操作函数会把该参数自动解释为**查询**参数。
+声明的参数不是路径参数时,路径操作函数会把该参数自动解释为“查询”参数。
{* ../../docs_src/query_params/tutorial001_py310.py hl[9] *}
* `skip`:值为 `0`
* `limit`:值为 `10`
-这些值都是 URL 的组成部分,因此,它们的类型**本应**是字符串。
+这些值都是 URL 的组成部分,因此,它们的类型“本应”是字符串。
但声明 Python 类型(上例中为 `int`)之后,这些值就会转换为声明的类型,并进行类型校验。
## 可选参数 { #optional-parameters }
-同理,把默认值设为 `None` 即可声明**可选的**查询参数:
+同理,把默认值设为 `None` 即可声明可选的查询参数:
{* ../../docs_src/query_params/tutorial002_py310.py hl[7] *}
## 必选查询参数 { #required-query-parameters }
-为不是路径参数的参数声明默认值(至此,仅有查询参数),该参数就**不是必选**的了。
+为不是路径参数的参数声明默认值(至此,仅有查询参数),该参数就不是必选的了。
-如果只想把参数设为**可选**,但又不想指定参数的值,则要把默认值设为 `None`。
+如果只想把参数设为可选,但又不想指定参数的值,则要把默认值设为 `None`。
-如果要把查询参数设置为**必选**,就不要声明默认值:
+如果要把查询参数设置为必选,就不要声明默认值:
{* ../../docs_src/query_params/tutorial005_py310.py hl[6:7] *}
/// tip | 提示
-还可以像在[路径参数](path-params.md#predefined-values){.internal-link target=_blank} 中那样使用 `Enum`。
+还可以像在[路径参数](path-params.md#predefined-values)中那样使用 `Enum`。
///
/// info | 信息
-要接收上传的文件,请先安装 <a href="https://github.com/Kludex/python-multipart" class="external-link" target="_blank">`python-multipart`</a>。
+要接收上传的文件,请先安装 [`python-multipart`](https://github.com/Kludex/python-multipart)。
-请确保你创建一个[虚拟环境](../virtual-environments.md){.internal-link target=_blank}、激活它,然后安装,例如:
+请确保你创建一个[虚拟环境](../virtual-environments.md)、激活它,然后安装,例如:
```console
$ pip install python-multipart
* 文件会先存储在内存中,直到达到最大上限,超过该上限后会写入磁盘。
* 因此,非常适合处理图像、视频、大型二进制等大文件,而不会占用所有内存。
* 你可以获取上传文件的元数据。
-* 它提供 <a href="https://docs.python.org/3/glossary.html#term-file-like-object" class="external-link" target="_blank">file-like</a> 的 `async` 接口。
-* 它暴露了一个实际的 Python <a href="https://docs.python.org/3/library/tempfile.html#tempfile.SpooledTemporaryFile" class="external-link" target="_blank">`SpooledTemporaryFile`</a> 对象,你可以直接传给期望「file-like」对象的其他库。
+* 它提供 [file-like](https://docs.python.org/3/glossary.html#term-file-like-object) 的 `async` 接口。
+* 它暴露了一个实际的 Python [`SpooledTemporaryFile`](https://docs.python.org/3/library/tempfile.html#tempfile.SpooledTemporaryFile) 对象,你可以直接传给期望「file-like」对象的其他库。
### `UploadFile` { #uploadfile }
* `filename`:上传的原始文件名字符串(`str`),例如 `myimage.jpg`。
* `content_type`:内容类型(MIME 类型 / 媒体类型)的字符串(`str`),例如 `image/jpeg`。
-* `file`:<a href="https://docs.python.org/3/library/tempfile.html#tempfile.SpooledTemporaryFile" class="external-link" target="_blank">`SpooledTemporaryFile`</a>(一个 <a href="https://docs.python.org/3/glossary.html#term-file-like-object" class="external-link" target="_blank">file-like</a> 对象)。这是实际的 Python 文件对象,你可以直接传递给其他期望「file-like」对象的函数或库。
+* `file`:[`SpooledTemporaryFile`](https://docs.python.org/3/library/tempfile.html#tempfile.SpooledTemporaryFile)(一个 [file-like](https://docs.python.org/3/glossary.html#term-file-like-object) 对象)。这是实际的 Python 文件对象,你可以直接传递给其他期望「file-like」对象的函数或库。
`UploadFile` 具有以下 `async` 方法。它们都会在底层调用对应的文件方法(使用内部的 `SpooledTemporaryFile`)。
contents = myfile.file.read()
```
-/// note | 注意
+/// note | `async` 技术细节
当你使用这些 `async` 方法时,**FastAPI** 会在线程池中运行相应的文件方法并等待其完成。
///
-/// note | 注意
+/// note | Starlette 技术细节
**FastAPI** 的 `UploadFile` 直接继承自 **Starlette** 的 `UploadFile`,但添加了一些必要的部分,使其与 **Pydantic** 以及 FastAPI 的其他部分兼容。
**FastAPI** 会确保从正确的位置读取这些数据,而不是从 JSON 中读取。
-/// note | 注æ\84\8f
+/// note | æ\8a\80æ\9c¯ç»\86è\8a\82
当不包含文件时,来自表单的数据通常使用「媒体类型」`application/x-www-form-urlencoded` 编码。
但当表单包含文件时,会编码为 `multipart/form-data`。如果你使用 `File`,**FastAPI** 会知道需要从请求体的正确位置获取文件。
-如果你想进一步了解这些编码和表单字段,请参阅 <a href="https://developer.mozilla.org/en-US/docs/Web/HTTP/Methods/POST" class="external-link" target="_blank"><abbr title="Mozilla Developer Network - Mozilla 开发者网络">MDN</abbr> 关于 <code>POST</code> 的 Web 文档</a>。
+如果你想进一步了解这些编码和表单字段,请参阅 [<abbr title="Mozilla Developer Network - Mozilla 开发者网络">MDN</abbr> 关于 `POST` 的 Web 文档](https://developer.mozilla.org/en-US/docs/Web/HTTP/Methods/POST)。
///
## 可选文件上传 { #optional-file-upload }
-您可以通过使用标准类型注解并将 `None` 作为默认值的方式将一个文件参数设为可选:
+你可以通过使用标准类型注解并将 `None` 作为默认值的方式将一个文件参数设为可选:
{* ../../docs_src/request_files/tutorial001_02_an_py310.py hl[9,17] *}
## 带有额外元数据的 `UploadFile` { #uploadfile-with-additional-metadata }
-您也可以将 `File()` 与 `UploadFile` 一起使用,例如,设置额外的元数据:
+你也可以将 `File()` 与 `UploadFile` 一起使用,例如,设置额外的元数据:
{* ../../docs_src/request_files/tutorial001_03_an_py310.py hl[9,15] *}
接收的也是含 `bytes` 或 `UploadFile` 的列表(`list`)。
-/// note | 注æ\84\8f
+/// note | æ\8a\80æ\9c¯ç»\86è\8a\82
也可以使用 `from starlette.responses import HTMLResponse`。
/// info | 信息
-要使用表单,首先安装 <a href="https://github.com/Kludex/python-multipart" class="external-link" target="_blank">`python-multipart`</a>。
+要使用表单,首先安装 [`python-multipart`](https://github.com/Kludex/python-multipart)。
-确保你创建一个[虚拟环境](../virtual-environments.md){.internal-link target=_blank},激活它,然后再安装,例如:
+确保你创建一个[虚拟环境](../virtual-environments.md),激活它,然后再安装,例如:
```console
$ pip install python-multipart
/// info | 信息
-接收上传的文件和/或表单数据,首先安装 <a href="https://github.com/Kludex/python-multipart" class="external-link" target="_blank">`python-multipart`</a>。
+接收上传的文件和/或表单数据,首先安装 [`python-multipart`](https://github.com/Kludex/python-multipart)。
-请先创建并激活一个[虚拟环境](../virtual-environments.md){.internal-link target=_blank},然后再安装,例如:
+请先创建并激活一个[虚拟环境](../virtual-environments.md),然后再安装,例如:
```console
$ pip install python-multipart
/// info
-要使用表单,首先安装 <a href="https://github.com/Kludex/python-multipart" class="external-link" target="_blank">`python-multipart`</a>。
+要使用表单,首先安装 [`python-multipart`](https://github.com/Kludex/python-multipart)。
-请先创建并激活一个[虚拟环境](../virtual-environments.md){.internal-link target=_blank},然后再进行安装,例如:
+请先创建并激活一个[虚拟环境](../virtual-environments.md),然后再进行安装,例如:
```console
$ pip install python-multipart
例如,在 OAuth2 规范的一种使用方式(称为“密码流”)中,要求将 `username` 和 `password` 作为表单字段发送。
-<dfn title="规范">规范</dfn> 要求这些字段必须精确命名为 `username` 和 `password`,并且作为表单字段发送,而不是 JSON。
+<dfn title="规范">规范</dfn>要求这些字段必须精确命名为 `username` 和 `password`,并且作为表单字段发送,而不是 JSON。
使用 `Form` 可以像使用 `Body`(以及 `Query`、`Path`、`Cookie`)一样声明相同的配置,包括校验、示例、别名(例如将 `username` 写成 `user-name`)等。
但当表单包含文件时,会编码为 `multipart/form-data`。你将在下一章阅读如何处理文件。
-如果你想了解更多关于这些编码和表单字段的信息,请参阅 <a href="https://developer.mozilla.org/en-US/docs/Web/HTTP/Methods/POST" class="external-link" target="_blank"><abbr title="Mozilla Developer Network - Mozilla 开发者网络">MDN</abbr> Web 文档的 <code>POST</code></a>。
+如果你想了解更多关于这些编码和表单字段的信息,请参阅 [<abbr title="Mozilla Developer Network - Mozilla 开发者网络">MDN</abbr> Web 文档的 `POST`](https://developer.mozilla.org/en-US/docs/Web/HTTP/Methods/POST)。
///
* 在 OpenAPI 的*路径操作*中为响应添加**JSON Schema**。
* 它会被**自动文档**使用。
* 它也会被自动客户端代码生成工具使用。
+* 使用 Pydantic 将返回数据**序列化**为 JSON。Pydantic 使用**Rust**编写,因此会**快很多**。
但更重要的是:
/// info | 信息
-要使用 `EmailStr`,首先安装 <a href="https://github.com/JoshData/python-email-validator" class="external-link" target="_blank">`email-validator`</a>。
+要使用 `EmailStr`,首先安装 [`email-validator`](https://github.com/JoshData/python-email-validator)。
-请先创建并激活一个[虚拟环境](../virtual-environments.md){.internal-link target=_blank},然后安装,例如:
+请先创建并激活一个[虚拟环境](../virtual-environments.md),然后安装,例如:
```console
$ pip install email-validator
### 直接返回 Response { #return-a-response-directly }
-最常见的情况是[直接返回 Response,详见进阶文档](../advanced/response-directly.md){.internal-link target=_blank}。
+最常见的情况是[直接返回 Response,详见进阶文档](../advanced/response-directly.md)。
{* ../../docs_src/response_model/tutorial003_02_py310.py hl[8,10:11] *}
* `response_model_exclude_defaults=True`
* `response_model_exclude_none=True`
-详见 <a href="https://docs.pydantic.dev/1.10/usage/exporting_models/#modeldict" class="external-link" target="_blank">Pydantic 文档</a>中对 `exclude_defaults` 和 `exclude_none` 的说明。
+详见 [Pydantic 文档](https://docs.pydantic.dev/1.10/usage/exporting_models/#modeldict)中对 `exclude_defaults` 和 `exclude_none` 的说明。
///
/// info | 信息
-`status_code` 还能接收 `IntEnum` 类型,比如 Python 的 <a href="https://docs.python.org/3/library/http.html#http.HTTPStatus" class="external-link" target="_blank">`http.HTTPStatus`</a>。
+`status_code` 还能接收 `IntEnum` 类型,比如 Python 的 [`http.HTTPStatus`](https://docs.python.org/3/library/http.html#http.HTTPStatus)。
///
/// tip | 提示
-状态码及适用场景的详情,请参阅 <a href="https://developer.mozilla.org/en-US/docs/Web/HTTP/Status" class="external-link" target="_blank"><abbr title="Mozilla Developer Network - Mozilla 开发者网络">MDN</abbr> 的 HTTP 状态码文档</a>。
+想了解每个状态码的更多信息以及适用场景,请参阅 [<abbr title="Mozilla Developer Network - Mozilla 开发者网络">MDN</abbr> 的 HTTP 状态码文档](https://developer.mozilla.org/en-US/docs/Web/HTTP/Status)。
///
## 更改默认状态码 { #changing-the-default }
-[高级用户指南](../advanced/response-change-status-code.md){.internal-link target=_blank}中,将介绍如何返回与在此声明的默认状态码不同的状态码。
+稍后在[高级用户指南](../advanced/response-change-status-code.md)中,你将看到如何返回与此处声明的默认状态码不同的状态码。
这些额外信息会原样添加到该模型输出的 JSON Schema 中,并会在 API 文档中使用。
-你可以使用属性 `model_config`,它接收一个 `dict`,详见 <a href="https://docs.pydantic.dev/latest/api/config/" class="external-link" target="_blank">Pydantic 文档:配置</a>。
+你可以使用属性 `model_config`,它接收一个 `dict`,详见 [Pydantic 文档:配置](https://docs.pydantic.dev/latest/api/config/)。
你可以设置 `"json_schema_extra"`,其值为一个 `dict`,包含你希望出现在生成 JSON Schema 中的任意附加数据,包括 `examples`。
OpenAPI 还在规范的其他部分添加了 `example` 和 `examples` 字段:
-- <a href="https://github.com/OAI/OpenAPI-Specification/blob/main/versions/3.1.0.md#parameter-object" class="external-link" target="_blank">`Parameter Object`(规范中)</a>,被 FastAPI 的以下内容使用:
+- [`Parameter Object`(规范中)](https://github.com/OAI/OpenAPI-Specification/blob/main/versions/3.1.0.md#parameter-object),被 FastAPI 的以下内容使用:
- `Path()`
- `Query()`
- `Header()`
- `Cookie()`
-- <a href="https://github.com/OAI/OpenAPI-Specification/blob/main/versions/3.1.0.md#media-type-object" class="external-link" target="_blank">`Request Body Object` 中的 `content` 字段里的 `Media Type Object`(规范中)</a>,被 FastAPI 的以下内容使用:
+- [`Request Body Object` 中的 `content` 字段里的 `Media Type Object`(规范中)](https://github.com/OAI/OpenAPI-Specification/blob/main/versions/3.1.0.md#media-type-object),被 FastAPI 的以下内容使用:
- `Body()`
- `File()`
- `Form()`
### JSON Schema 的 `examples` 字段 { #json-schemas-examples-field }
-后来,JSON Schema 在新版本的规范中添加了 <a href="https://json-schema.org/draft/2019-09/json-schema-validation.html#rfc.section.9.5" class="external-link" target="_blank">`examples`</a> 字段。
+后来,JSON Schema 在新版本的规范中添加了 [`examples`](https://json-schema.org/draft/2019-09/json-schema-validation.html#rfc.section.9.5) 字段。
随后新的 OpenAPI 3.1.0 基于最新版本(JSON Schema 2020-12),其中包含了这个新的 `examples` 字段。
/// info | 信息
-当你使用命令 `pip install "fastapi[standard]"` 安装 **FastAPI** 时,<a href="https://github.com/Kludex/python-multipart" class="external-link" target="_blank">`python-multipart`</a> 包会自动安装。
+当你使用命令 `pip install "fastapi[standard]"` 安装 **FastAPI** 时,[`python-multipart`](https://github.com/Kludex/python-multipart) 包会自动安装。
但是,如果你使用 `pip install fastapi`,默认不会包含 `python-multipart` 包。
-如需手动安装,请先创建并激活[虚拟环境](../../virtual-environments.md){.internal-link target=_blank},然后执行:
+如需手动安装,请先创建并激活[虚拟环境](../../virtual-environments.md),然后执行:
```console
$ pip install python-multipart
<div class="termy">
```console
-$ fastapi dev main.py
+$ fastapi dev
<span style="color: green;">INFO</span>: Uvicorn running on http://127.0.0.1:8000 (Press CTRL+C to quit)
```
## 查看 { #check-it }
-打开交互式文档:<a href="http://127.0.0.1:8000/docs" class="external-link" target="_blank">http://127.0.0.1:8000/docs</a>。
+打开交互式文档:[http://127.0.0.1:8000/docs](http://127.0.0.1:8000/docs)。
你会看到类似这样的界面:
因为使用的是相对 URL,若你的 API 位于 `https://example.com/`,它将指向 `https://example.com/token`;若你的 API 位于 `https://example.com/api/v1/`,它将指向 `https://example.com/api/v1/token`。
-使用相对 URL 很重要,这能确保你的应用在诸如[使用代理](../../advanced/behind-a-proxy.md){.internal-link target=_blank}等高级用例中依然正常工作。
+使用相对 URL 很重要,这能确保你的应用在诸如[使用代理](../../advanced/behind-a-proxy.md)等高级用例中依然正常工作。
///
一周后令牌过期,用户将不再被授权,需要重新登录以获取新令牌。而如果用户(或第三方)尝试修改令牌来更改过期时间,你也能发现,因为签名将不匹配。
-如果你想动手体验 JWT 令牌并了解它的工作方式,请访问 <a href="https://jwt.io/" class="external-link" target="_blank">https://jwt.io</a>。
+如果你想动手体验 JWT 令牌并了解它的工作方式,请访问 [https://jwt.io](https://jwt.io/)。
## 安装 `PyJWT` { #install-pyjwt }
我们需要安装 `PyJWT`,以便在 Python 中生成和校验 JWT 令牌。
-请确保创建并激活一个[虚拟环境](../../virtual-environments.md){.internal-link target=_blank},然后安装 `pyjwt`:
+请确保创建并激活一个[虚拟环境](../../virtual-environments.md),然后安装 `pyjwt`:
<div class="termy">
如果你计划使用类似 RSA 或 ECDSA 的数字签名算法,你应该安装加密库依赖项 `pyjwt[crypto]`。
-可以在 <a href="https://pyjwt.readthedocs.io/en/latest/installation.html" class="external-link" target="_blank">PyJWT 安装文档</a>中了解更多。
+可以在 [PyJWT 安装文档](https://pyjwt.readthedocs.io/en/latest/installation.html)中了解更多。
///
推荐的算法是 “Argon2”。
-请确保创建并激活一个[虚拟环境](../../virtual-environments.md){.internal-link target=_blank},然后安装带 Argon2 的 pwdlib:
+请确保创建并激活一个[虚拟环境](../../virtual-environments.md),然后安装带 Argon2 的 pwdlib:
<div class="termy">
## 检查 { #check-it }
-运行服务器并打开文档:<a href="http://127.0.0.1:8000/docs" class="external-link" target="_blank">http://127.0.0.1:8000/docs</a>。
+运行服务器并打开文档:[http://127.0.0.1:8000/docs](http://127.0.0.1:8000/docs)。
你会看到这样的用户界面:
/// info | 信息
-`user_dict` 的说明,详见[**更多模型**一章](../extra-models.md#about-user-in-dict){.internal-link target=_blank}。
+`user_dict` 的说明,详见[**更多模型**一章](../extra-models.md#about-user-in-dict)。
///
## 实际效果 { #see-it-in-action }
-打开 API 文档:<a href="http://127.0.0.1:8000/docs" class="external-link" target="_blank">http://127.0.0.1:8000/docs</a>。
+打开交互式文档:[http://127.0.0.1:8000/docs](http://127.0.0.1:8000/docs)。
### 身份验证 { #authenticate }
**FastAPI** 并不要求你使用 SQL(关系型)数据库。你可以使用你想用的**任何数据库**。
-这里,我们来看一个使用 <a href="https://sqlmodel.tiangolo.com/" class="external-link" target="_blank">SQLModel</a> 的示例。
+这里,我们来看一个使用 [SQLModel](https://sqlmodel.tiangolo.com/) 的示例。
-**SQLModel** 基于 <a href="https://www.sqlalchemy.org/" class="external-link" target="_blank">SQLAlchemy</a> 和 Pydantic 构建。它由 **FastAPI** 的同一作者制作,旨在完美匹配需要使用**SQL 数据库**的 FastAPI 应用程序。
+**SQLModel** 基于 [SQLAlchemy](https://www.sqlalchemy.org/) 和 Pydantic 构建。它由 **FastAPI** 的同一作者制作,旨在完美匹配需要使用**SQL 数据库**的 FastAPI 应用程序。
/// tip | 提示
/// tip | 提示
-有一个使用 **FastAPI** 和 **PostgreSQL** 的官方项目生成器,其中包括了前端和更多工具: <a href="https://github.com/fastapi/full-stack-fastapi-template" class="external-link" target="_blank">https://github.com/fastapi/full-stack-fastapi-template</a>
+有一个使用 **FastAPI** 和 **PostgreSQL** 的官方项目生成器,其中包括了前端和更多工具: [https://github.com/fastapi/full-stack-fastapi-template](https://github.com/fastapi/full-stack-fastapi-template)
///
-这是一个非常简单和简短的教程。如果你想了解一般的数据库、SQL 或更高级的功能,请查看 <a href="https://sqlmodel.tiangolo.com/" class="external-link" target="_blank">SQLModel 文档</a>。
+这是一个非常简单和简短的教程。如果你想了解一般的数据库、SQL 或更高级的功能,请查看 [SQLModel 文档](https://sqlmodel.tiangolo.com/)。
## 安装 `SQLModel` { #install-sqlmodel }
-首先,确保你创建并激活了[虚拟环境](../virtual-environments.md){.internal-link target=_blank},然后安装 `sqlmodel`:
+首先,确保你创建并激活了[虚拟环境](../virtual-environments.md),然后安装 `sqlmodel`:
<div class="termy">
* `Field(primary_key=True)` 会告诉 SQLModel `id` 是 SQL 数据库中的**主键**(你可以在 SQLModel 文档中了解更多关于 SQL 主键的信息)。
- **注意:** 我们为主键字段使用 `int | None`,这样在 Python 代码中我们可以在没有 `id`(`id=None`)的情况下创建对象,并假定数据库在保存时会生成它。SQLModel 会理解数据库会提供 `id`,并在数据库模式中将该列定义为非空的 `INTEGER`。详见 <a href="https://sqlmodel.tiangolo.com/tutorial/create-db-and-table/#primary-key-id" class="external-link" target="_blank">SQLModel 关于主键的文档</a>。
+ **注意:** 我们为主键字段使用 `int | None`,这样在 Python 代码中我们可以在没有 `id`(`id=None`)的情况下创建对象,并假定数据库在保存时会生成它。SQLModel 会理解数据库会提供 `id`,并在数据库模式中将该列定义为非空的 `INTEGER`。详见 [SQLModel 关于主键的文档](https://sqlmodel.tiangolo.com/tutorial/create-db-and-table/#primary-key-id)。
* `Field(index=True)` 会告诉 SQLModel 应该为此列创建一个 **SQL 索引**,这样在读取按此列过滤的数据时,程序能在数据库中进行更快的查找。
/// tip | 提示
-SQLModel 将会拥有封装 Alembic 的迁移工具,但目前你可以直接使用 <a href="https://alembic.sqlalchemy.org/en/latest/" class="external-link" target="_blank">Alembic</a>。
+SQLModel 将会拥有封装 Alembic 的迁移工具,但目前你可以直接使用 [Alembic](https://alembic.sqlalchemy.org/en/latest/)。
///
<div class="termy">
```console
-$ fastapi dev main.py
+$ fastapi dev
<span style="color: green;">INFO</span>: Uvicorn running on http://127.0.0.1:8000 (Press CTRL+C to quit)
```
<div class="termy">
```console
-$ fastapi dev main.py
+$ fastapi dev
<span style="color: green;">INFO</span>: Uvicorn running on http://127.0.0.1:8000 (Press CTRL+C to quit)
```
## 总结 { #recap }
-你可以使用 <a href="https://sqlmodel.tiangolo.com/" class="external-link" target="_blank">**SQLModel**</a> 与 SQL 数据库进行交互,并通过*数据模型*和*表模型*简化代码。
+你可以使用 [**SQLModel**](https://sqlmodel.tiangolo.com/) 与 SQL 数据库进行交互,并通过*数据模型*和*表模型*简化代码。
-你可以在 **SQLModel** 文档中学习到更多内容,其中有一个更详细的<a href="https://sqlmodel.tiangolo.com/tutorial/fastapi/" class="external-link" target="_blank">将 SQLModel 与 **FastAPI** 一起使用的迷你教程</a>。🚀
+你可以在 **SQLModel** 文档中学习到更多内容,其中有一个更详细的[将 SQLModel 与 **FastAPI** 一起使用的迷你教程](https://sqlmodel.tiangolo.com/tutorial/fastapi/)。🚀
这与使用 `APIRouter` 不同,因为挂载的应用是完全独立的。主应用的 OpenAPI 和文档不会包含已挂载应用的任何内容,等等。
-你可以在[高级用户指南](../advanced/index.md){.internal-link target=_blank}中了解更多。
+你可以在[高级用户指南](../advanced/index.md)中了解更多。
## 细节 { #details }
## 更多信息 { #more-info }
-更多细节和选项请查阅 <a href="https://www.starlette.dev/staticfiles/" class="external-link" target="_blank">Starlette 的静态文件文档</a>。
+更多细节和选项请查阅 [Starlette 的静态文件文档](https://www.starlette.dev/staticfiles/)。
# 测试 { #testing }
-感谢 <a href="https://www.starlette.dev/testclient/" class="external-link" target="_blank">Starlette</a>,测试**FastAPI** 应用轻松又愉快。
+感谢 [Starlette](https://www.starlette.dev/testclient/),测试**FastAPI** 应用轻松又愉快。
-它基于 <a href="https://www.python-httpx.org" class="external-link" target="_blank">HTTPX</a>, 而HTTPX又是基于Requests设计的,所以很相似且易懂。
+它基于 [HTTPX](https://www.python-httpx.org),而HTTPX又是基于Requests设计的,所以很相似且易懂。
-有了它,你可以直接与**FastAPI**一起使用 <a href="https://docs.pytest.org/" class="external-link" target="_blank">pytest</a>。
+有了它,你可以直接与**FastAPI**一起使用 [pytest](https://docs.pytest.org/)。
## 使用 `TestClient` { #using-testclient }
/// info | 信息
-要使用 `TestClient`,先要安装 <a href="https://www.python-httpx.org" class="external-link" target="_blank">`httpx`</a>。
+要使用 `TestClient`,先要安装 [`httpx`](https://www.python-httpx.org)。
-确保你创建并激活一个[虚拟环境](../virtual-environments.md){.internal-link target=_blank},然后再安装,例如:
+确保你创建并激活一个[虚拟环境](../virtual-environments.md),然后再安装,例如:
```console
$ pip install httpx
/// tip | 提示
-除了发送请求之外,如果你还想测试时在FastAPI应用中调用 `async` 函数(例如异步数据库函数), 可以在高级教程中看下 [Async Tests](../advanced/async-tests.md){.internal-link target=_blank} 。
+除了发送请求之外,如果你还想测试时在FastAPI应用中调用 `async` 函数(例如异步数据库函数), 可以在高级教程中看下 [Async Tests](../advanced/async-tests.md) 。
///
### **FastAPI** app 文件 { #fastapi-app-file }
-假设你有一个像 [更大的应用](bigger-applications.md){.internal-link target=_blank} 中所描述的文件结构:
+假设你有一个像[更大的应用](bigger-applications.md)中所描述的文件结构:
```
.
│ └── test_main.py
```
-假设现在包含**FastAPI** app的文件 `main.py` 有些其他**路径操作**。
+假设现在包含**FastAPI** app的文件 `main.py` 有些其他**路径操作**。
有个 `GET` 操作会返回错误。
{* ../../docs_src/app_testing/app_b_an_py310/test_main.py *}
-每当你需要客户端在请求中传递信息,但你不知道如何传递时,你可以通过搜索(谷歌)如何用 `httpx`做,或者是用 `requests` 做,毕竟HTTPX的设计是基于Requests的设计的。
+每当你需要客户端在请求中传递信息,但你不知道如何传递时,你可以通过搜索(谷歌)如何用 `httpx` 做,或者是用 `requests` 做,毕竟HTTPX的设计是基于Requests的设计的。
接着只需在测试中同样操作。
* 要发送 *headers*,传 `dict` 给 `headers` 参数。
* 对于 *cookies*,传 `dict` 给 `cookies` 参数。
-关于如何传数据给后端的更多信息 (使用`httpx` 或 `TestClient`),请查阅 <a href="https://www.python-httpx.org" class="external-link" target="_blank">HTTPX 文档</a>.
+关于如何传数据给后端的更多信息(使用 `httpx` 或 `TestClient`),请查阅 [HTTPX 文档](https://www.python-httpx.org)。
/// info | 信息
注意 `TestClient` 接收可以被转化为JSON的数据,而不是Pydantic模型。
-如果你在测试中有一个Pydantic模型,并且你想在测试时发送它的数据给应用,你可以使用在[JSON Compatible Encoder](encoder.md){.internal-link target=_blank}介绍的`jsonable_encoder` 。
+如果你在测试中有一个Pydantic模型,并且你想在测试时发送它的数据给应用,你可以使用在[JSON Compatible Encoder](encoder.md)介绍的`jsonable_encoder` 。
///
之后,你只需要安装 `pytest`。
-确保你创建并激活一个[虚拟环境](../virtual-environments.md){.internal-link target=_blank},然后再安装,例如:
+确保你创建并激活一个[虚拟环境](../virtual-environments.md),然后再安装,例如:
<div class="termy">
这个页面将教你如何使用**虚拟环境**以及了解它们的工作原理。
-如果你计划使用一个**可以为你管理一切的工具**(包括安装 Python),试试 <a href="https://github.com/astral-sh/uv" class="external-link" target="_blank">uv</a>。
+如果你计划使用一个**可以为你管理一切的工具**(包括安装 Python),试试 [uv](https://github.com/astral-sh/uv)。
///
//// tab | `uv`
-如果你安装了 <a href="https://github.com/astral-sh/uv" class="external-link" target="_blank">`uv`</a>,你也可以使用它来创建一个虚拟环境。
+如果你安装了 [`uv`](https://github.com/astral-sh/uv),你也可以使用它来创建一个虚拟环境。
<div class="termy">
//// tab | Windows Bash
-或者,如果你在 Windows 上使用 Bash(例如 <a href="https://gitforwindows.org/" class="external-link" target="_blank">Git Bash</a>):
+或者,如果你在 Windows 上使用 Bash(例如 [Git Bash](https://gitforwindows.org/)):
<div class="termy">
/// tip | 提示
-如果你使用 <a href="https://github.com/astral-sh/uv" class="external-link" target="_blank">`uv`</a> 来安装内容,而不是 `pip`,那么你就不需要升级 `pip`。😎
+如果你使用 [`uv`](https://github.com/astral-sh/uv) 来安装内容,而不是 `pip`,那么你就不需要升级 `pip`。😎
///
/// tip | 提示
-如果你使用 <a href="https://github.com/astral-sh/uv" class="external-link" target="_blank">`uv`</a> 来创建虚拟环境,它会自动为你完成这个操作,你可以跳过这一步。😎
+如果你使用 [`uv`](https://github.com/astral-sh/uv) 来创建虚拟环境,它会自动为你完成这个操作,你可以跳过这一步。😎
///
//// tab | `uv`
-如果你有 <a href="https://github.com/astral-sh/uv" class="external-link" target="_blank">`uv`</a>:
+如果你有 [`uv`](https://github.com/astral-sh/uv):
<div class="termy">
//// tab | `uv`
-如果你有 <a href="https://github.com/astral-sh/uv" class="external-link" target="_blank">`uv`</a>:
+如果你有 [`uv`](https://github.com/astral-sh/uv):
<div class="termy">
例如:
-* <a href="https://code.visualstudio.com/docs/python/environments#_select-and-activate-an-environment" class="external-link" target="_blank">VS Code</a>
-* <a href="https://www.jetbrains.com/help/pycharm/creating-virtual-environment.html" class="external-link" target="_blank">PyCharm</a>
+* [VS Code](https://code.visualstudio.com/docs/python/environments#_select-and-activate-an-environment)
+* [PyCharm](https://www.jetbrains.com/help/pycharm/creating-virtual-environment.html)
/// tip | 提示
## 为什么要使用虚拟环境 { #why-virtual-environments }
-你需要安装 <a href="https://www.python.org/" class="external-link" target="_blank">Python</a> 才能使用 FastAPI。
+你需要安装 [Python](https://www.python.org/) 才能使用 FastAPI。
之后,你需要**安装** FastAPI 和你想要使用的任何其他**软件包**。
</div>
-这将会从 <a href="https://pypi.org/project/fastapi/" class="external-link" target="_blank">PyPI</a> 下载一个压缩文件,其中包含 FastAPI 代码。
+这将会从 [PyPI](https://pypi.org/project/fastapi/) 下载一个压缩文件,其中包含 FastAPI 代码。
它还会**下载** FastAPI 依赖的其他软件包的文件。
//// tab | Windows Bash
-或者如果你在 Windows 上使用 Bash(例如 <a href="https://gitforwindows.org/" class="external-link" target="_blank">Git Bash</a>):
+或者如果你在 Windows 上使用 Bash(例如 [Git Bash](https://gitforwindows.org/)):
<div class="termy">
////
-这个命令会创建或修改一些[环境变量](environment-variables.md){.internal-link target=_blank},这些环境变量将在接下来的命令中可用。
+这个命令会创建或修改一些[环境变量](environment-variables.md),这些环境变量将在接下来的命令中可用。
其中之一是 `PATH` 变量。
/// tip | 提示
-你可以在 [环境变量](environment-variables.md#path-environment-variable){.internal-link target=_blank} 部分了解更多关于 `PATH` 环境变量的内容。
+你可以在 [环境变量](environment-variables.md#path-environment-variable) 部分了解更多关于 `PATH` 环境变量的内容。
///
有许多**替代方案**来管理虚拟环境、包依赖(requirements)、工程。
-一旦你准备好并想要使用一个工具来**管理整个工程**、包依赖、虚拟环境等,建议你尝试 <a href="https://github.com/astral-sh/uv" class="external-link" target="_blank">uv</a>。
+一旦你准备好并想要使用一个工具来**管理整个工程**、包依赖、虚拟环境等,建议你尝试 [uv](https://github.com/astral-sh/uv)。
`uv` 可以做很多事情,它可以: